Whether you want to kick back in a beach chair with a cold cocktail in hand or hike through misty mountains, these island escapes will have you daydreaming about your 2018 travel bucket list.
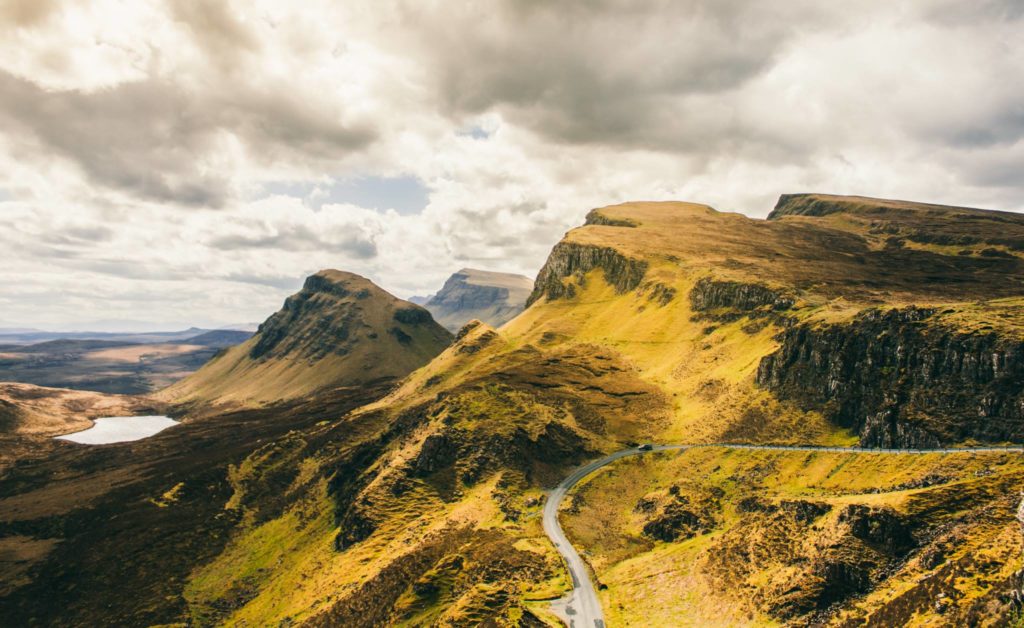
Isle of Skye, Scotland
The Isle of Skye is one of the most enchanting destinations, with misty mountains, ancient castles and unspoiled landscapes. The entire island feels like a fantasy novel for outdoor adventurers. You’ll want to spend some time here hiking around a few mythical destinations like the Fairly Glen, Fairy Pools, The Quiraing and the Old Man of Storr.
Isle of Skye, Scotland
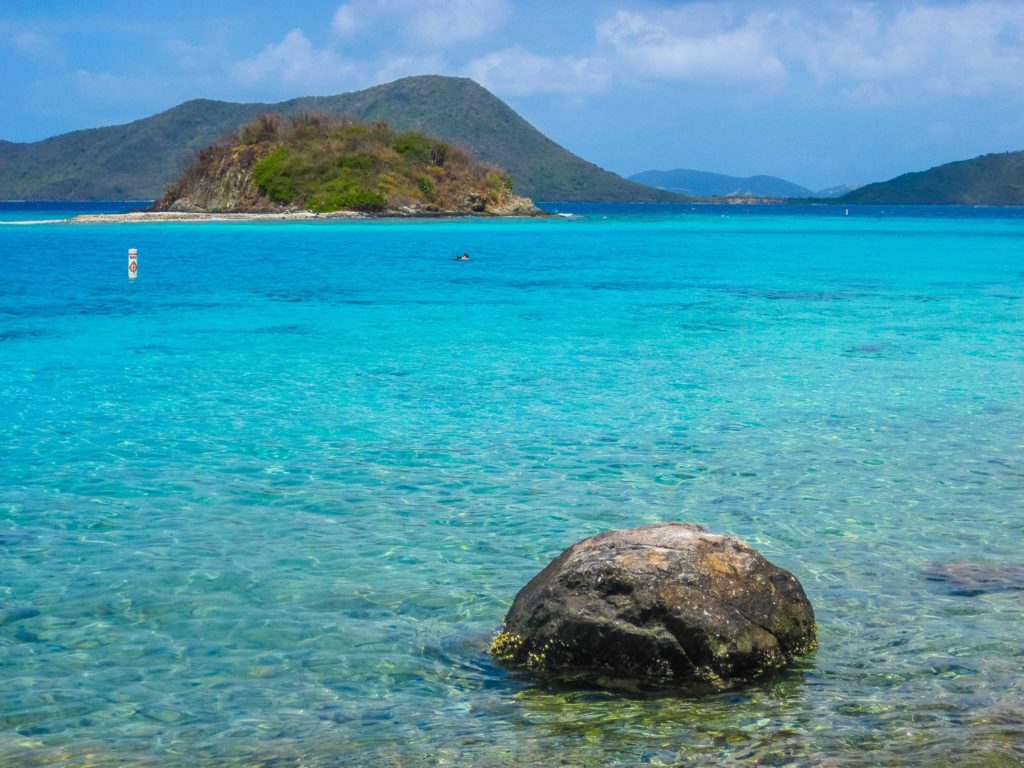
St. John, U.S. Virgin Islands If you’re looking for a quiet beach destination in the Caribbean, look no further than St. John in the U.S. Virgin Islands. Over 60% of the island is protected as part of Virgin Islands National Park. Trunk Bay is one of the most famous beaches on the island, but there are lesser-known but equally impressive beaches scattered all over the island.
Once you’ve explored the island, the British Virgin Islands is only a quick ferry ride away.
St. John, U.S. Virgin Islands
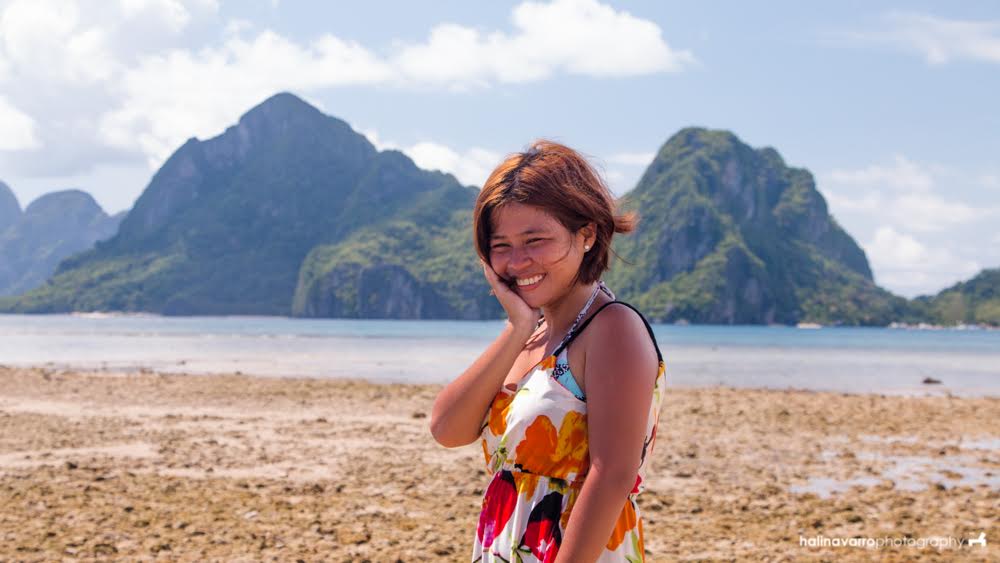
Palawan Island, Philippines
Sugar-white sand, world-class SCUBA diving, lush jungle, crystal clear water and towering limestone cliffs draw visits to Palawan Island in the Philippines. This island has been voted the #1 island in the world by several travel publications and it’s not hard to see why. The downside of visiting Palawan? You’ll never want to leave.
Lofoten Islands, Norway Located north of the Arctic Circle, the Lofoten Islands are a year-round destination. During the months of June and July, you’ll have 24 hours of daylight, perfect for hiking in the mountains. Visit during the winter to go whale watching and see the aurora borealis.
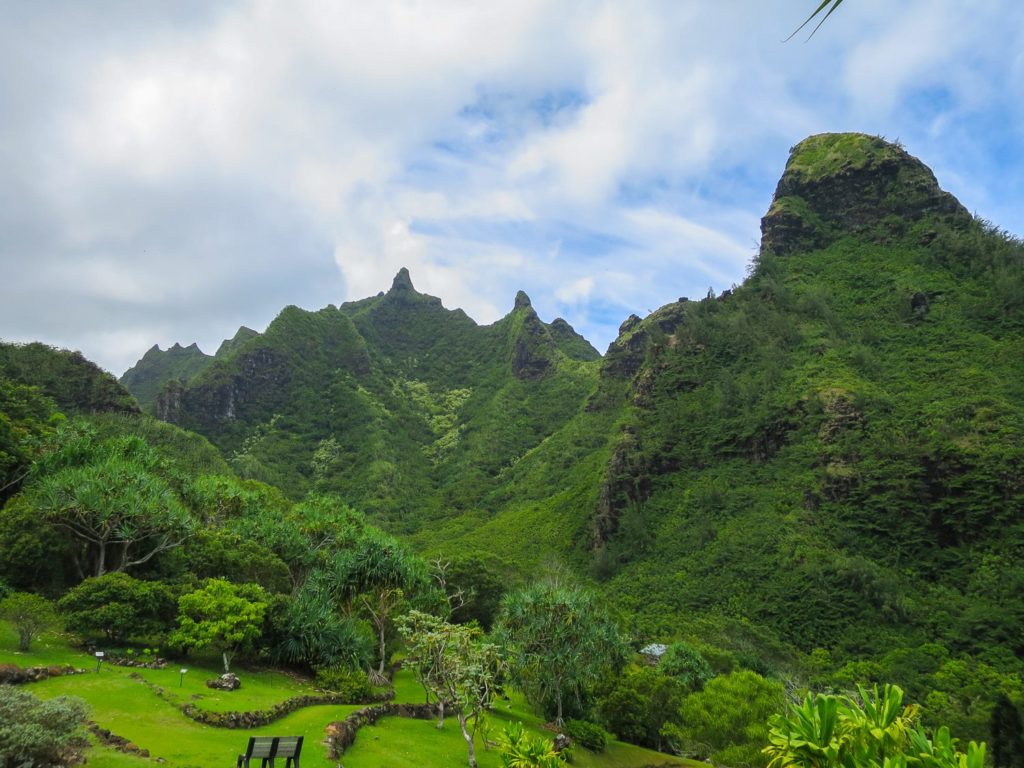
Kauai, United States Known as the Garden Island, Kauai receives fewer visitors per year than Maui, Oahu or the Big Island, making it a fairly quiet destination. This small island isn’t short on scenery though. From the dramatic views of Hanalei Bay to the Na Pali coast, there are plenty of outdoor activities and amazing viewpoints to make Kauai one of the most magical destinations.
Kauai
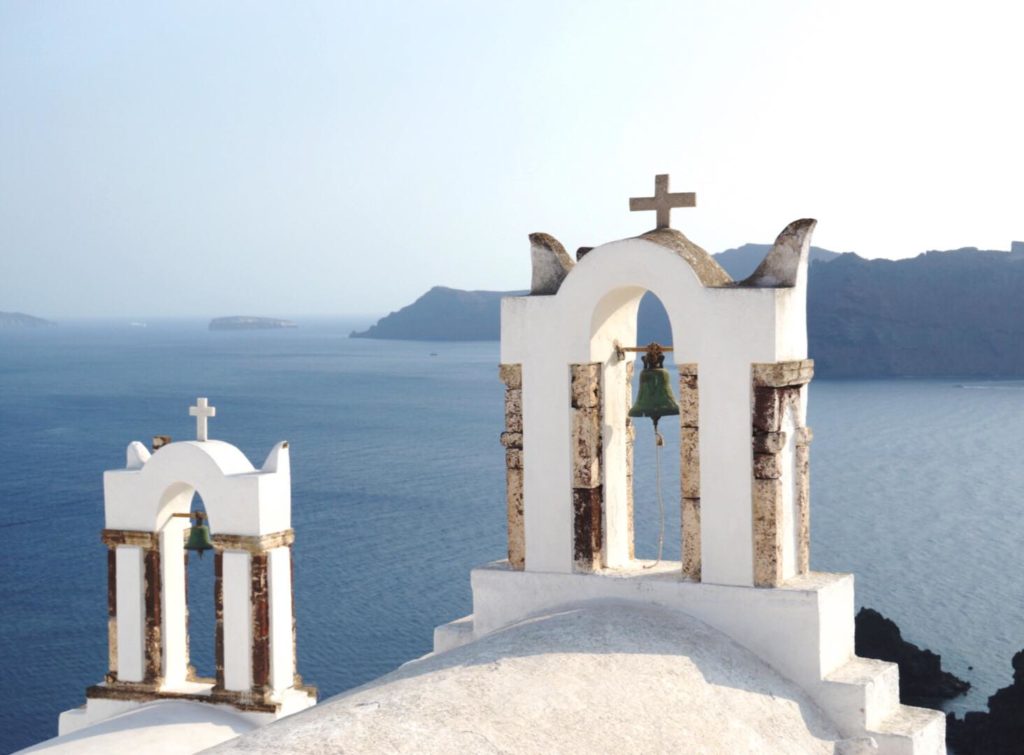
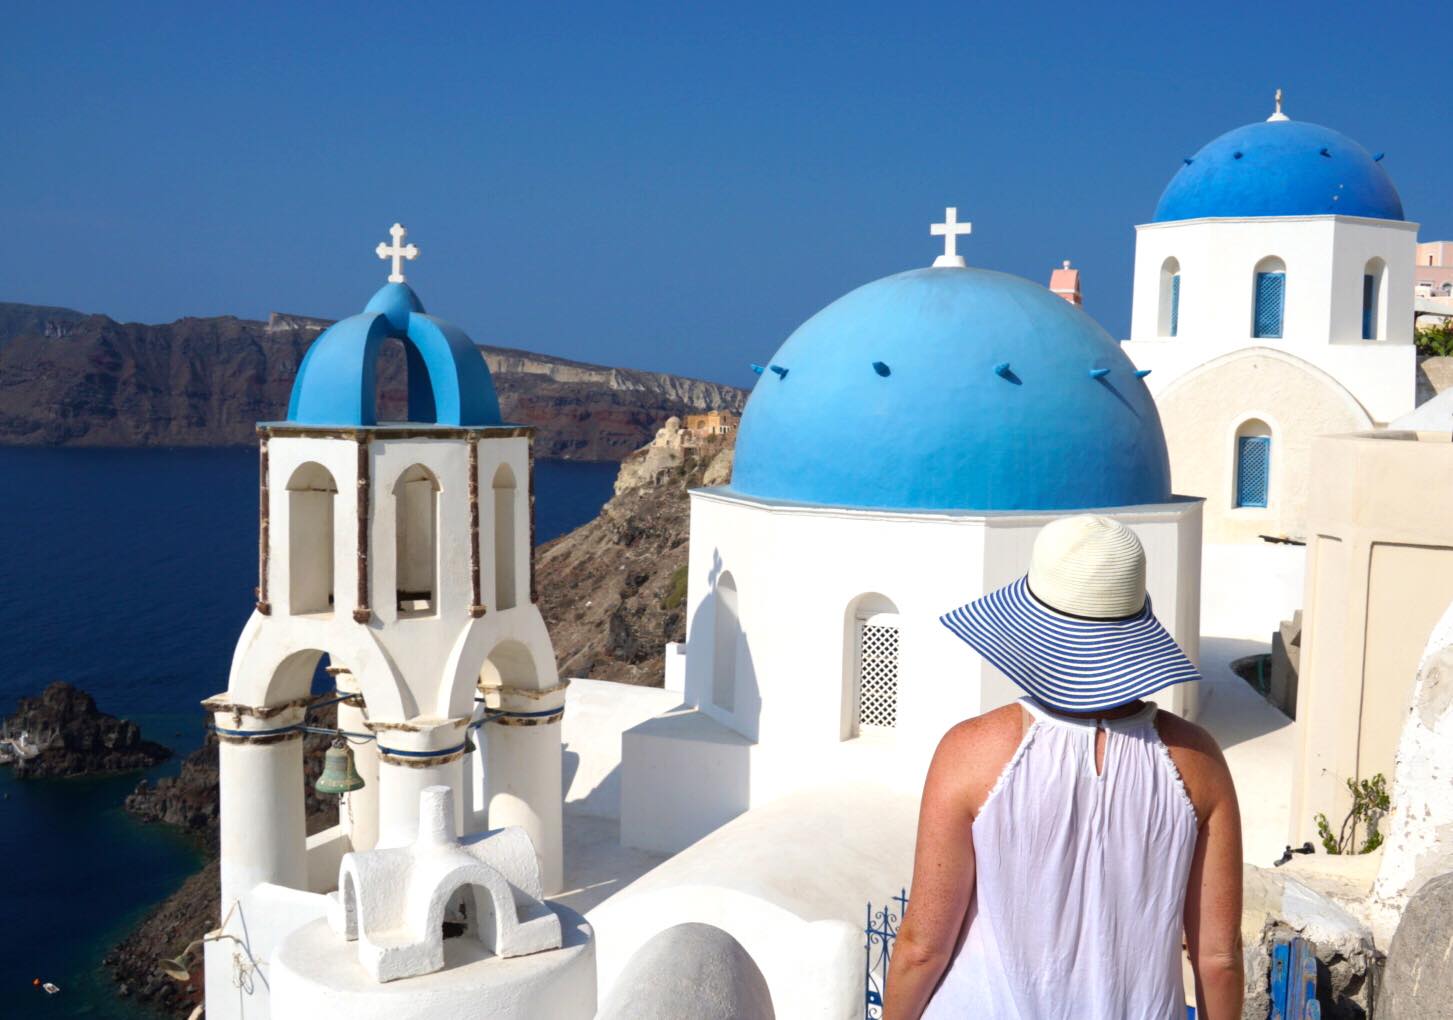
Santorini, Greece
From the blue-domed churches to the striking ocean-front cliffs, there’s no other place on Earth like Santorini. Spend your days hiking, wine tasting, shopping the local art galleries or simply relaxing by the beach. In the evening, make your way to Oia for one of the most romantic sunsets in the world.
Your trip can easily be extended by visiting nearby islands such as Naxos, Mykonos, Paros or Ios.
Santorini, Greece
The Maldives This tiny country in the Indian ocean consists of 1,200 islands, 200 of which are inhabited. Getting to the majority of the resorts in the Maldives is an adventure, with international flights arrive at Malé International Airport, followed by a seaplane flight to the resort’s private island.
Once there, you’ll feel like you’ve stepped into a postcard, with turquoise blue water and pure white sand.
Zanzibar, Tanzania
Zanzibar, located on the eastern side of Africa, is the perfect place to unwind after an African safari. While the beaches are stunning, Zanzibar is full of stunning architecture and culture. Stone Town, a UNESCO World Heritage Site, is full of alleyways, colorful markets and an old fort.
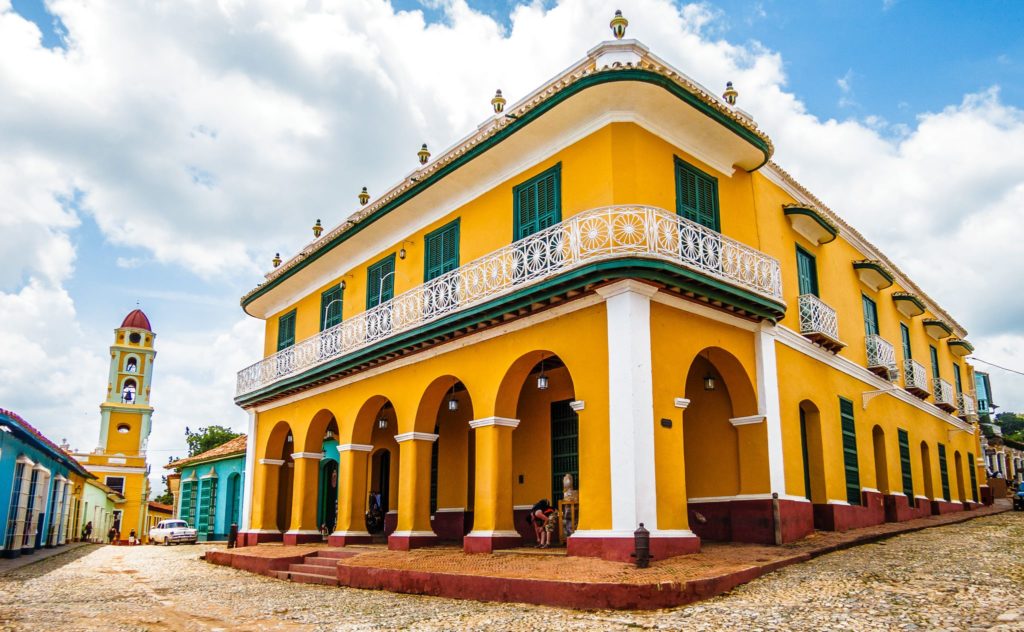
Cuba Cuba features miles of sandy beaches with clear, blue water and stunning architecture. Most tourists are attracted to Cuba due to the lack of Western chains and charming culture. If you’re an American, you can visit this country legally by joining an approved tour.
Trinidad, Cuba
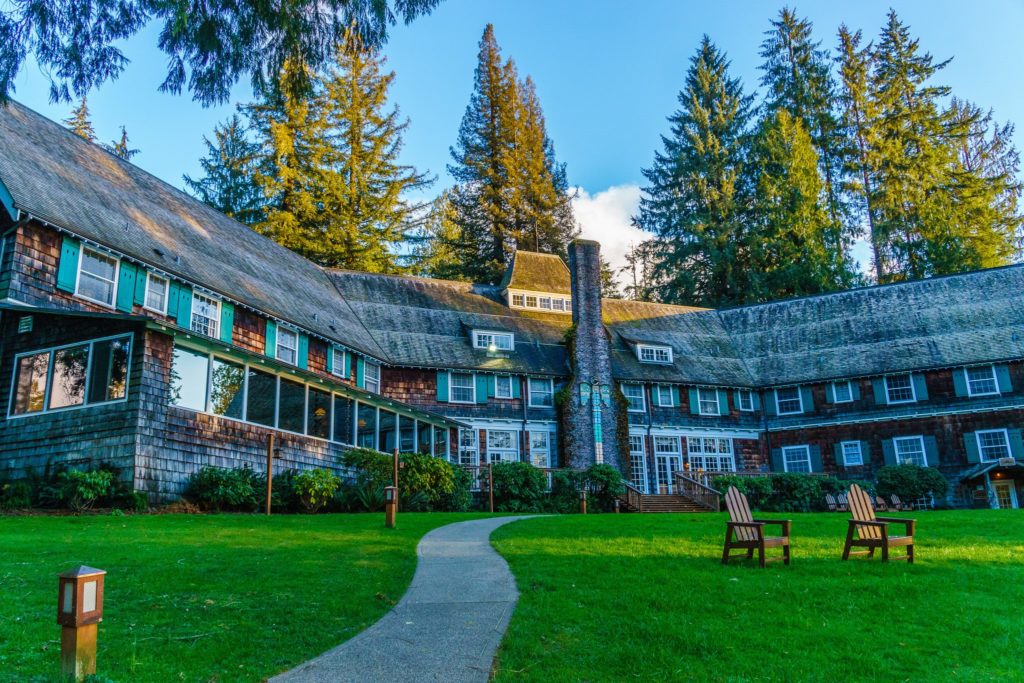
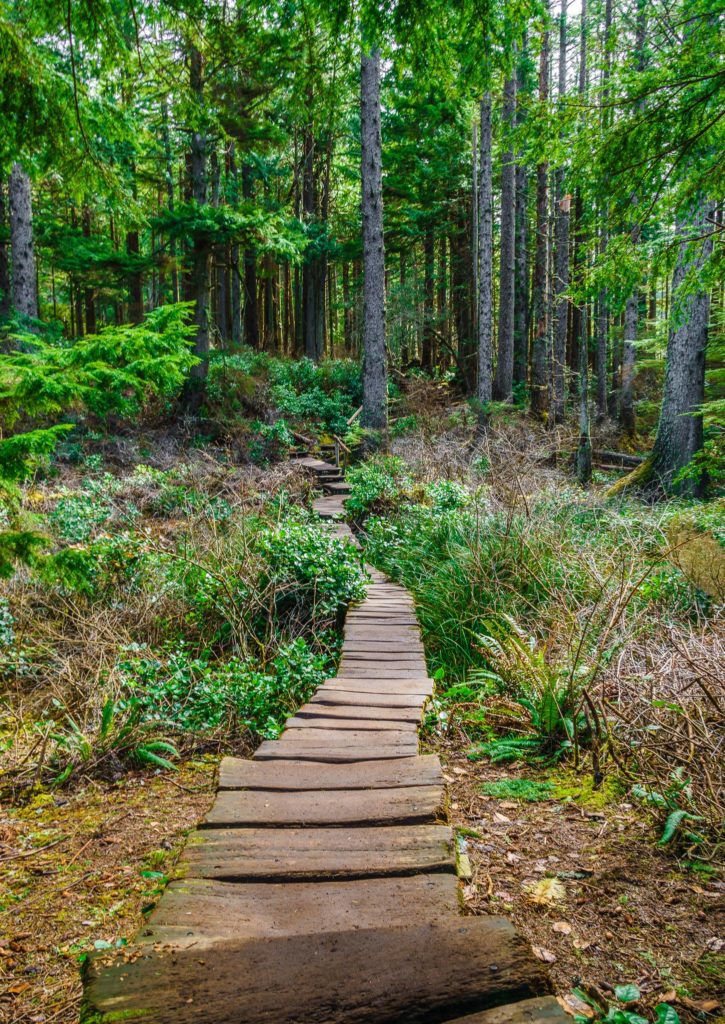
Vancouver Island, Canada
If you love rugged coastlines and outdoor adventure, Vancouver Island is the perfect destination for you. It’s also a great place for wildlife spotting: bears, orcas, bald eagles and elk all call this island home.
This week, I’m kicking off a new series on my blog called Photo Friday, where I’ll feature some of my favorite travel bloggers and instagrammer’s photos based on a theme.
This week, it’s gorgeous mountain scenery around the world, from New Zealand to Kosovo. Warning: You’re going to have a serious case of wanderlust after looking at these photos. Go ahead and pack your bags: the mountains are calling.
Why Marina loves this location: Vinicunca mountain, commontly known as Rainbow mountain, it is 5.200 m high (over the sea level). Including the three hours drive from Cusco, it takes around six hours in total to reach the top. The breathtaking landscape, loads of alpacas and some wild vicunas (if you’re lucky) make the trek one of the must things to do when in Perú
Why Sarah Loves this location: The Tongariro Crossing is a 19.5km walk through mountainous volcanic terrain in the centre of New Zealand’s North Island. Every hour of the walk the scenery seems to change completely but is always totally stunning.
Why Justine love this location: Monte Baldo (accessible by cable car) offers the most fabulous views you will ever have of Lake Garda in Italy. The lake itself sparkles like a sapphire and Monte Baldo lets you see just how much it sparkles from above. Wow!
Why Lisa loves this location: What you can’t see in this photo is that right behind me is a huge lagoon in the most beautiful blue ever. It is hard to decide where you should look first when driving around the Cajon del Maipo.
7. Neuschwanstein Castle, Germany by Kris Morton of Nomad by Trade
Why Kris love this location: Neuschwanstein is one of the most beautiful buildings in the world. The view from inside of it is just as stunning though.
Why Kris loves this location: The little town of Hallstatt, nestled in the Austrian Alps, is one of my favorite towns. You can swim, dine, and learn some local history, all while enjoying this view.
A post shared by Professional Nomad | Blogger (@nomadbytrade) on
9. Triglav National Park, Slovenia by Karen E of Wanderlustingk
Why Karen loves this location: Triglav National Park is on par with Yosemite when it comes to amazing mountain views and incredible hiking. Luckily, it’s much smaller, so you can explore it easily on a day-trip from Lake Bled!
Why Janine loves this location: The Adventure Capital of the world, Queenstown, I love so much as it brings the world together for a common purpose to seek adrenaline-pumping experiences while embracing such picturesque and unmatched scenery. No matter where you go in Queenstown, chances are you will meet someone just like you from a different corner of the planet. It is truly magical.
Why Karen loves this location: Kosovo’s Sar Mountains are largely unknown, yet they have incredible hiking as well as skiing. In fall, the mountains turn orange with the turning leaves.
12. Skippers Canyon, Queenstown New Zealand by Janine Good of Fill My Passport
Why Janine loves this location: Skippers Canyon in Queenstown is the home of the famous jet boats that whisk through at thrilling speeds; however, less known to this adventure junkie hub are the cliff side Onsen Hot Pools that transform a whirlpool spa retreat to an unforgettable serene experience that captivates bathers with its unmatched views of the incredible surrounding mountains.
Why Karen loves this location: Kosovo’s Sar Mountains are largely unkonwn, so you’ll have the mountains to yourself and a short bus/taxi ride from the historic city of Prizren to access these beautiful mountains as well as its hand-made wooden bridges over mountain streams.
14. Triglav National Park, Slovenia by Karen E of Wanderlusting K
Why Karen loves this location: The Julian Alps are spectacular and should be on the bucket list for every nature lover. When hiking in Triglav national park, I came across this steep/beautiful field of yellow flowers leading down the mountain to the valley.
15. Triglav National Park, Slovenia by Karen E of Wanderlustingk
Why Karen loves this location: This is the third highest mountain in Slovenia, Mangart located in Triglav national park. The trail leads to the very bottom of this magnificent mountain and to the viaferrata that goes straight up, including through two caves.
Why Karen loves this location: I was just absolutely fascinated by the red cuillins, otherwise known as the redhills due their curved shape. Unlike the black Cuillins, they are slightly smaller and composed of granite, however it is a striking comparison to the green everywhere.
Why Karen loves this location: The Fairy Pools on the Isle of Skye are a sight to behold. They’re surrounded by mountains and you can even dip into these colorful pools.
Why Karen loves this location: The water is so clear that you can see the beautiful mountains reflected in it.
The story goes that a water nymph lived in the lake and a magician fell in love with her. He tried to get her out of the lake by tricking her by making a rainbow to distract her. As she admired it, the magician jumped into the lake and the nymph went away. The heartbroken magician shattered the rainbow and threw it in the lake, hence its nickname as the rainbow lake.”
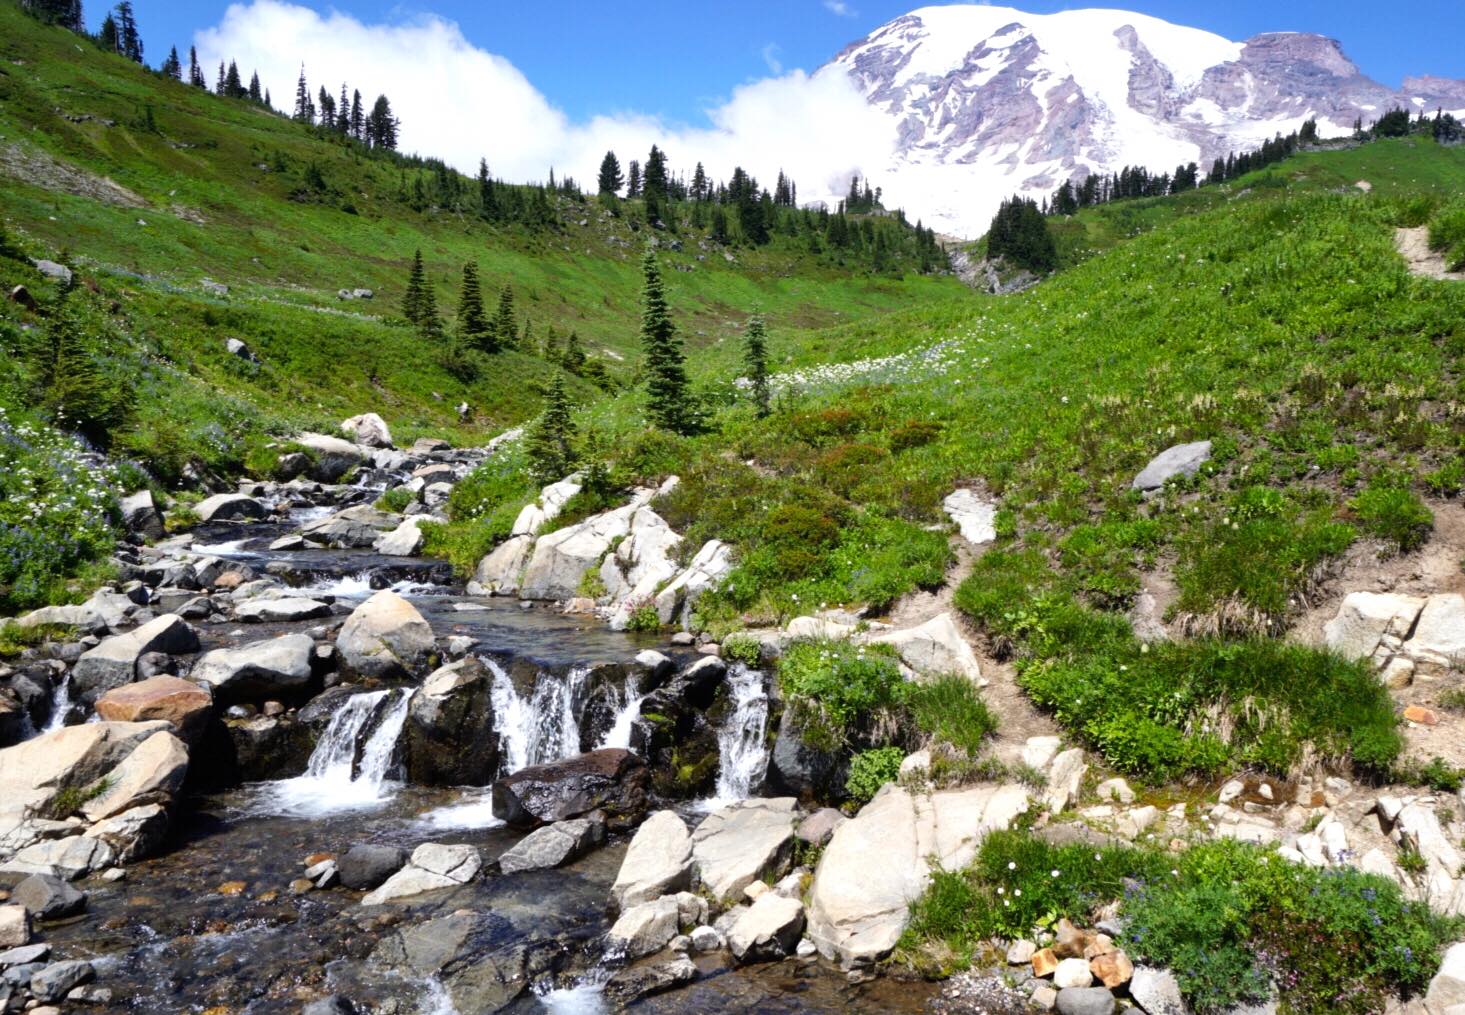
Why Rebecca loves this location: Mt. Rainier is a majestic beauty with folks in the Pacific Northwest referring to her as “the mountain.” When she’s out, everyone stops and stares. To get this close to her majestic beauty is awe-inspiring.
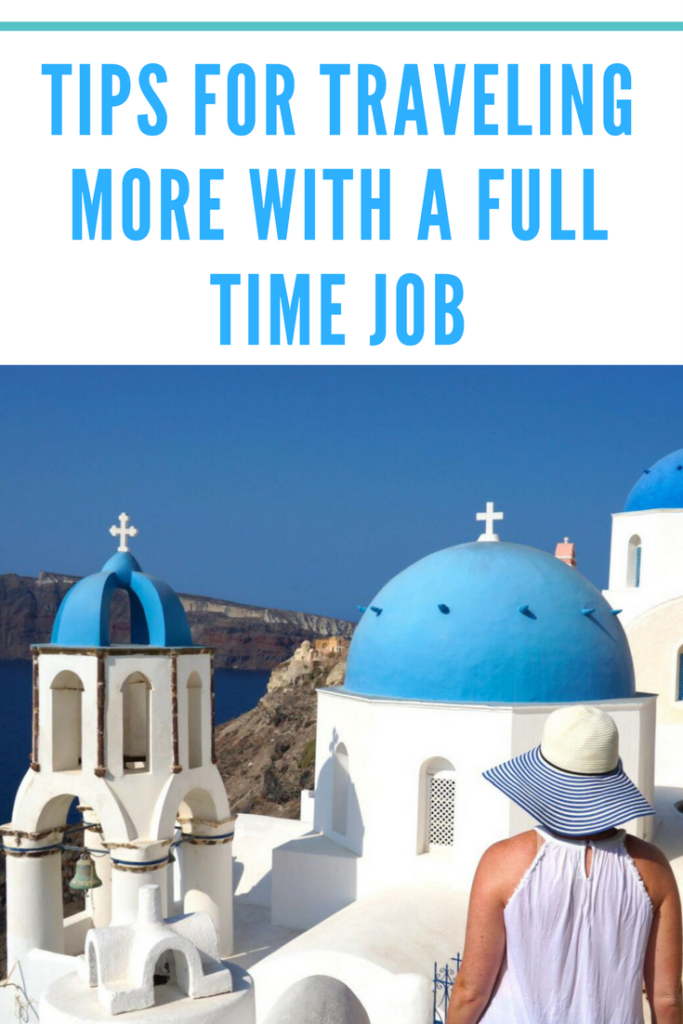
If you’ve read travel magazines or blogs, you’ve likely read a story (or two) about a travel blogger who quits her job, sells nearly everything she owns and travels around the world, armed with an infinite amount of time and an entire world to explore. While there’s nothing wrong with that decision (honestly, I’m a little jealous), it’s not a practical choice for a lot of people.
You may not want to quit your job because you’re moving up the career ladder and finally reaping the rewards in a demanding field. Perhaps you have kids and you don’t want to interrupt their social life or school experience. Or you don’t want to rent your home or sell it. Or maybe you don’t want to live your beloved furry family member at home. Whatever the reason, not quitting your job to travel the world is totally normal (even if it doesn’t feel that way in the blogosphere).
That said, balancing a career with travel can be challenging, especially for my fellow Americans since we average a measly two weeks of vacation per year (and a lot of people aren’t even using their 2 weeks).
In order to provide you with inspiration and practical advice, I asked some fellow part-time traveler bloggers to share their tricks for incorporating more travel into their busy lives. Consider this your ultimate guide for learning how to balance your career with your sense of wanderlust.
Everybody’s Working for the Weekend Let’s play with some numbers. If you work the typical Monday-Friday 8-5 grind, you have approximately 55 hours each week dedicated to your weekend. In order to balance your career and travel as much as possible, learn how to embrace the weekend. Become a weekend warrior. Sure, you may not be jetting to Paris, but one person’s hometown is another’s vacation destination.
Here are my top three tips to make the most of weekend travel:
Don’t procrastinate. Accomplish your weekend chores during the week. Pack your bags on a Wednesday. Prepare for your following week on Thursday since your Sunday is going to be occupied with travel.
Leave early. If your job allows, flex your time during the week. By arriving 15 minutes early and leaving 15 minutes late every day, you’ve banked 2 hours that should allow you to wave goodbye to your office at 3pm.
Pick a theme. Weekend travel means accepting that you can’t do it all. By picking a “theme” for your weekend, you can focus your energies and maximize your time. A foodie weekend in Chicago or a wine tasting weekend in Traverse City sound much more appealing than scheduling every minute just to say you did it all!
I struggle, hard, with establishing balance between career and travel, because ultimately I want one: career, but always feel I am heavily sacrificing discovering the world. As a travel-lover you’ll know there is never enough time in the year/ life for all the places that you want to see; so essentially we always feel travel-time is somewhat off balance, it’s a loosing battle!
In the less woe-is-me moments however, I sit down, dream, then get creative with my holiday. I usually take one long haul trip in the year, which lasts between 10 days and 3 weeks, to at least give me a sense of how it might feel to live in the destination. I then pepper the rest of the year with long weekends, where I sometimes take a half or full day off on the Friday. In addition, when the New Year rolls around, I strategically claim days around bank holidays to give me lengthier trips.
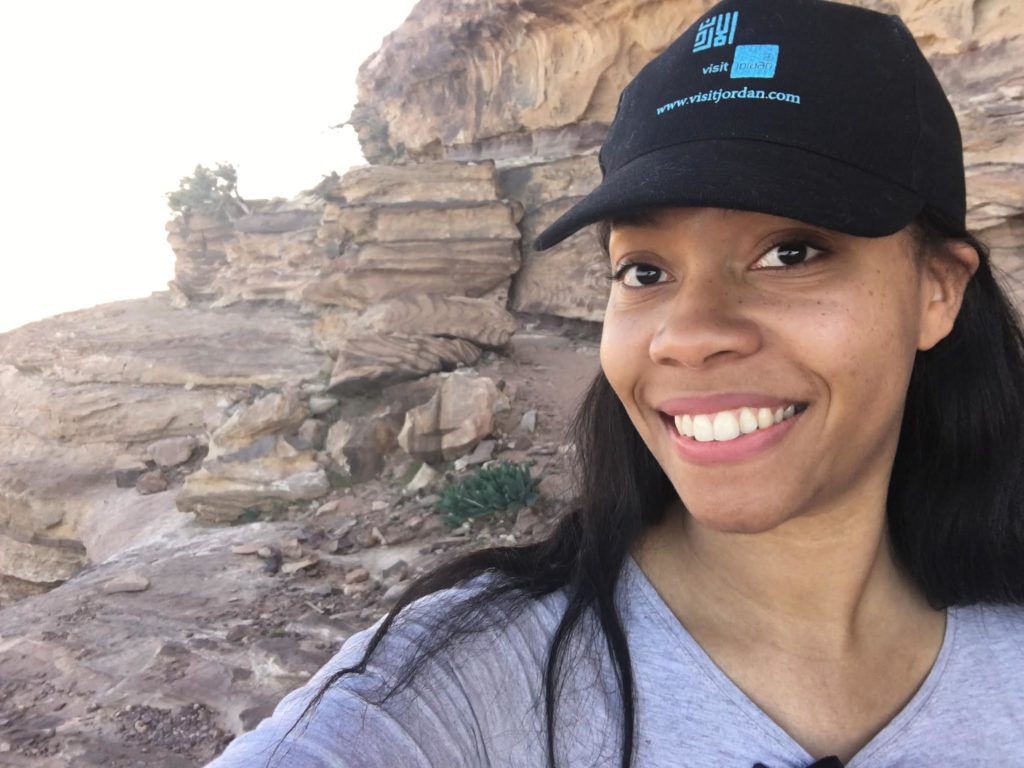
To get closer to the travel world, I also made the move to work in travel two years ago, a decision that took me to Jordan last year. Now in my second role, working for a Travel Association, I enjoy learning about the industry and confronting some less-sexy-but-important topics such as sustainable travel.
My favorite tip for maximizing vacation time with work is to schedule your time off to coincide with a company scheduled no work holiday. In the US it can be difficult to take time off, let alone take multiple days off at a time. In order to get the most out of my break time I use the scheduled no work day(s) in my favor. Take Thanksgiving week, quite a few companies in the US close on that Thursday and Friday. Schedule your vacation for the week of or after and you then add on up to 4 extra days to travel. The same goes for any other company holiday. If the no work day lands on a Monday or Friday take the week of, before or after off. By including the scheduled no work holiday(s) in your plan you are able to attain extra days for yourself without using your vacation or personal days.
I work full-time as a software engineer and occasionally freelance as a copy editor; on my spare time I travel and maintain a blog along with my boyfriend. An advice that I can give is to find a company that will allow you to take an extended amount of leave at a time. Not all companies give employees freedom on when and how long to take leaves.
I have friends who have to submit leave application months ahead, and they have to choose a date that is still not taken by their project workmates (basically they cannot travel together!). The application then undergoes a strict review by the supervisor. It’s not uncommon to have travel acquaintances back out because leave applications are not approved. I’m lucky because even though I also do support on rotation in my work, we’re lenient in that we’re allowed to take leaves as long as we inform our leads at least a week in advance. Then we can discuss issues that have to be resolved and who can cover for our tasks, as necessary.
I believe that there’s always sacrifice when you have a full-time day job but also travel a lot and that this is necessary to ensure you can balance both without compromising your work performance or your passion outside of the office.
I live in isolated New Zealand so I can’t go far on a weekend break without it costing a lot of money. In order to manage a career and travel further afield as much as possible I maximise my leave by using it in conjunction with Public Holidays and weekends giving me more days off in a row.
My last three roles have also been maternity cover contracts. This really works for me as I have the secure corporate salary for a set amount of time, I save money in a separate account for travel and I am taking steps in my career. Then, whenever my contract ends I’m able to take a decent amount of time off to travel before finding a new position.
I also get the occasional business trip which allows me to accrue airline points without it being at my own expense which I can use later for my personal travel.
As a full time nanny who works 60+ hours a week, it is hard to find the time to maintain my travel blog and actually get out to explore new places. However, it is not impossible. I tend to have my evenings free that I devote to writing blog posts and promoting them. I spend my commute on Instagram, where I interact with my followers. Luckily I have weekends free, which is the time when I can go and explore the area. There are great hiking/camping places all over the UK that are great for just a weekend. Bank holidays are even better. I always make full advantage of them and find a nice place to visit.
As I love the outdoors this normally involves cycling, hiking, kayaking or sailing. I don’t have much flexibility with my holiday dates. I’m free when the family I work for goes on holiday. This is normally 2 weeks in summer, 1 during Christmas and 1 in February. So I suppose I have it all. 2 weeks for a nice road trip in the summer, 1 week to enjoy Christmas and 1 week to go skiing. I have to be organized to make the most of my limited holidays, but planning is half the joy already.
I’ve held “regular” jobs for exactly 2 years and that includes a semester I’ve worked and studied!
Circumstances led me to have to choose between very poorly paid jobs and trying to be a freelancer. I chose the latter and never looked back. I went from working project based only, to having a part-time job, and later to having a full-time job. Out of my house and / or wherever I would be and net would work. So I worked from a hotel room in Romania (3 weeks), Italy (5 weeks), and from whatever relative I was visiting (countless weeks!)
Currently, I hold a full-time (40h per week), fully remote job as a social media specialist! I also run 2 blogs of my own on the site and…travel.
What worked for me:
Finding jobs with flexible schedule! I’ve worked fixed schedule as well from home but burned out in 3 years.
Finding remote jobs! When I can work from anywhere, I can mix in travel easier since I get to work from another place than home.
Ditching a job when it doesn’t make me happy
Making good use of weekend travel and paid days off (as in: travel every single time I can!)
As I mentioned in a previous post, I have a fairly demanding job that requires more than the usual 40-hour workweek. In the past, I’ve been successful in trading some of those extra hours for additional “comp” time, which I’ll often use to extend my vacation by a day or two. I also have some flexibility to work remotely, provided that I’m working during our core business hours. I wouldn’t necessarily want to work while I was in India but it does mean that I can balance my work with a trip to a destination in North or South America.
I hope that you’re inspired by these tips to get away from the office and explore the world.
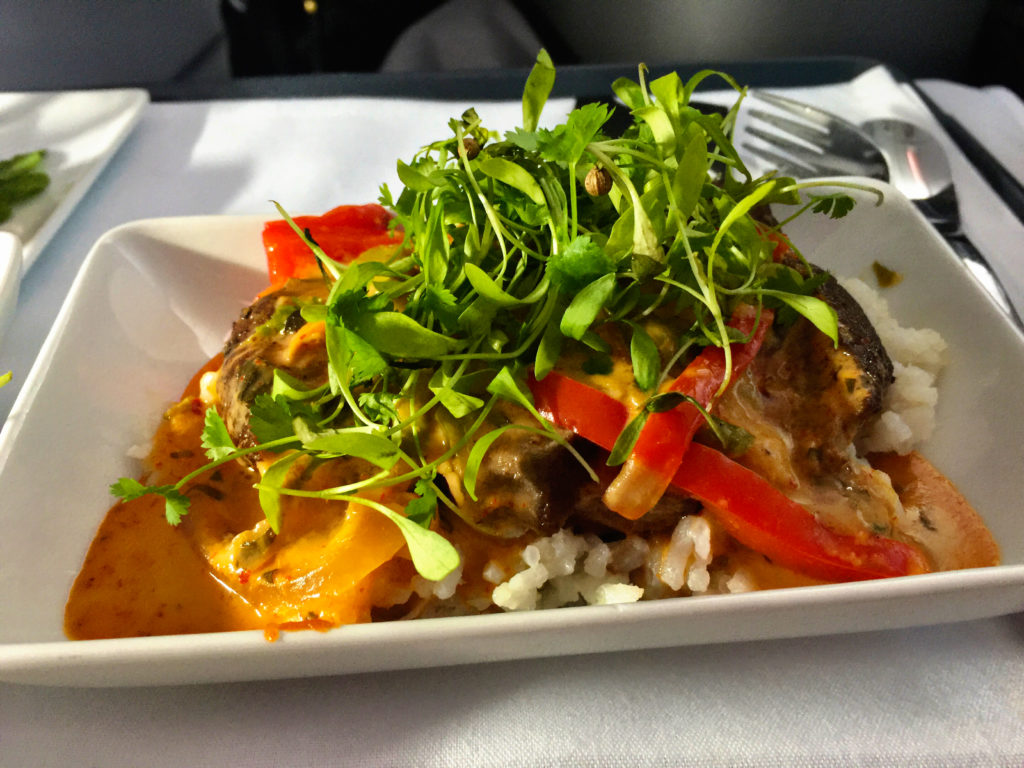
The last time you flew a long-haul international flight, you probably passed through the business class cabin, jealously admiring the large seats and glasses of champagne. Meanwhile, you’re schlepping yourself and your luggage to the back of the place and home to tiny seats, grumpy passengers and (more than likely), gruff flight attendants. You sit down in your seat and wonder if it’s a torture device. When your seatmate elbows you in the ribs, you know that indeed, the seat is in fact a torture chamber. And good luck getting a meal that isn’t soggy and unappetizing.
Business class dinner on American Airlines
Thankfully, I have a secret trick for finding business class tickets at an affordable price, which I’ve been using for over 4 years. One word of warning: Once you fly long-haul business class, you aren’t going to want to go back to economy.
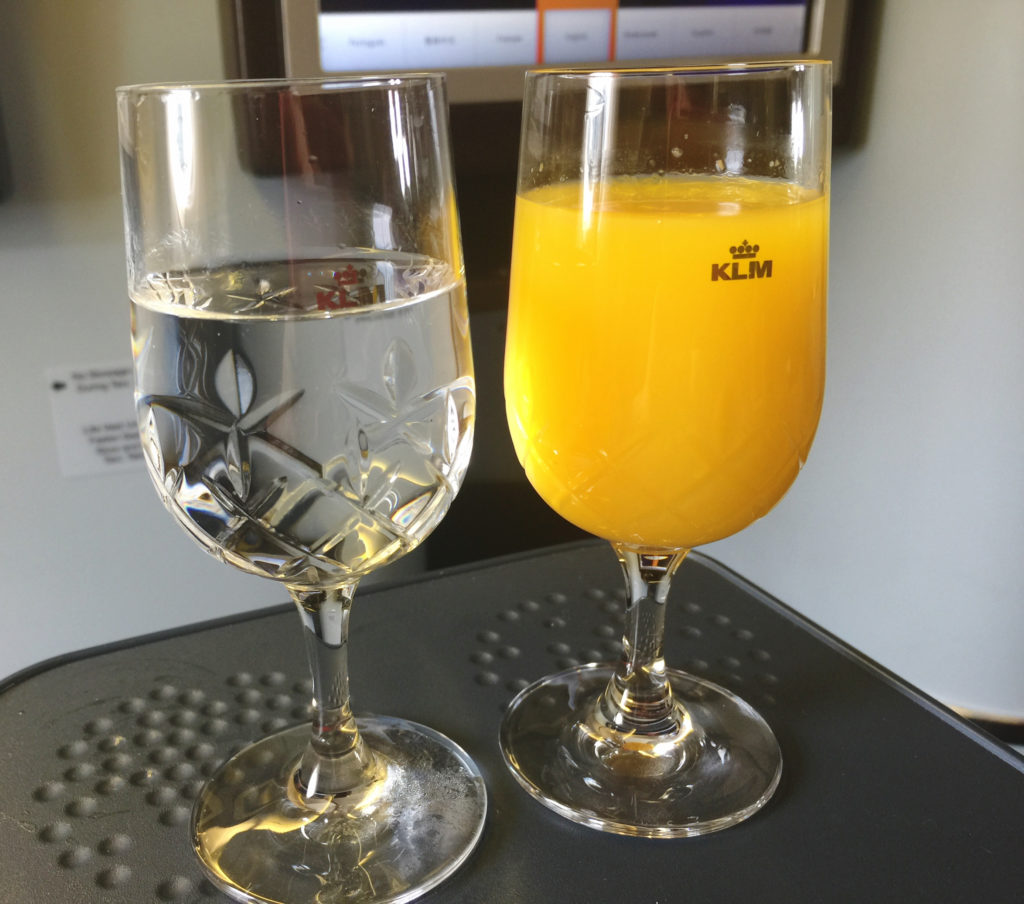
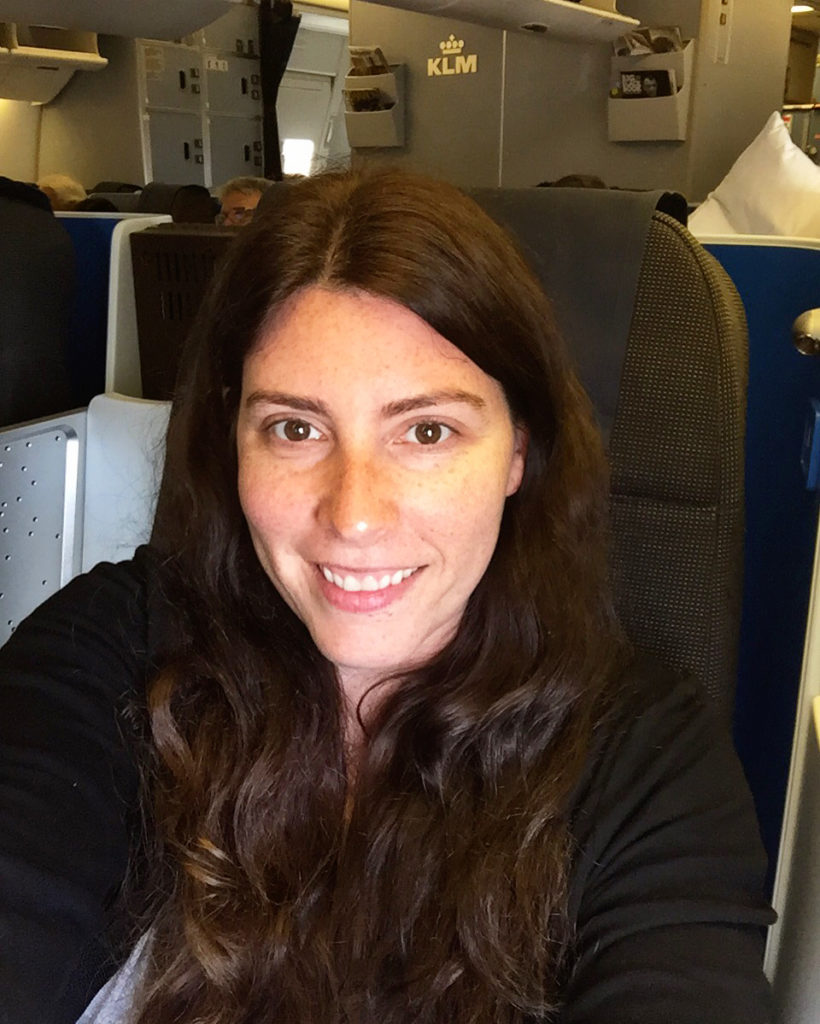
Champagne on a KLM business class flight
My Secret For Finding Business Class Airfares at a Discount
So what’s my secret you ask? It’s the Flyertalk Premium Fare Deal forum, of course. If you’re not familiar with Flyertalk, it’s a community of frequent travelers around the world. The forums are broken into sections, such as Airline Alliances, Hotels, Travel Safety, etc.
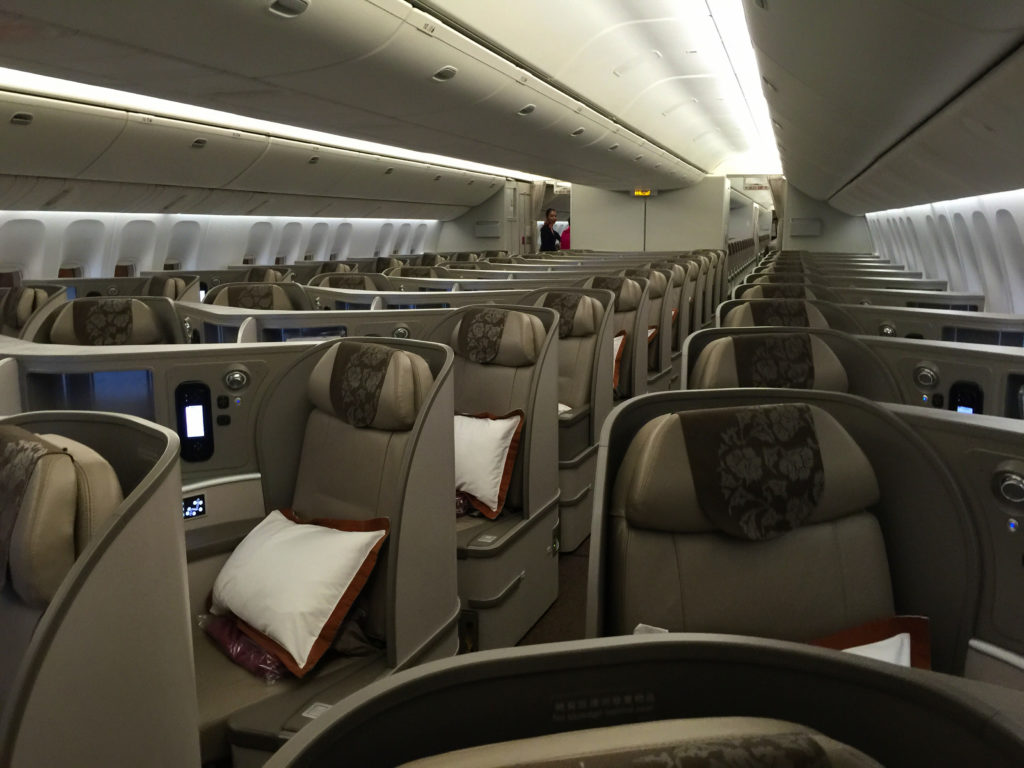
China Eastern Airlines Business class cabin
The Premium Fare Deal forum does have a little bit of a learning curve: Airlines and airports are listed by their IATA code. For example, this post says: VS/DL SFO-Man $2000 RT. What it really means is that the deal is valid flying from San Francisco to Manchester, UK on Virgin Atlantic / Delta, roundtrip. The posts will typically give sample dates as well as any fare rules, such as a required Saturday stay.
It may seem confusing at first but after spending some time on the Flyertalk forums, you’ll start remembering the most commonly used airlines and airports.
Some example airfares I’ve found on Flyertalk in the past couple of years include:
Vancouver to Athens on Air France: $1,400
Chicago to Delhi on KLM: $1,300
Vancouver to Edinburgh on KLM: $1,700
Los Angeles to Rio de Janeiro on American Airlines: $1,200
Los Angeles to Lima on Delta: $1,100
Feeling refreshed after a KLM business class flight
Another tip for finding inexpensive business class fares (new!):
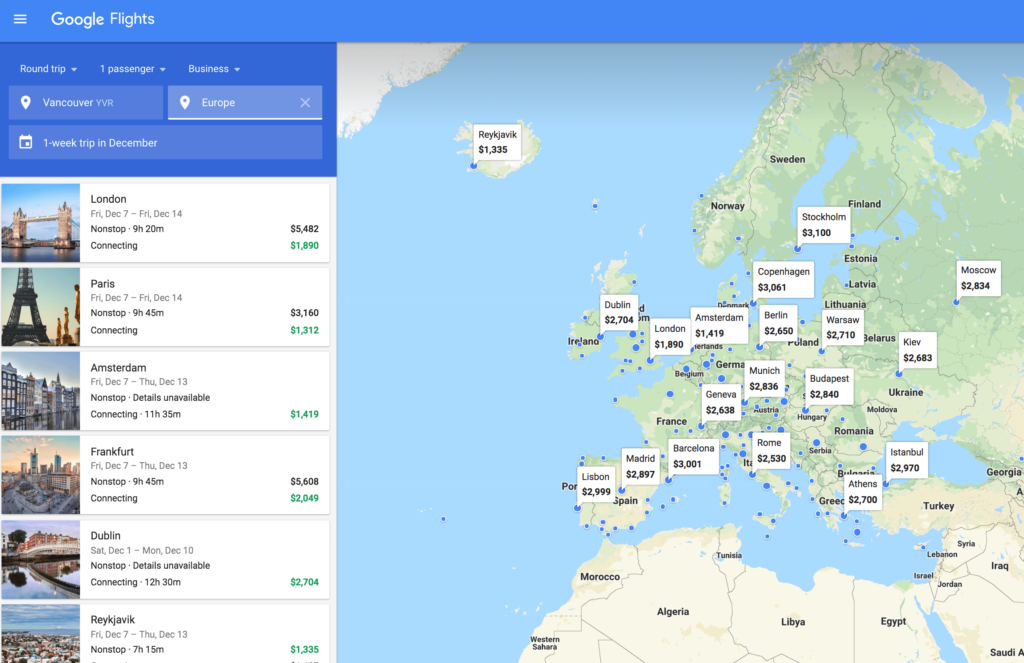
If your travel dates are flexible, another place to search for premium fare deals is Google Flights. Here’s how I use it to search for deals:
Let’s assume that I want a business class deal from Vancouver, Canada to Rome sometime in November or December
After going to Google Flights, I’ll type in Seattle to Europe. I’m choosing Europe instead of Rome because I want to see the cost of all flights to Europe. Once you’re in Europe, it’s usually very inexpensive to buy a cheap ticket on EasyJet, Ryanair, etc. If the prices to Rome look good, I’ll book that but if there are significant savings to another city, it’s something I’ll consider.
Click search (type in whatever dates you want for now). Once you’re on the search results page, click the dates again and select ‘Flexible.’ You’ll now be able to select whether you want to see fares for a weekend, 1-week or 2-week trip.
As you can see from the screenshot below, the least expensive ticket to Rome in December is $2,500. I can fly to Paris for $1,312 and buy an inexpensive ticket from Paris to Rome on EasyJet.
A few things to keep in mind:
The fares don’t usually stick around for a while. If you’re unsure as to whether or not you want to book the tickets, you can always buy them and cancel within 24 hours (note: This applies to people in the U.S. Check your country’s laws to see if this applies).
You may not see a fare to/from your exact city. In that case, check out another tool to see how much a domestic ticket will cost you to get to the starting destination. I’m based out of the Seattle area but in order to take advantage of some amazing deals, I’ve flown to Vancouver (Canada), Los Angeles, San Francisco and Chicago in order to position myself for the long-haul flight.
Research the business class seats on the airline carefully so that you understand what you’re getting. Some airlines, like Icelandair for example, have recliner seats in business while others have lie-flat seats. Seatguru is a great place to check the seat map to understand the type of business class seat you’re getting before you purchase.
Once you get used to delicious multi course meals, seats that recline into a full bed and actually arriving at your destination feeling fresh, you will never want to sit in the economy cabin ever again.
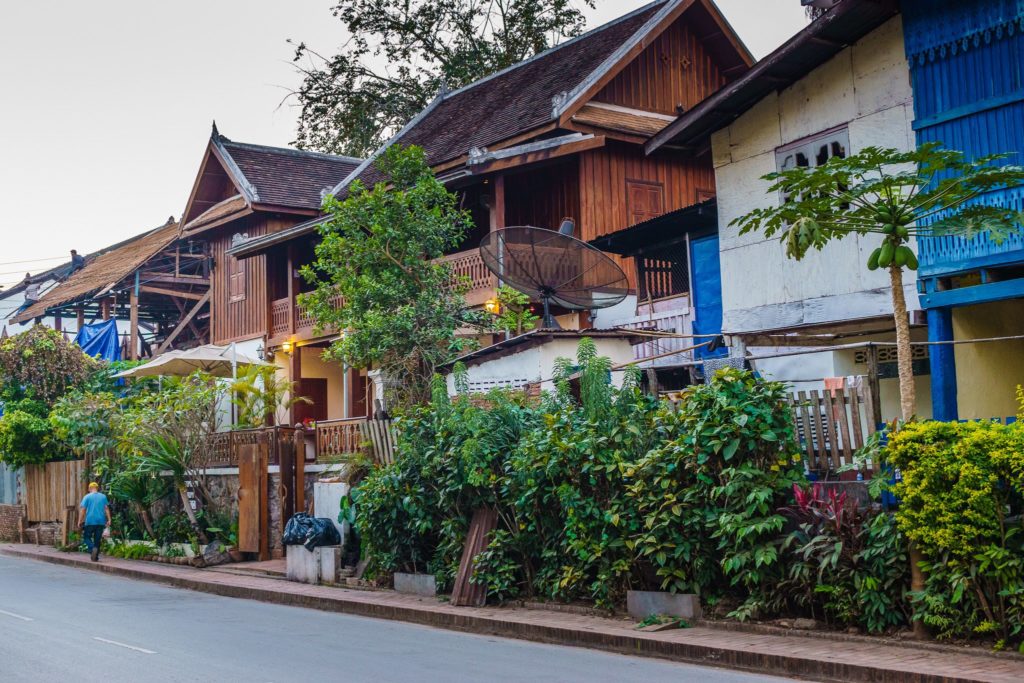
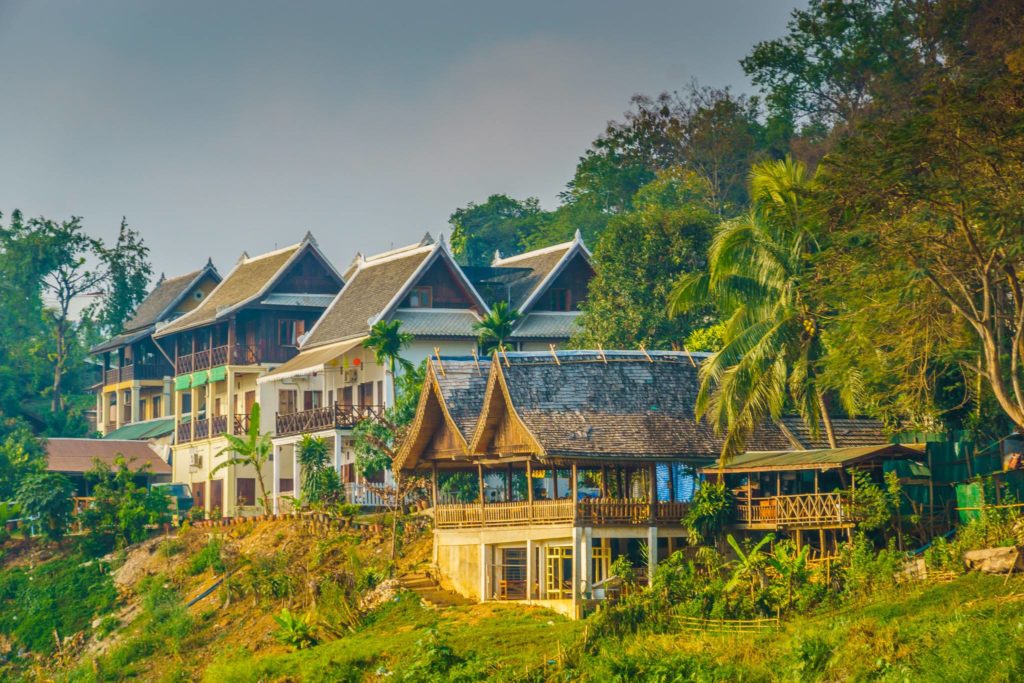
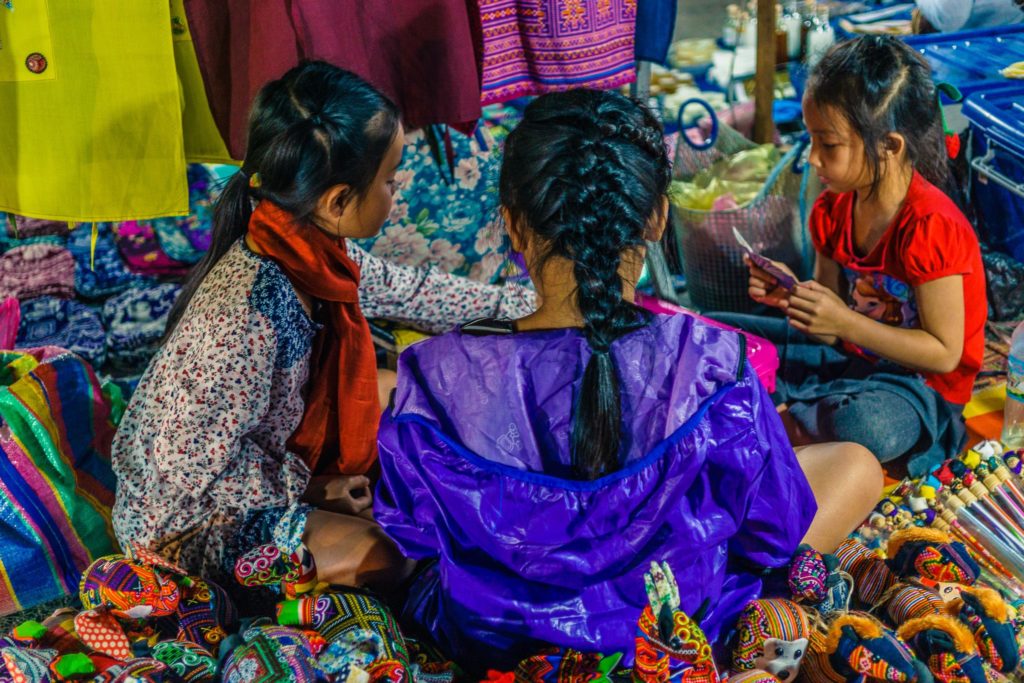
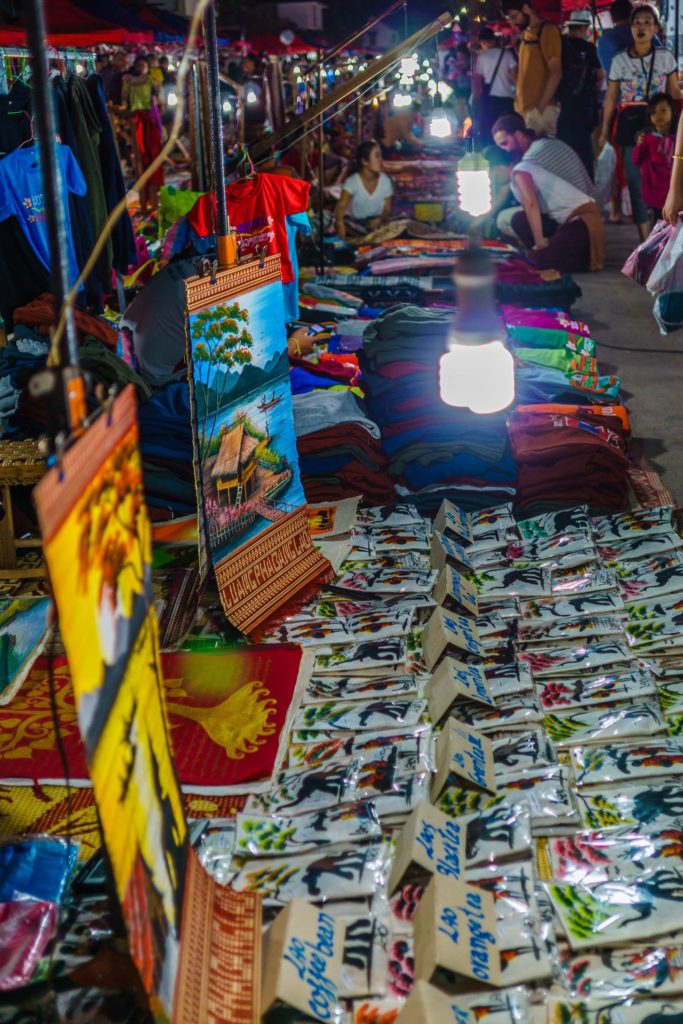
In early February, I spent just a little over 48 hours in the adorable town of Luang Prabang, Laos. Luang Prabang was the last stop on my two-week Asia adventure, which included Bhutan and Bangkok. Before visiting, I read quite a few blogs with varied opinions on Luang Prabang, ranging from “omg, it’s the cutest town ever” to “it’s tourist hell.”
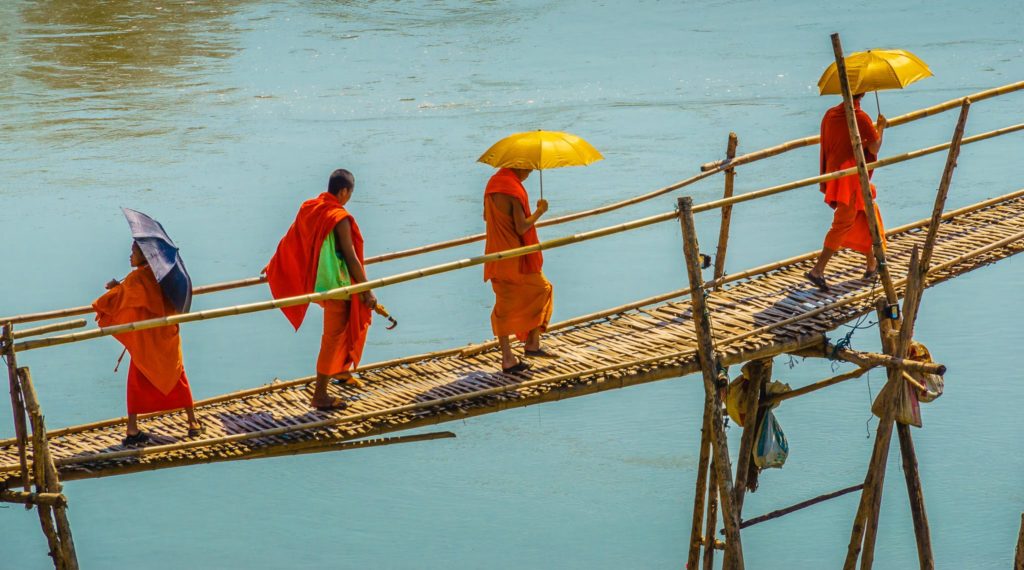
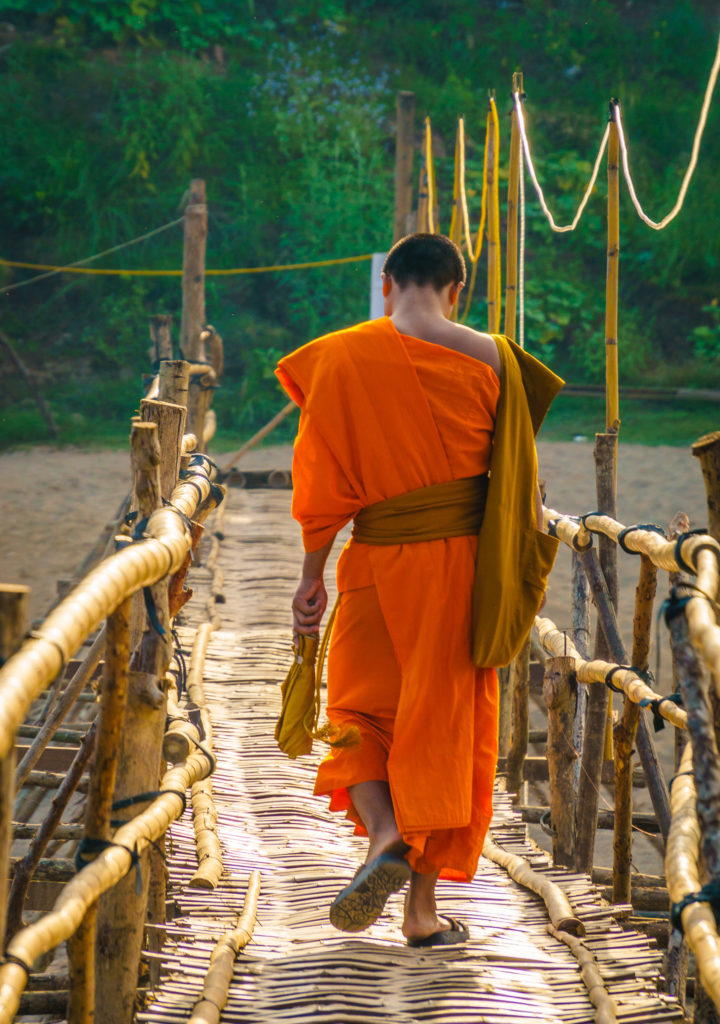
I’m happy to report that I loved my time in Luang Prabang and wish I had a couple more days to spend here. Yes, it’s a small town and you can see most of the attractions in a couple of days. However, the entire town has a chill, laid-back vibe and you’ll definitely want to slow down here. From watching monks cross the bamboo bridge to the luxurious spas, there’s plenty here to occupy your time.
I’ll be writing an itinerary guide shortly, but in the meantime, here are some photos that will make you want to book at trip to Luang Prabang ASAP.
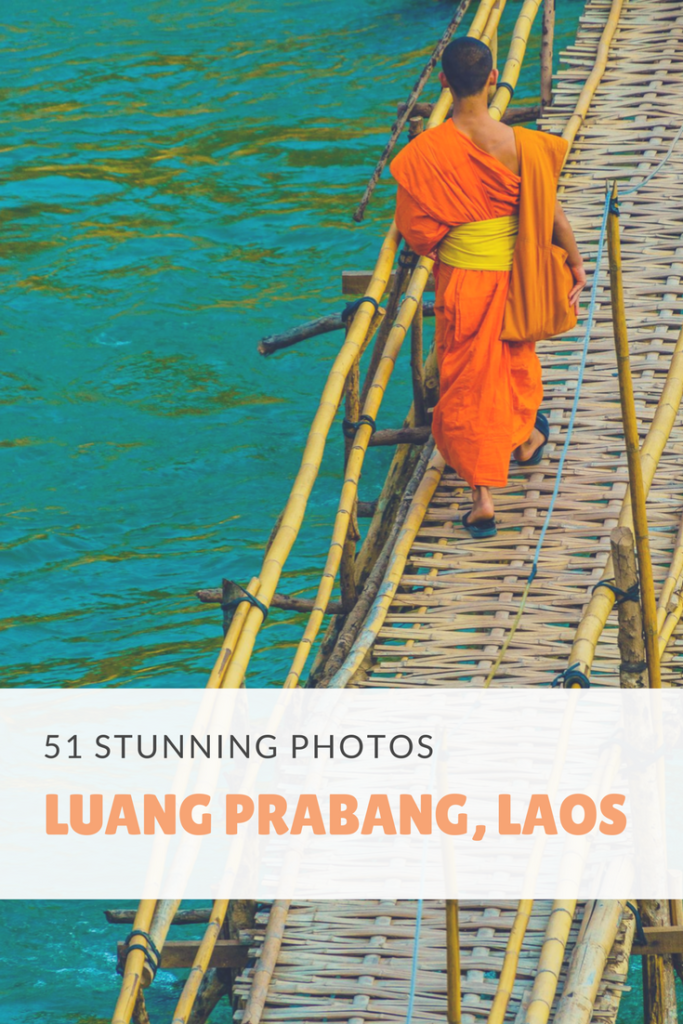
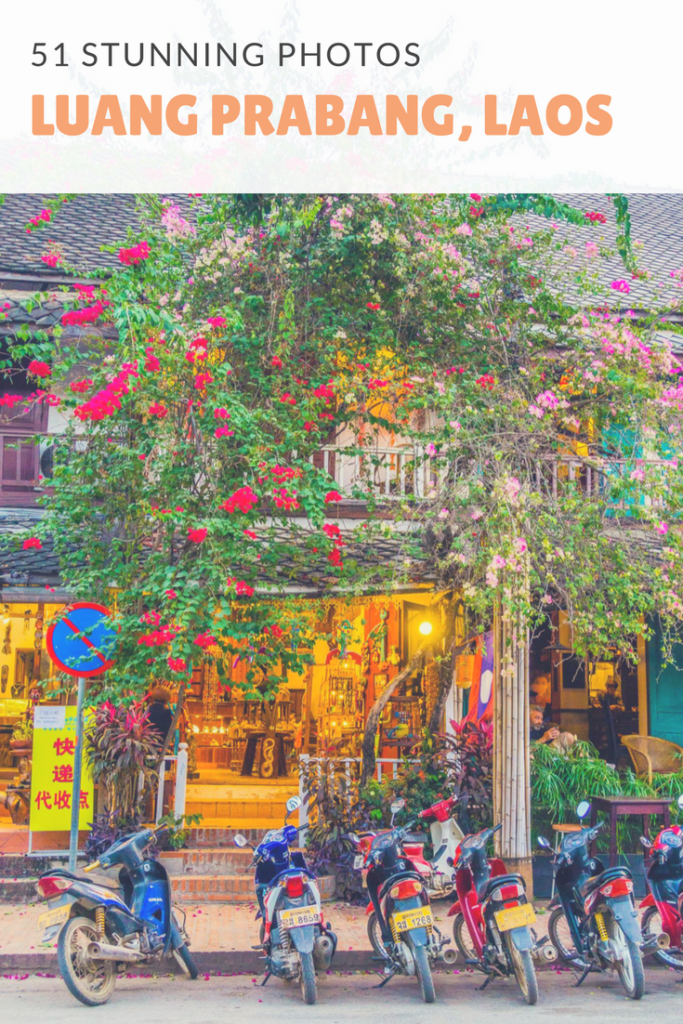
The 51 number of photos that will make you want to visit
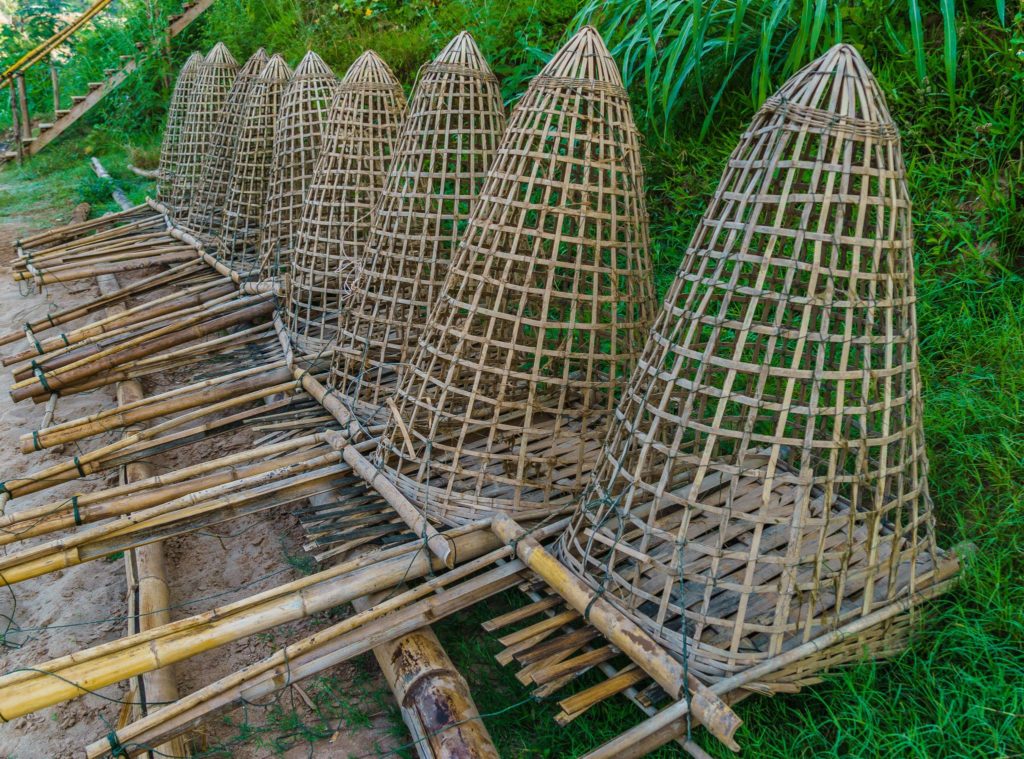
Fishing nets on the side of the river bank
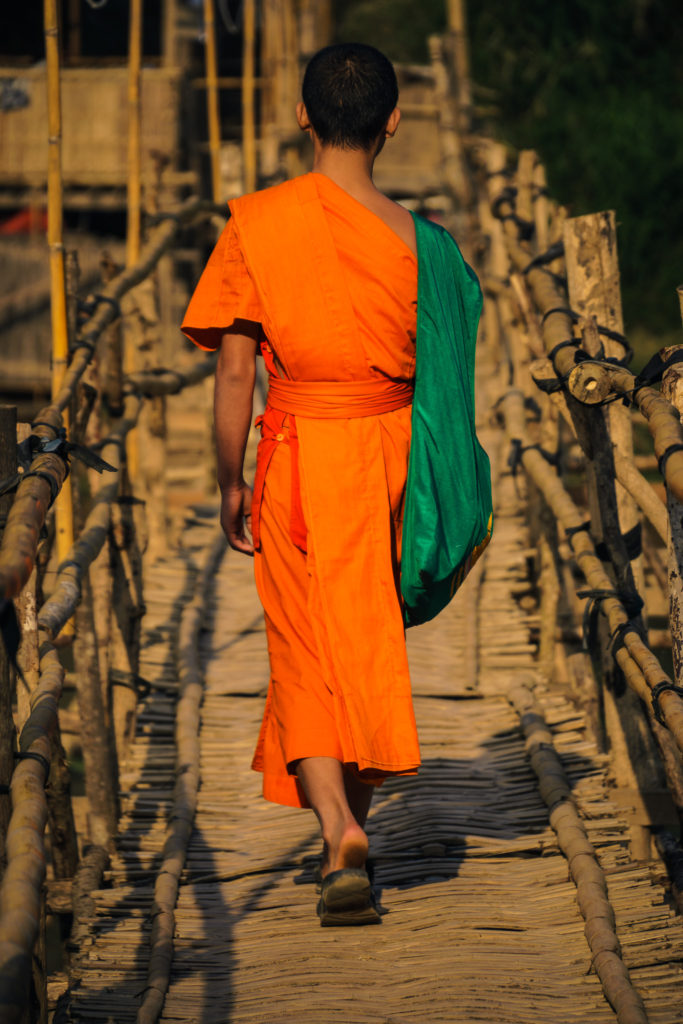
Monk walking across the handmade bridge.
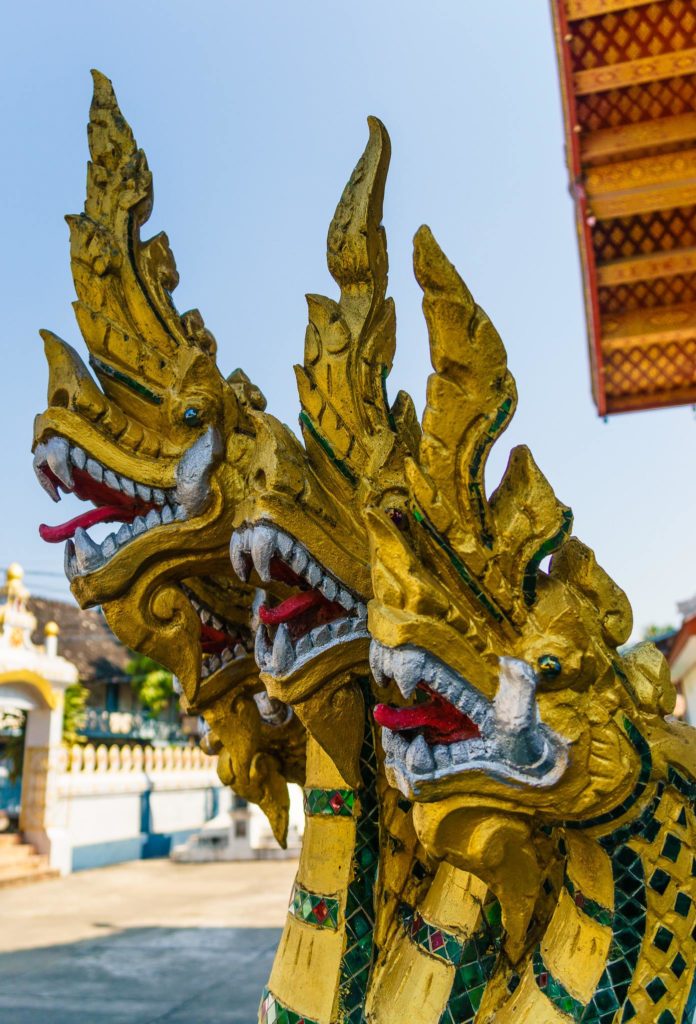
Three headed naga, which are mythical serpent-like creatures, believed to live in the Mekong river.
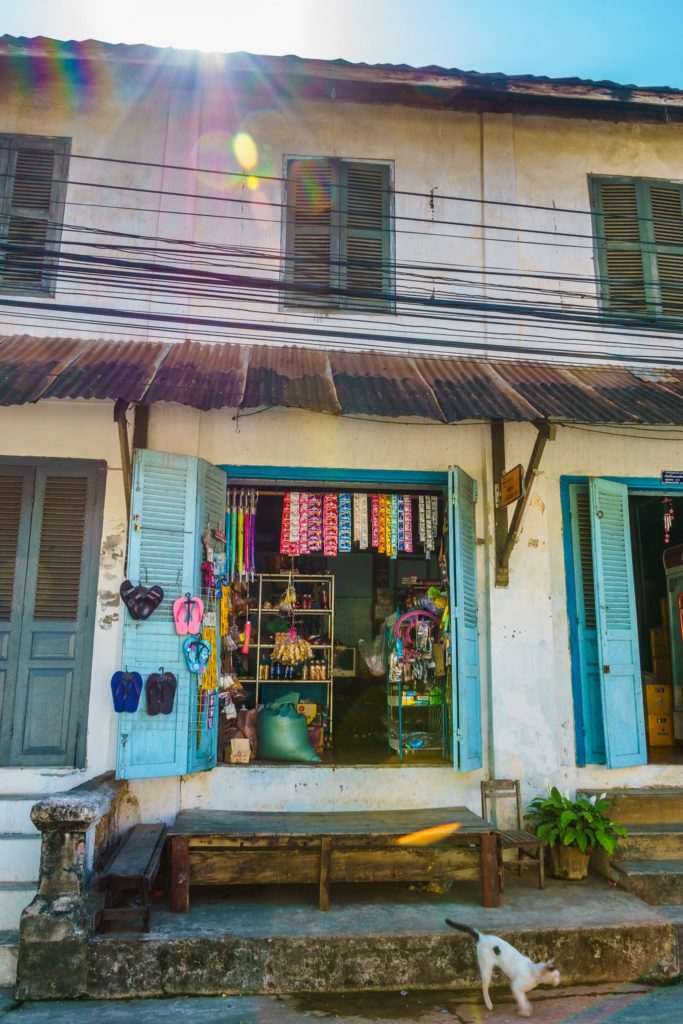
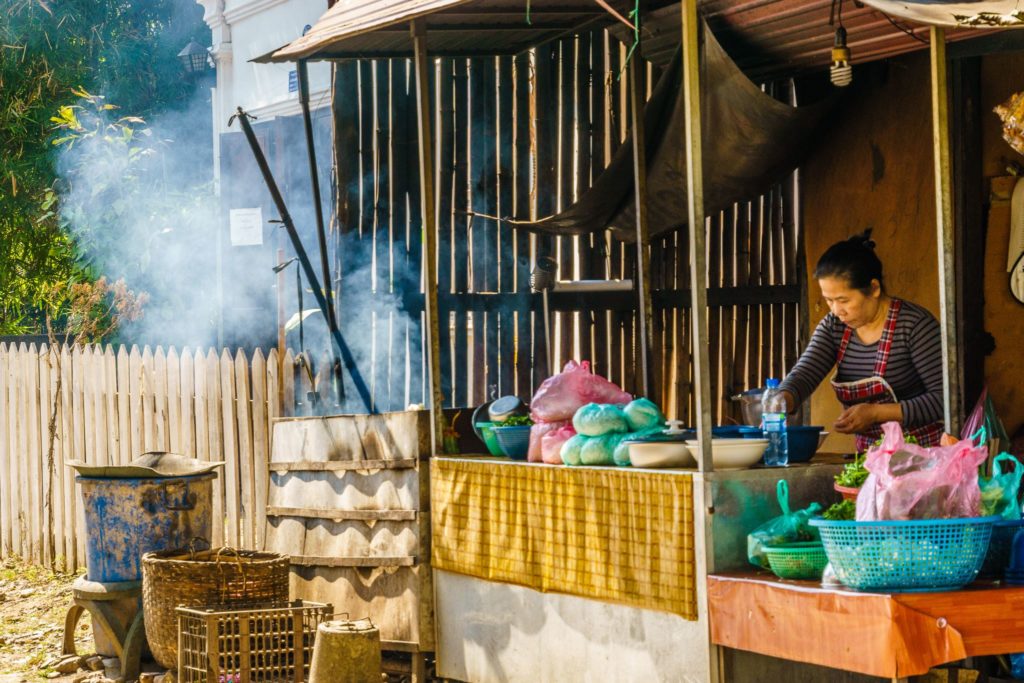
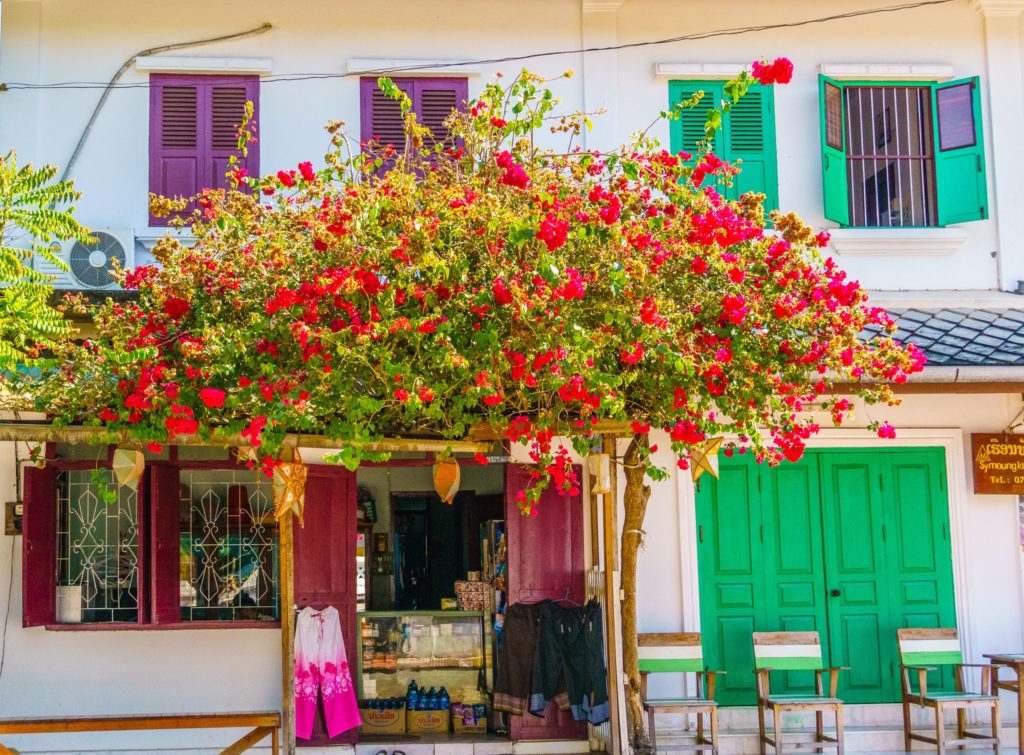
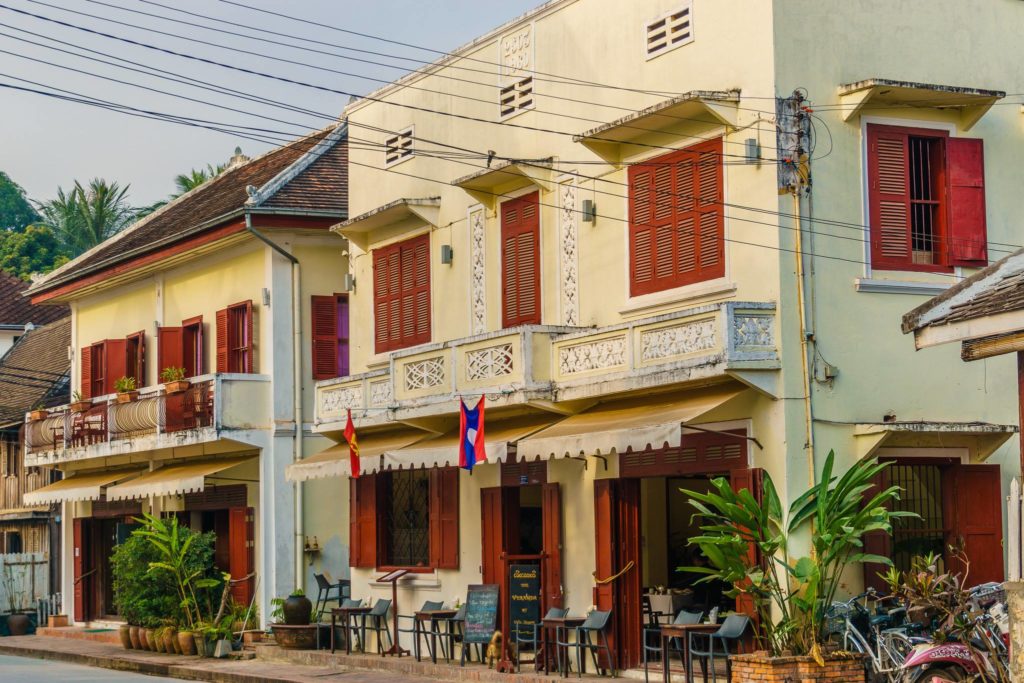
Adorable shop in Luang Prabang.
She’s probably cooking something very tasty.
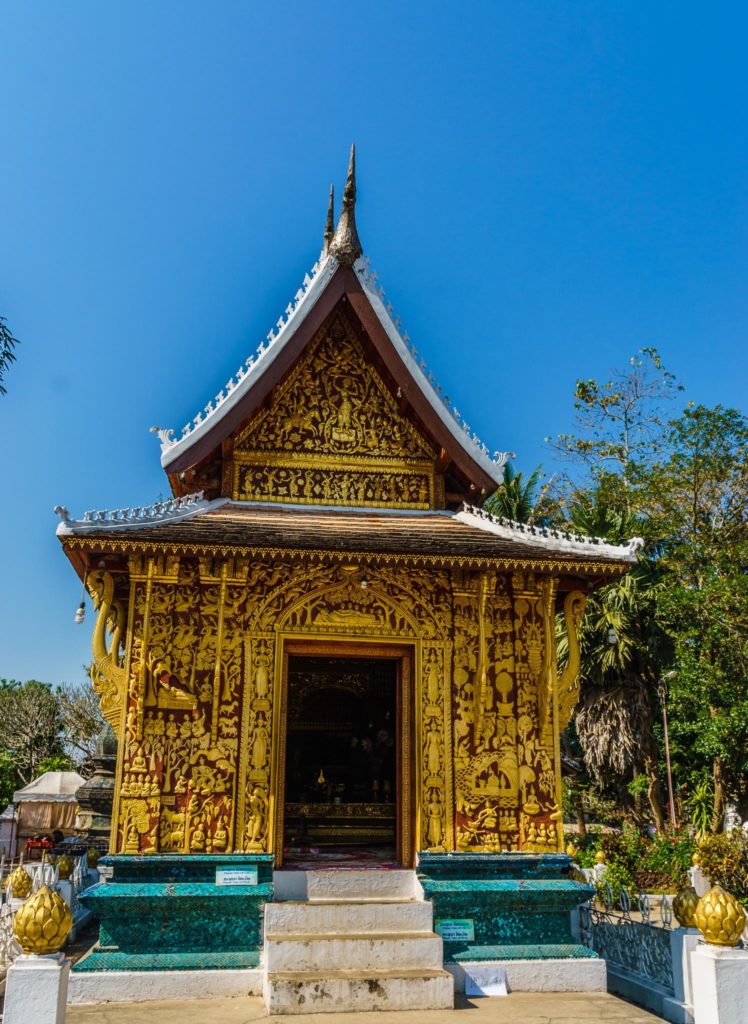
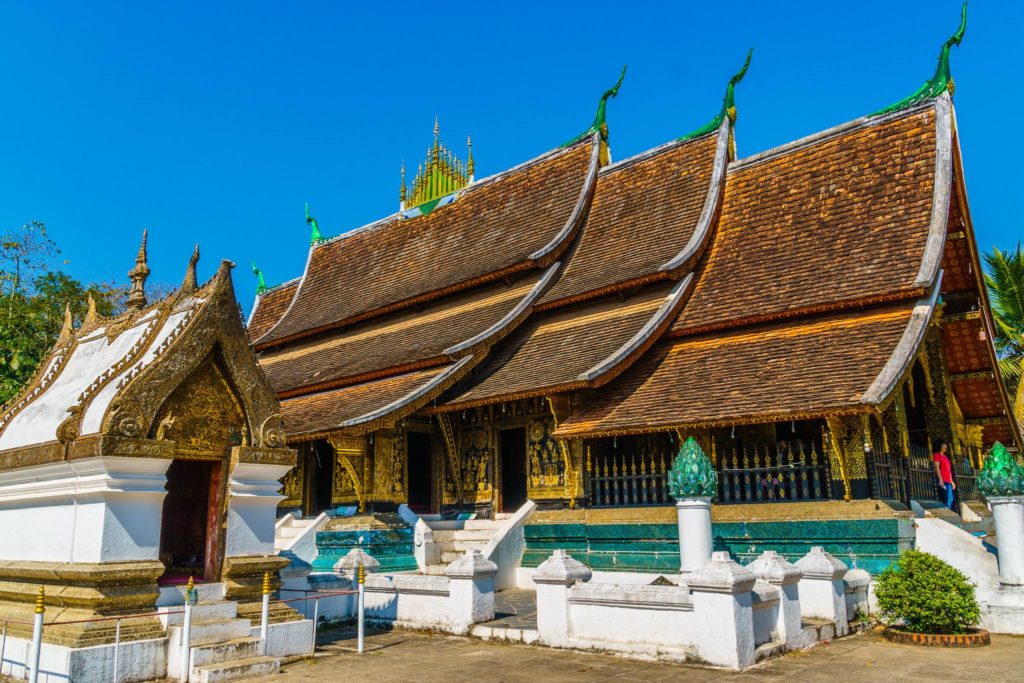
One of the temples at Wat Xiang Thong.
The temples are covered in beautiful tiles.
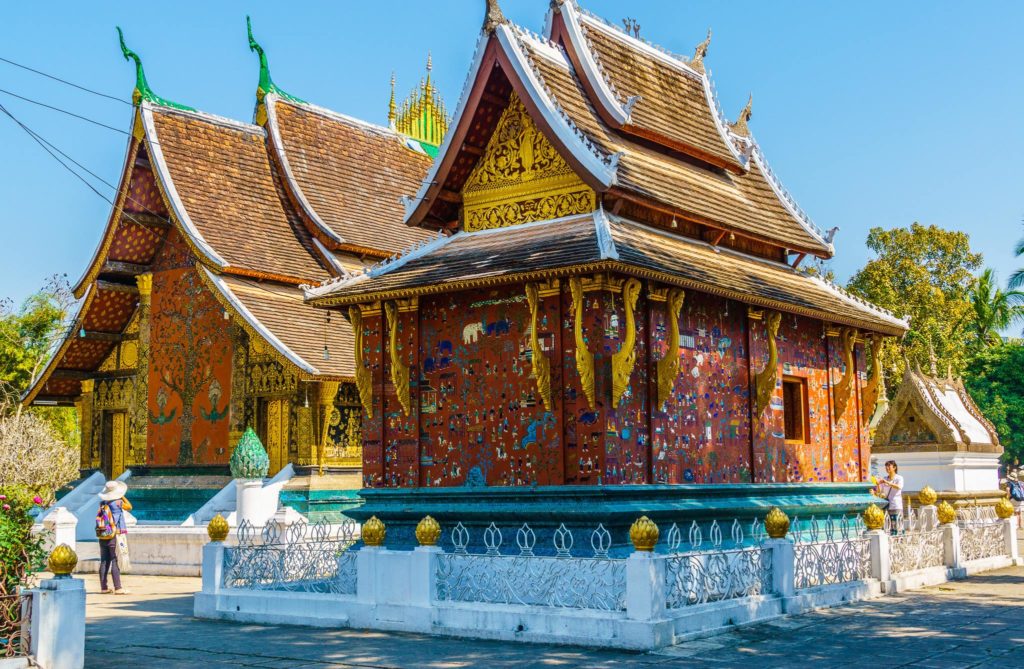
Exterior of a temple at Wat Xieng Thong, Luang Prabang, Laos
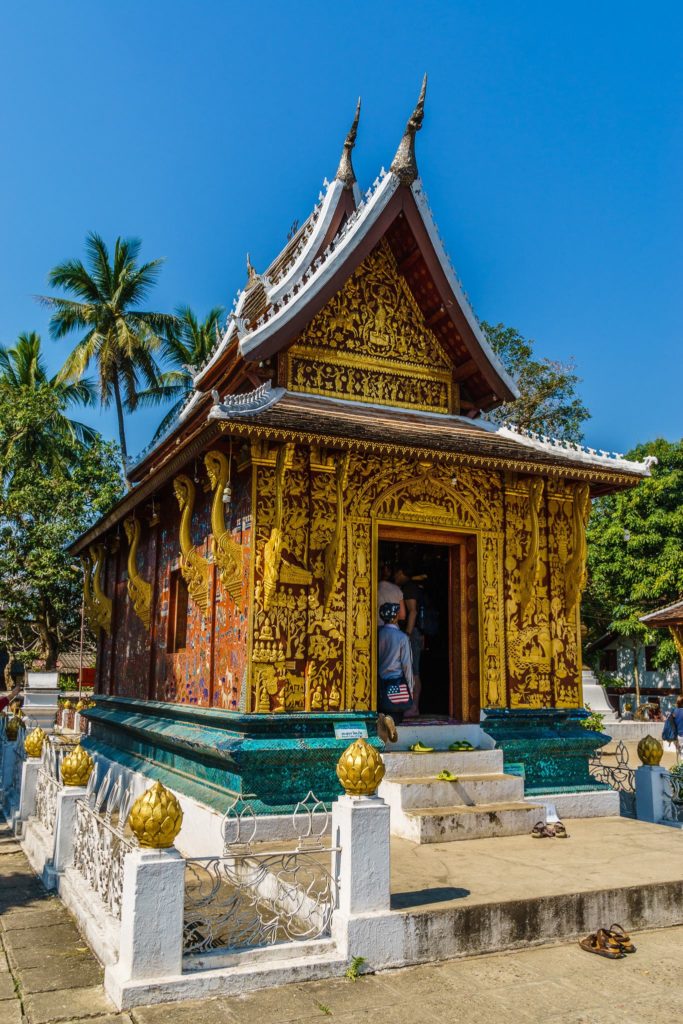
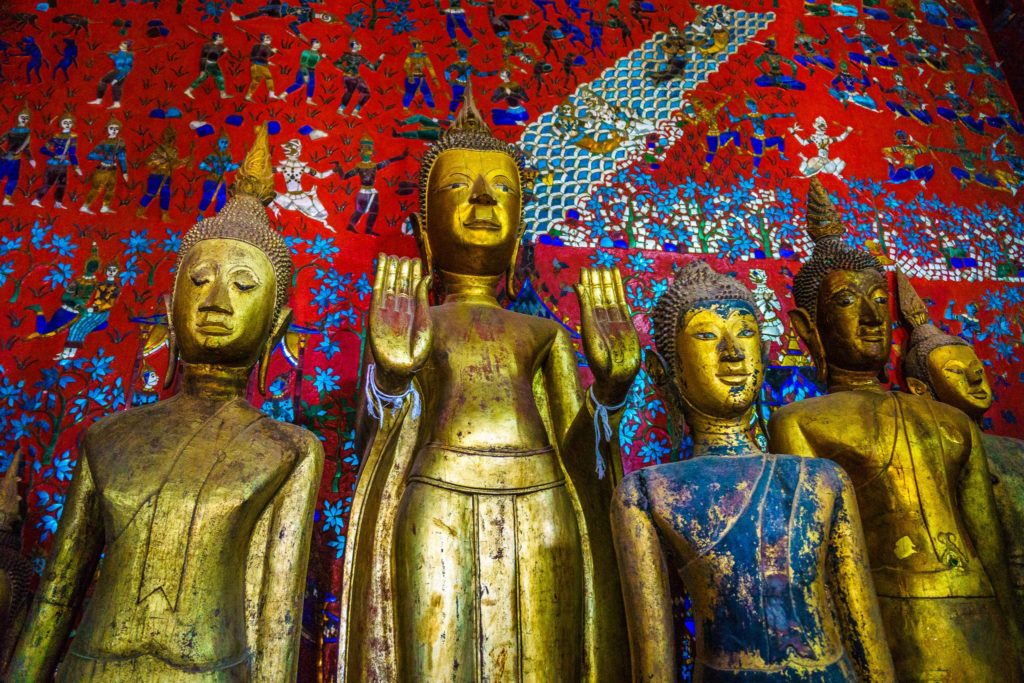
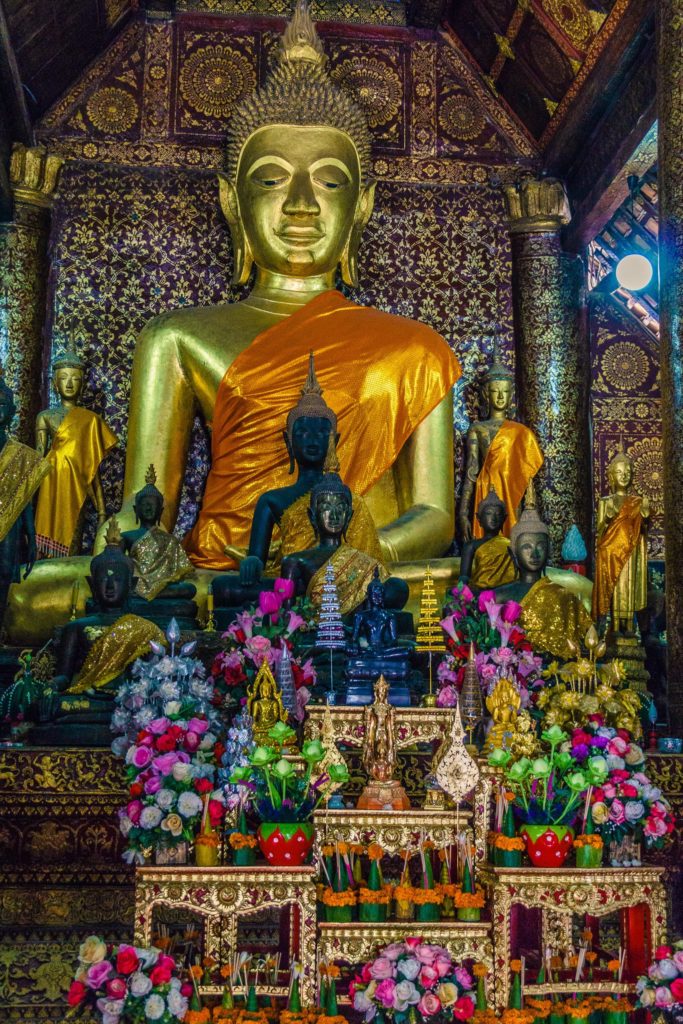
Statues inside Wat Xiang Thong.
The exterior of Wat Xiang Thong.
Buddha statue inside the temple.
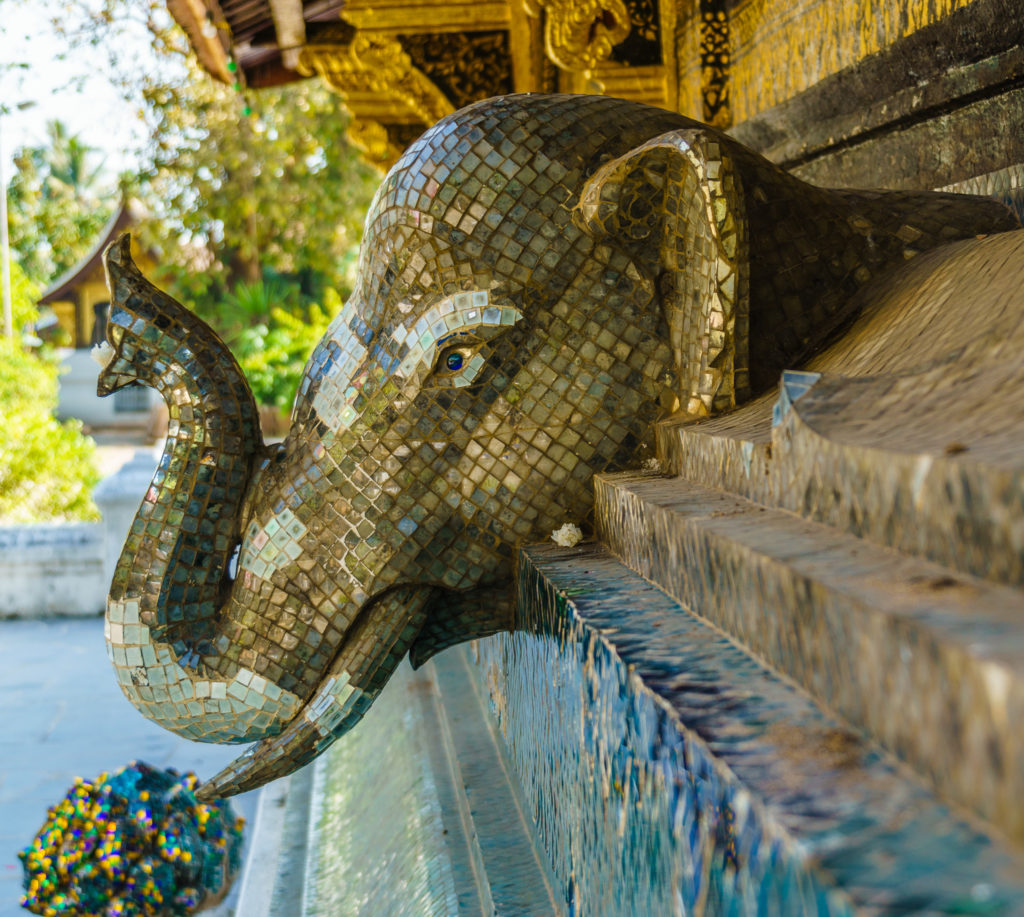
I loved this tiled elephant at Wat Xieng Thong.
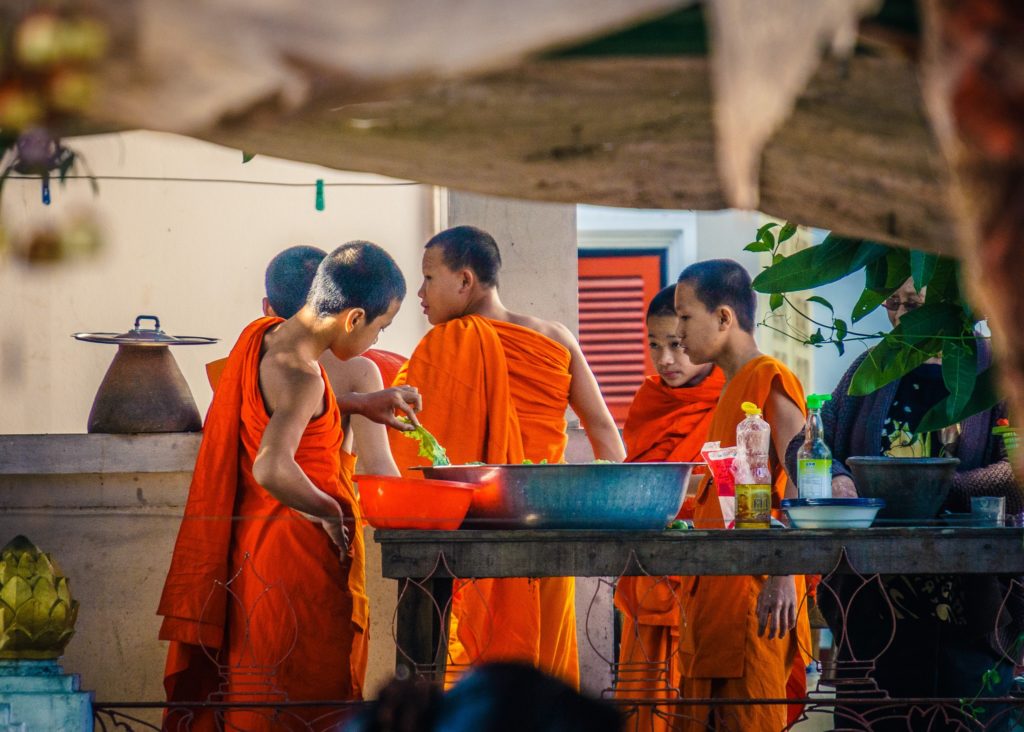
Young monks making a meal together.
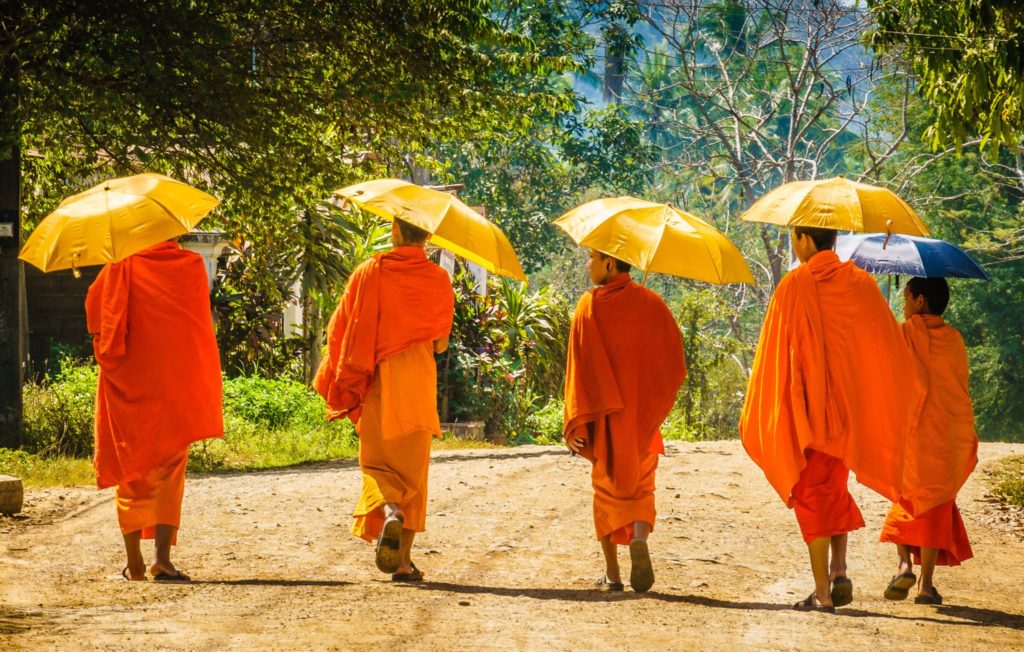
I was jealous of their umbrellas since it was over 90 degrees F at this point during the day.
Crossing the bridge to get to the other side.
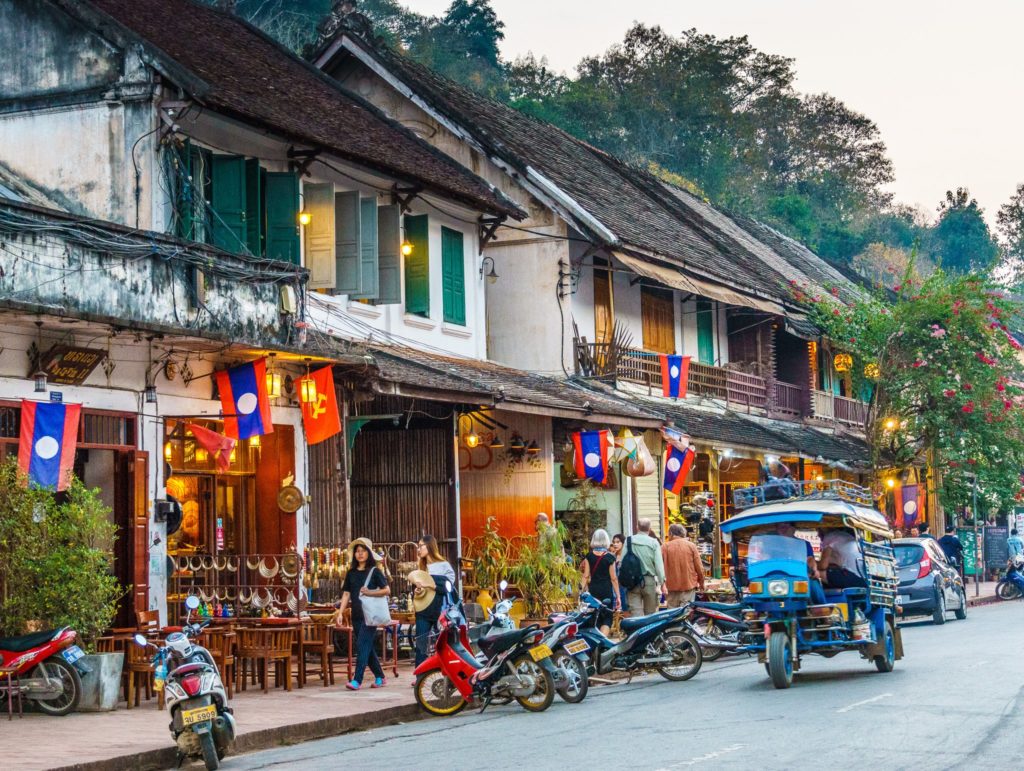
I loved all the cute shops and buildings in Luang Prabang.
Sunset in Luang Prabang
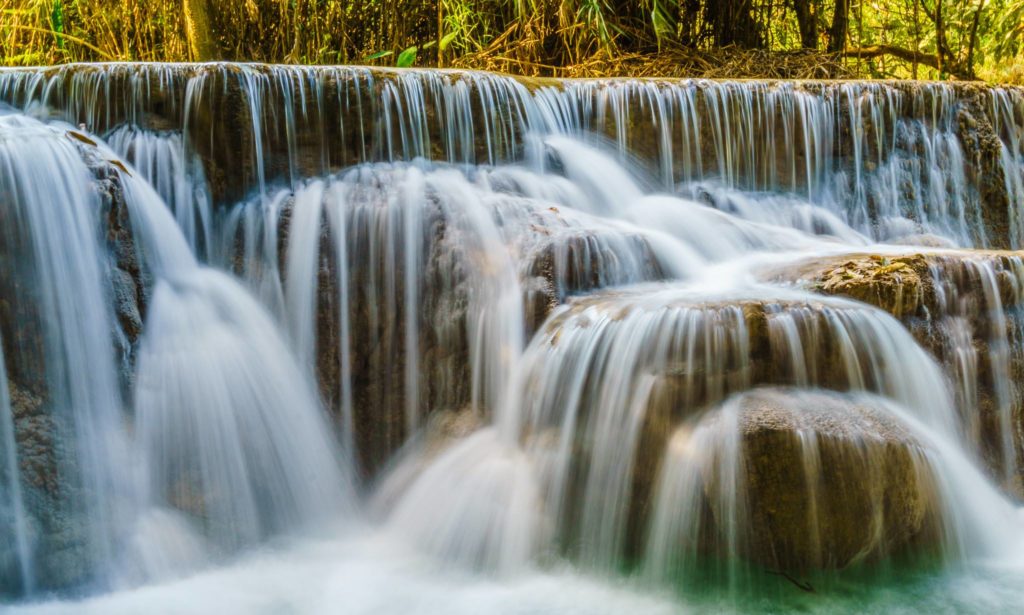
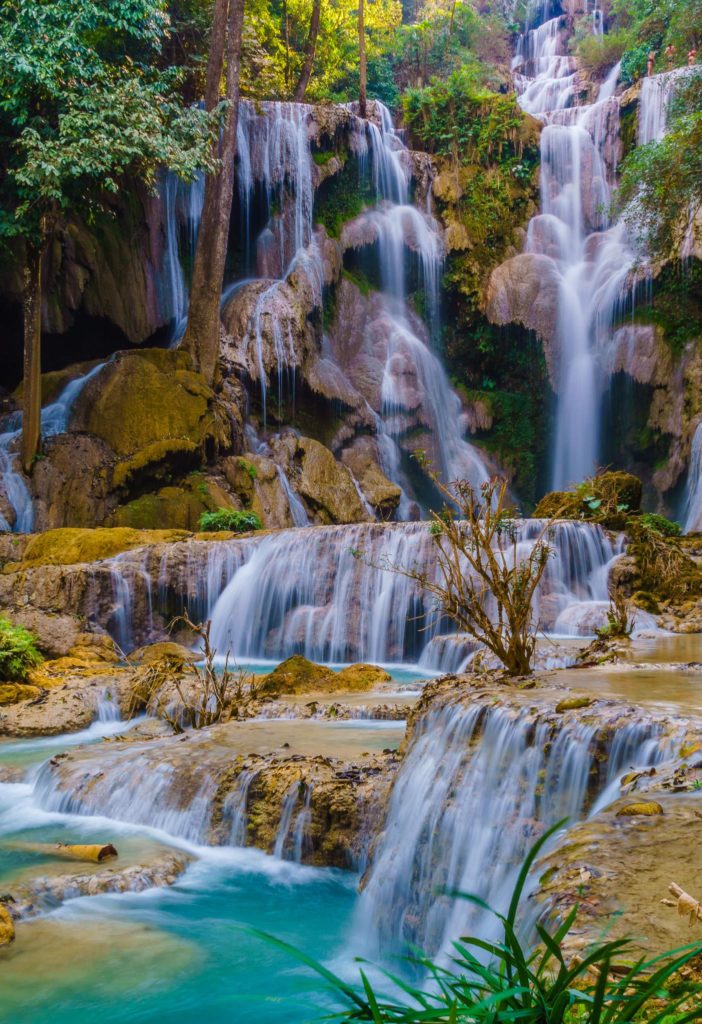
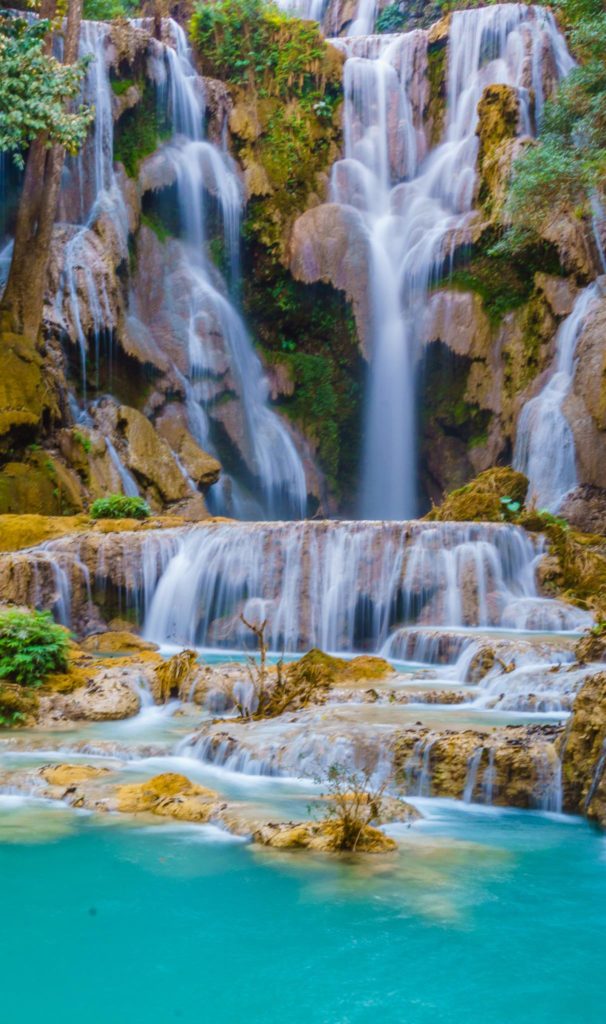
The beautiful Kuang Si waterfalls (lower falls).
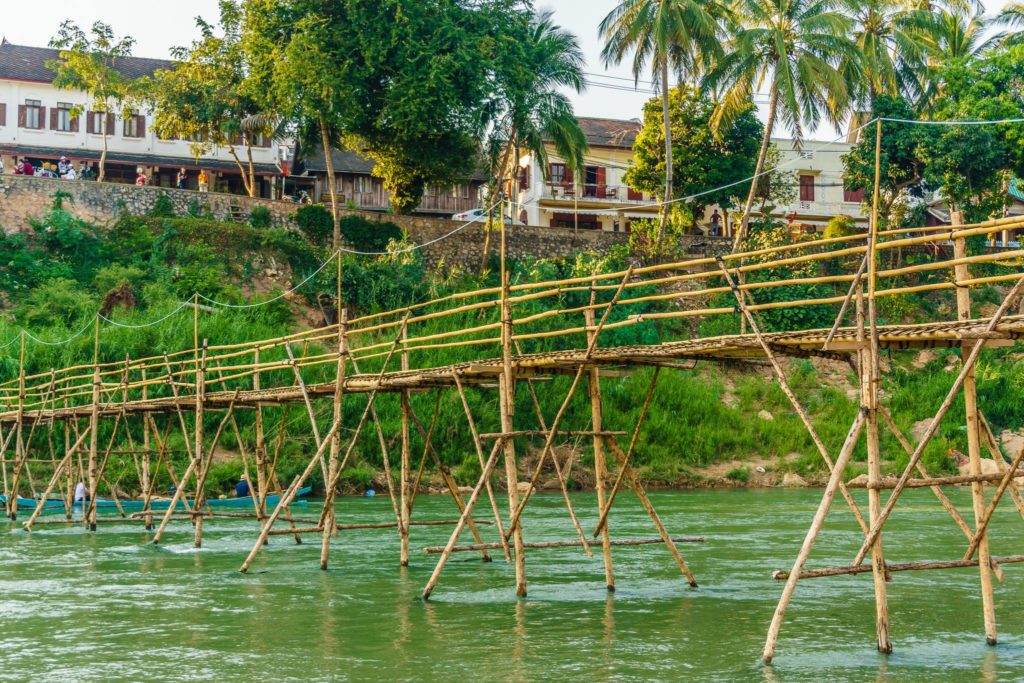
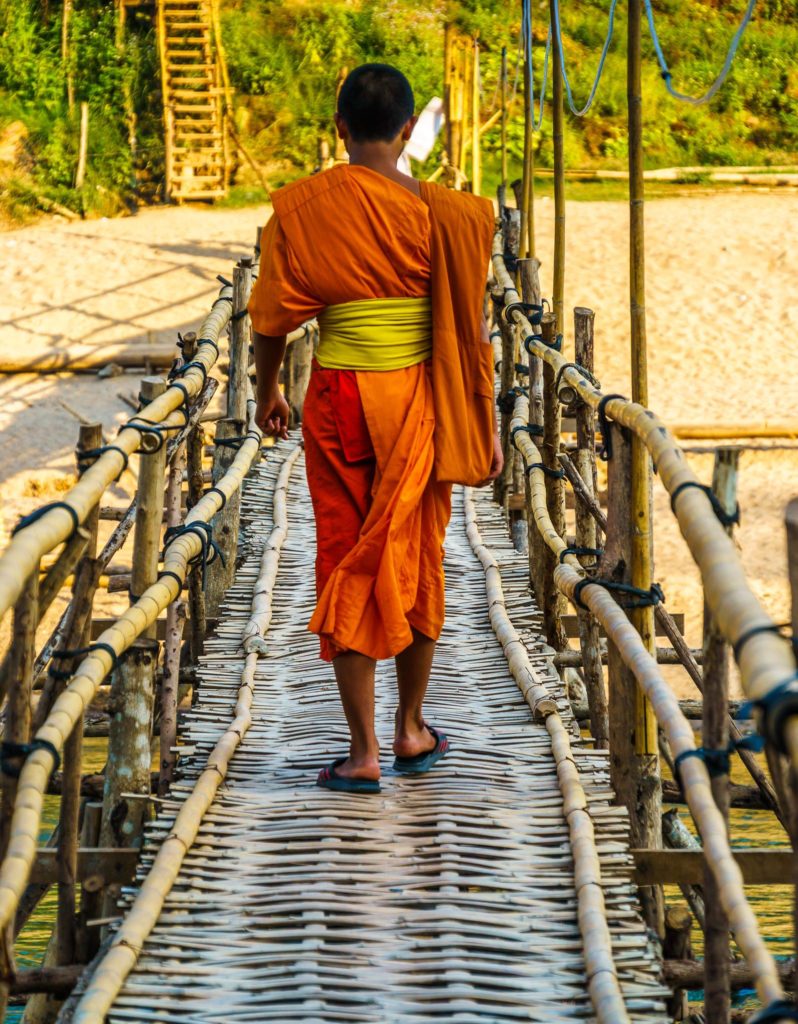
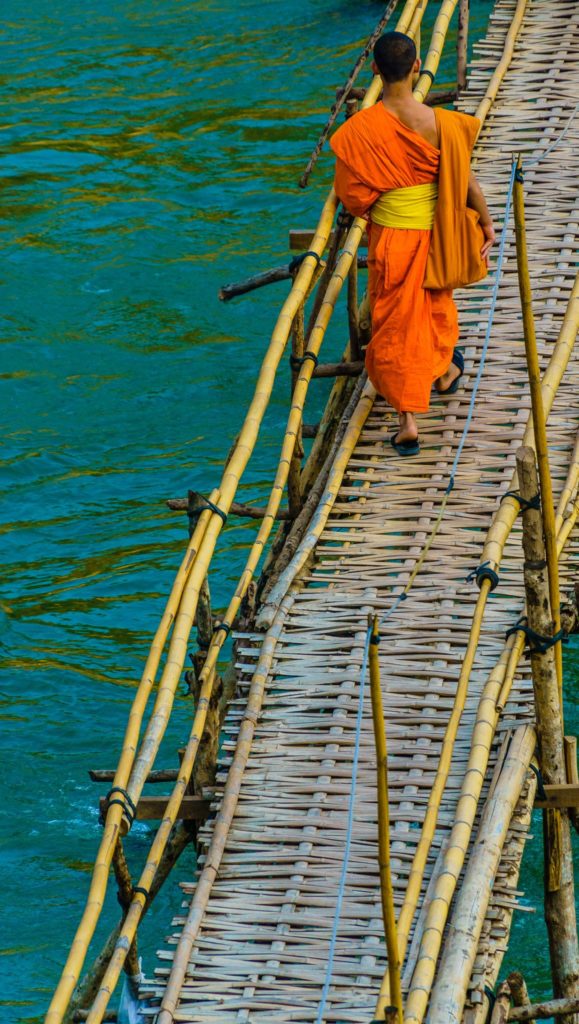
Monk crossing the bamboo bridge.
This bamboo bridge is constructed annually by a local family. You pay a small fee in order to cross.
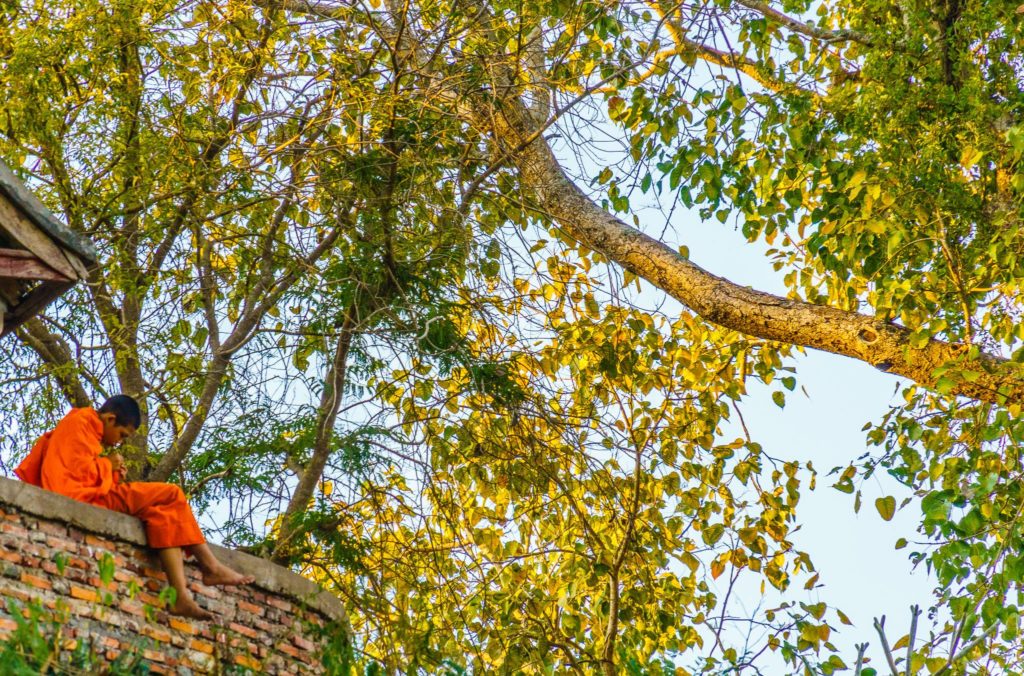
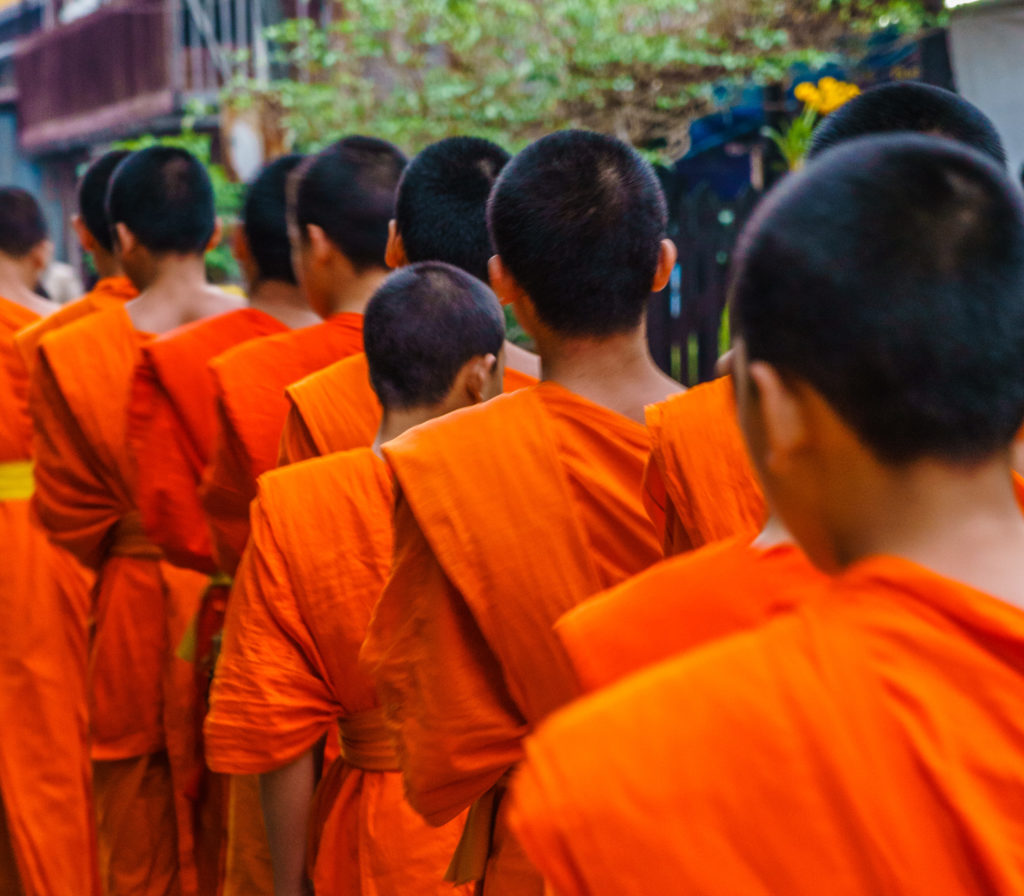
No matter where you go in Luang Prabang, you’ll see monks everywhere.
I love the contrast of the orange robe to the water.
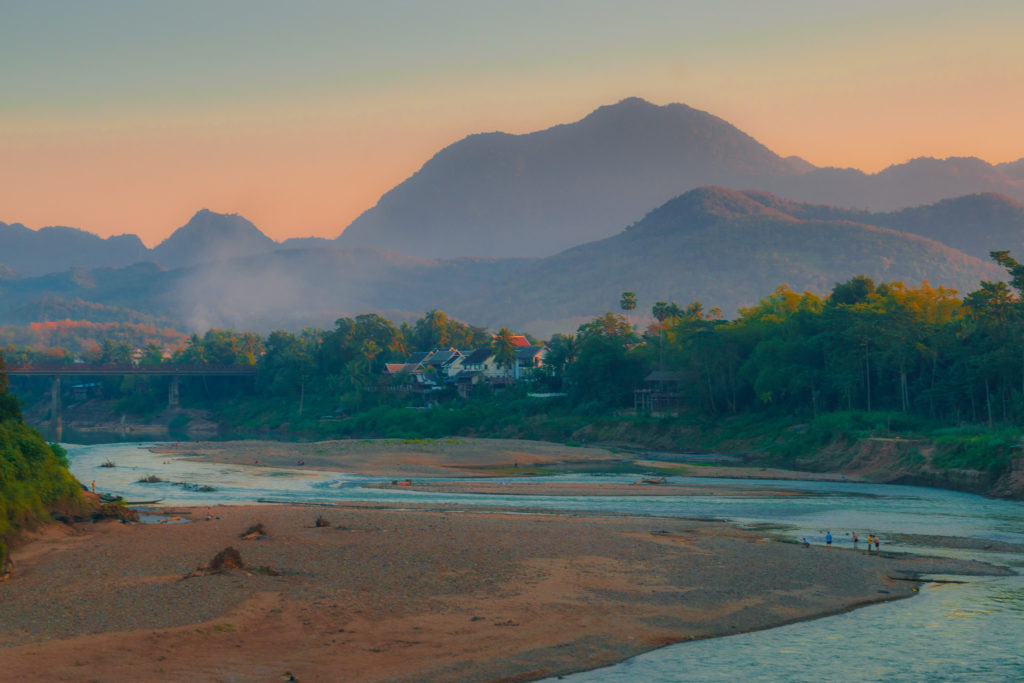
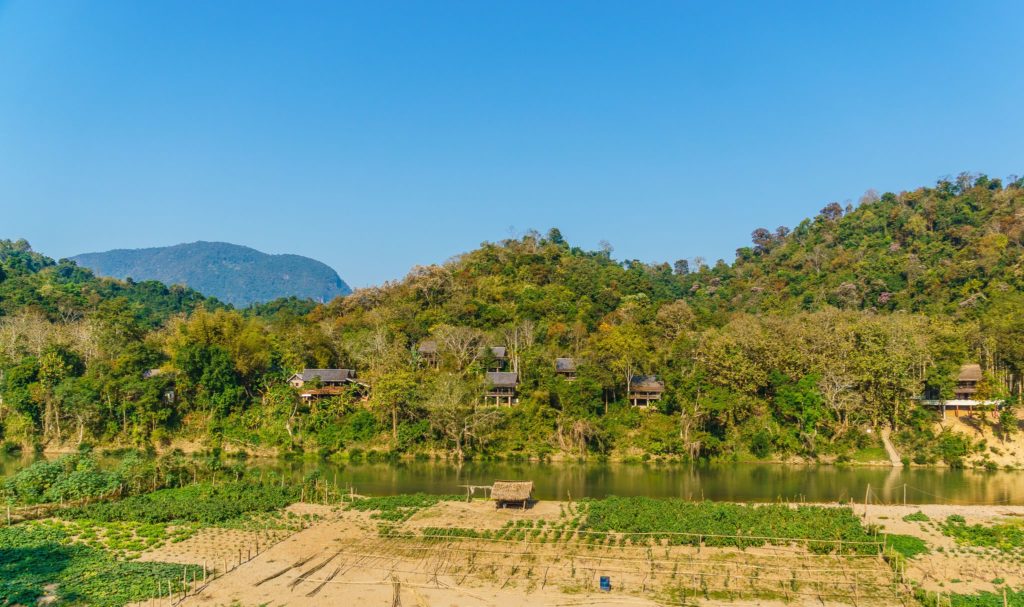
On the Mekong River in Luang Prabang.
The main attraction: Kuang Si waterfalls.
Kuang Si waterfalls
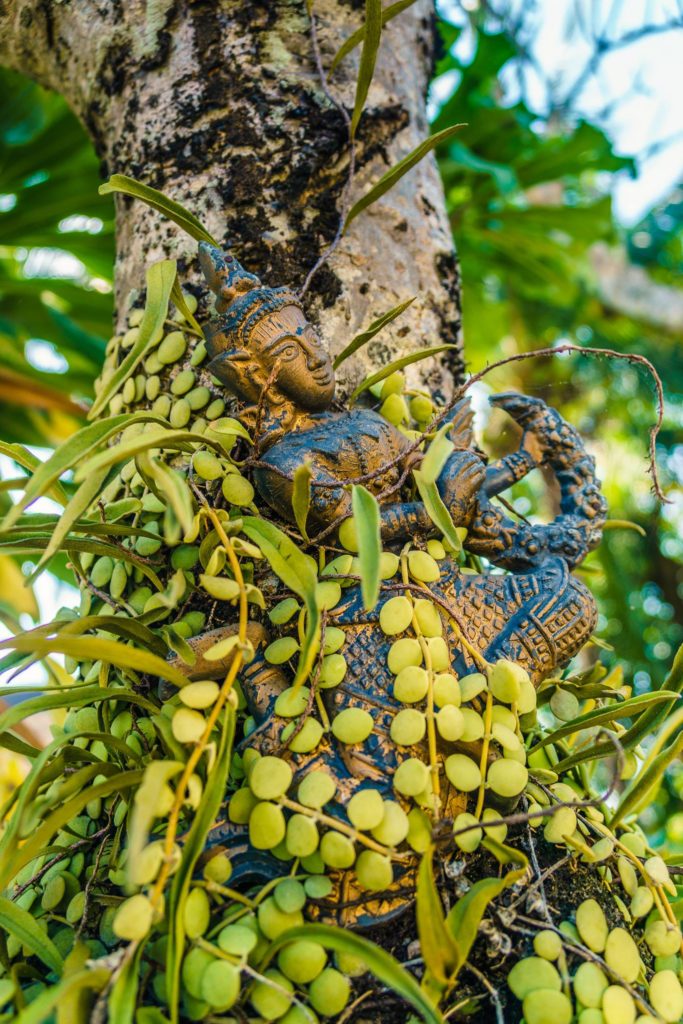
Tiny buddha in a tree
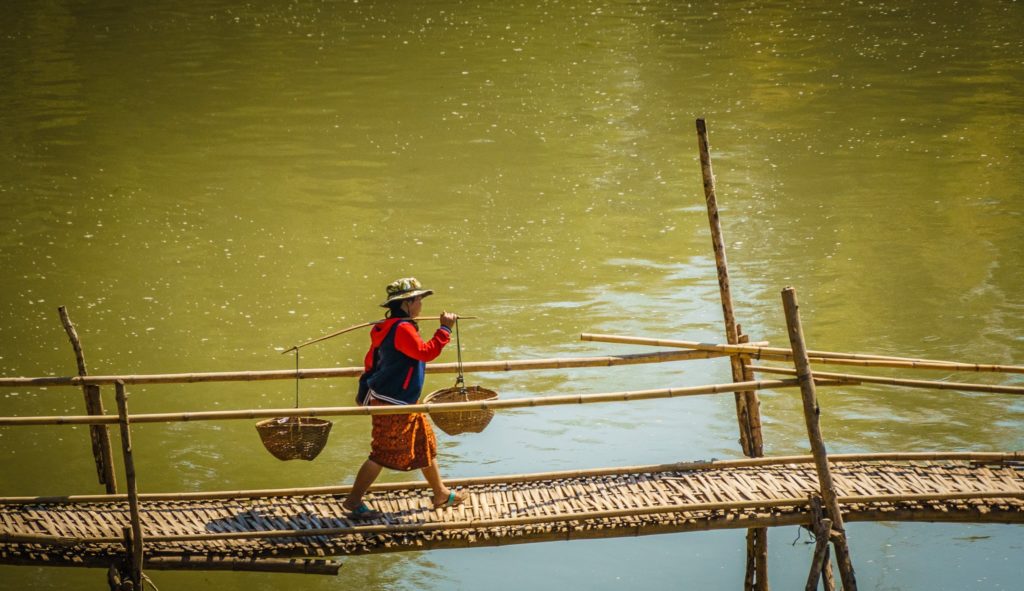
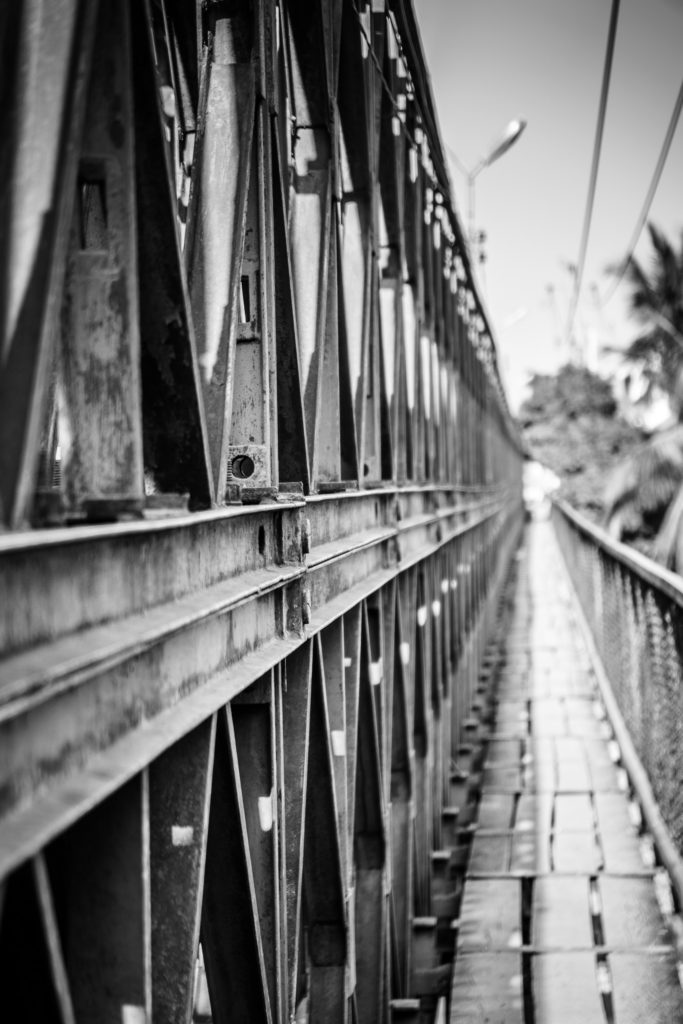
Crossing the Nam Khan River.
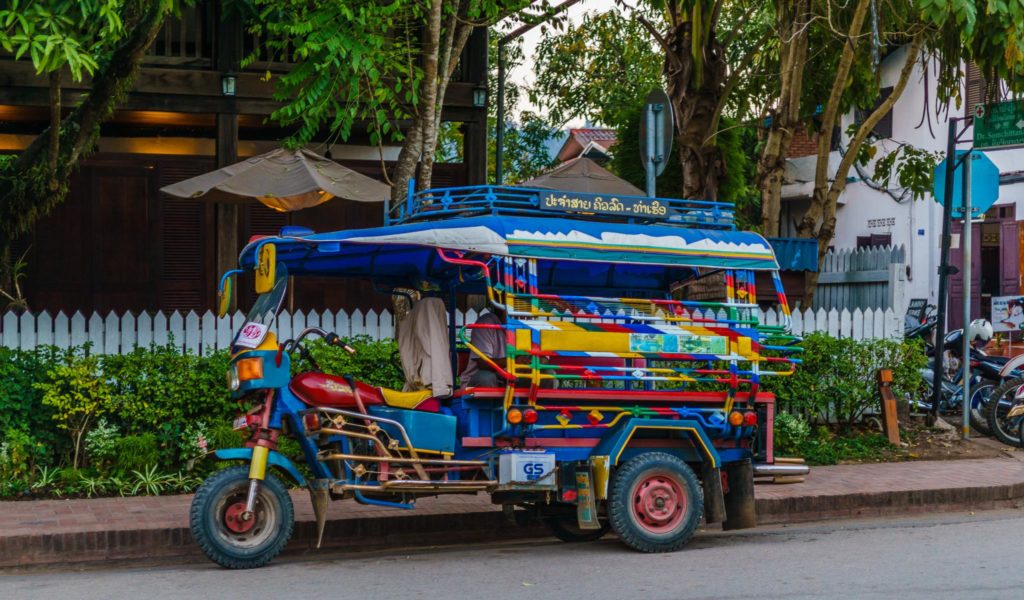
The tuk tuks in Luang Prabang are very colorful. I took this one to a spa appointment at Sofitel Luang Prabang.
Cute street in Luang Prabang.
River front in Luang Prabang.
Monk crossing the bamboo bridge.
Cute little cafes in Luang Prabang
Playing some sort of card game to pass the night.
The night market where you can buy almost anything.
This monk was doing a lot of people watching below him.
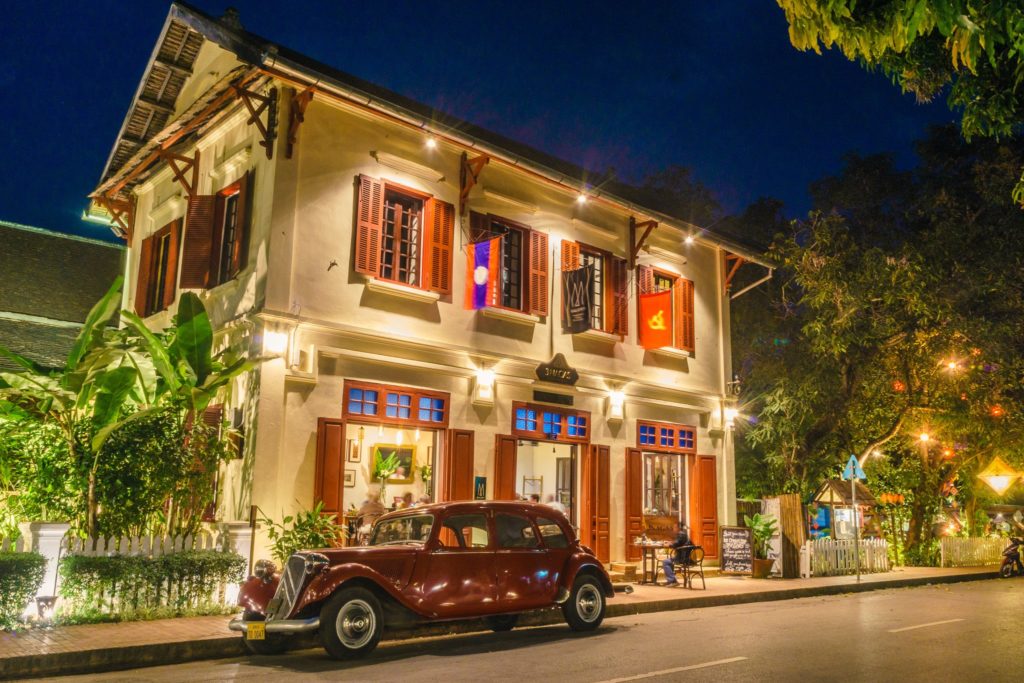
Part of the hotel where I stayed in Luang Prabang. This building used to house the royal iced creamery.
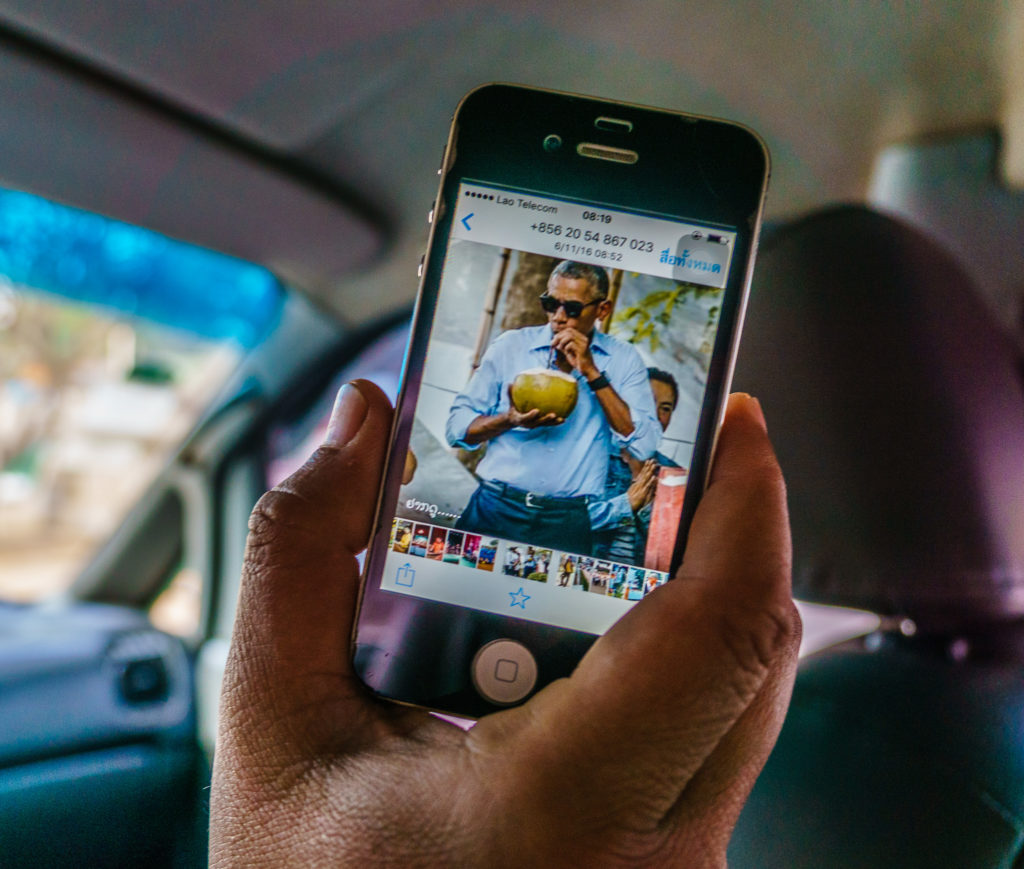
The driver to Kuang Si falls was so excited to tell me about Obama’s visit to Luang Prabang.
Cute little street in Luang Prabang.
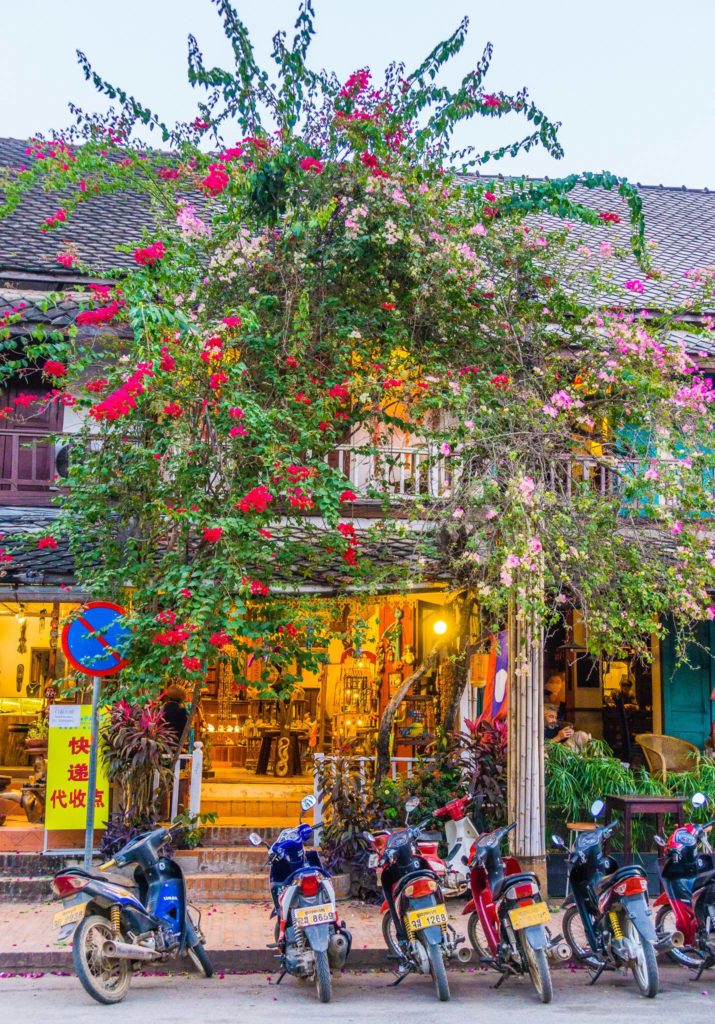
Beautiful flowers in Luang Prabang.
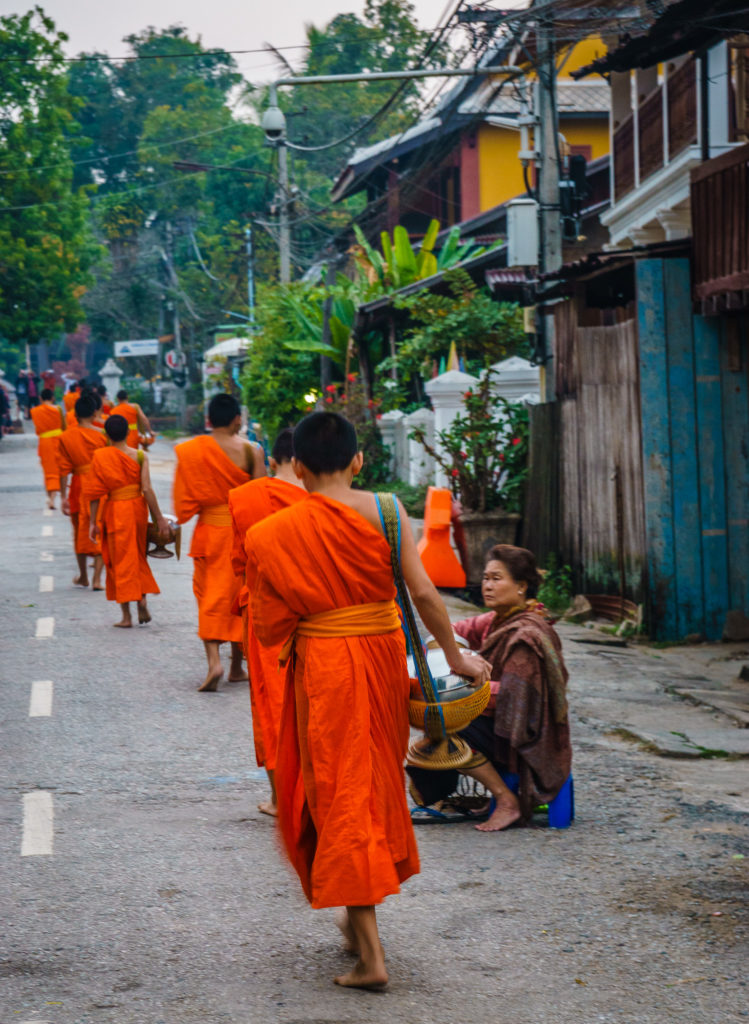
Monks at the morning alms giving ceremony.
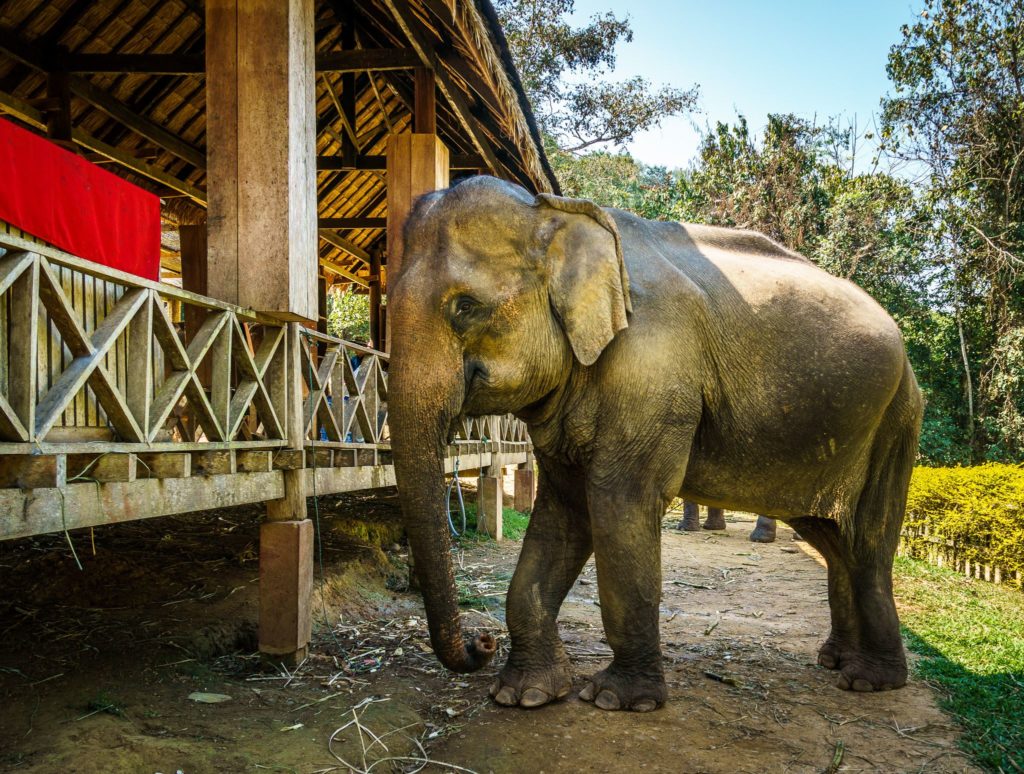
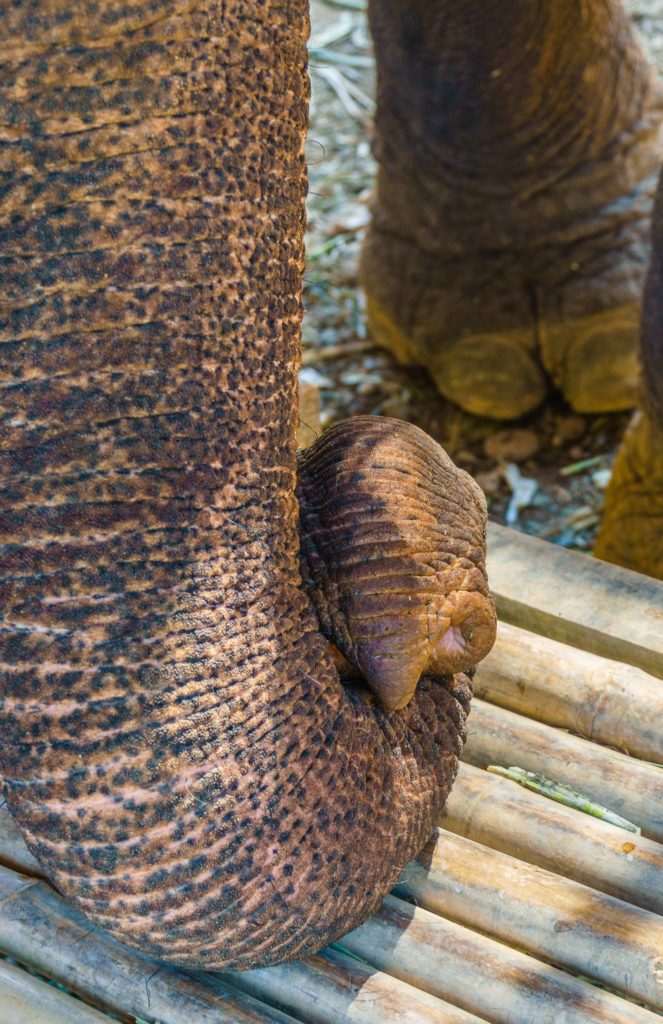
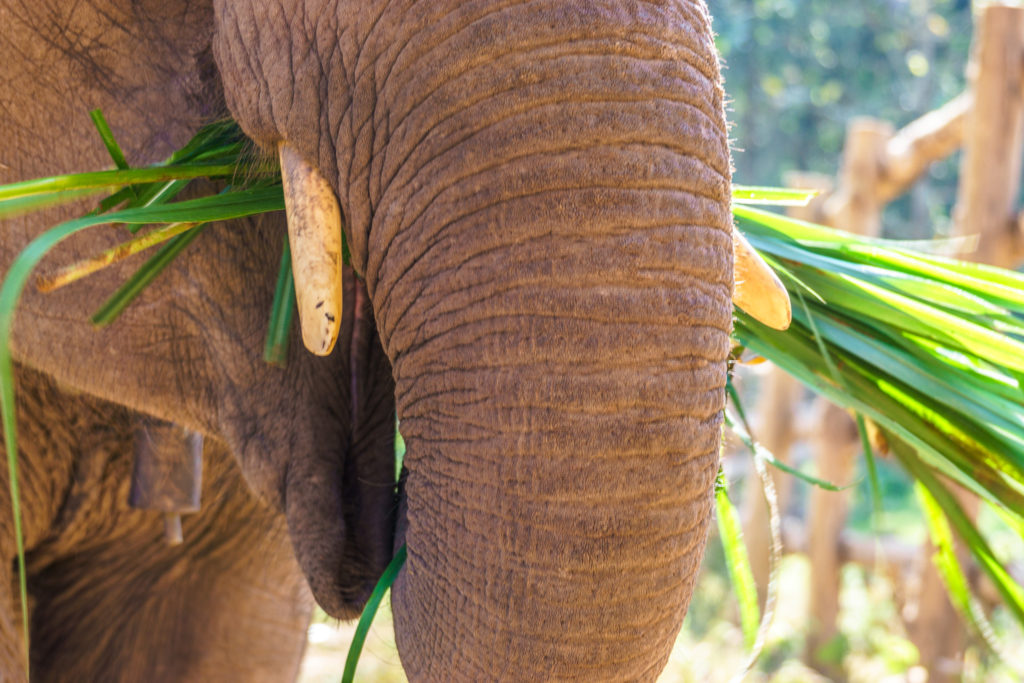
Rescued elephant at Elephant Village Sanctuary.
Rescued elephant at Elephant Village Sanctuary.
I think he’s a little bored.
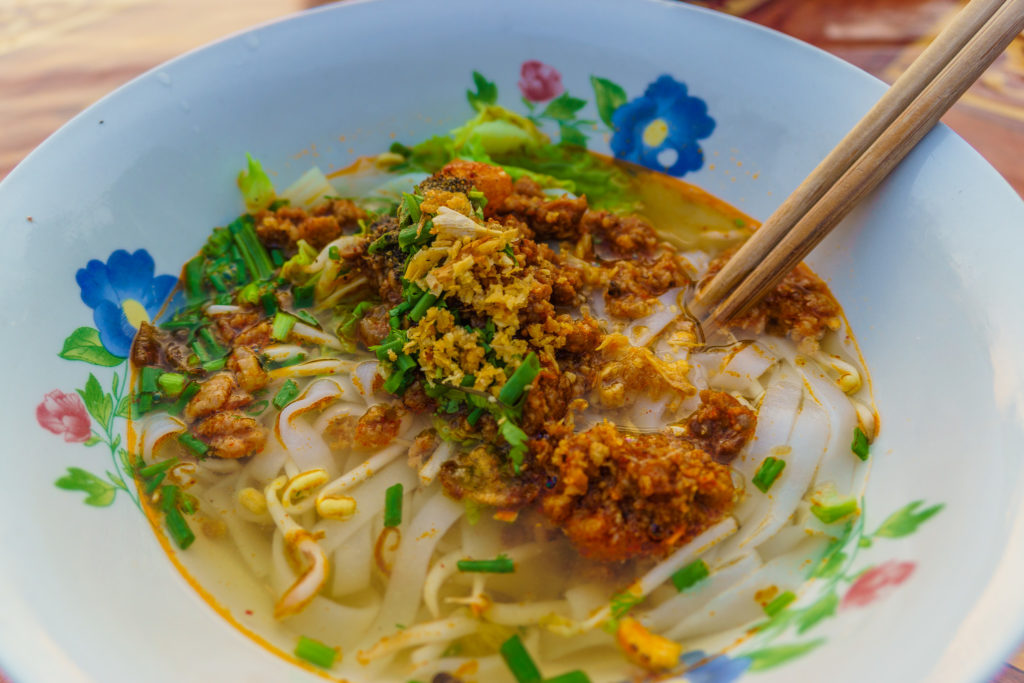
Delicious Khao Soi noodle soup from the night market. And it was only $2 too!
Monks at the morning alms giving ceremony.
Monks at the morning alms giving ceremony.
Rescued elephant at Elephant Village Sanctuary.
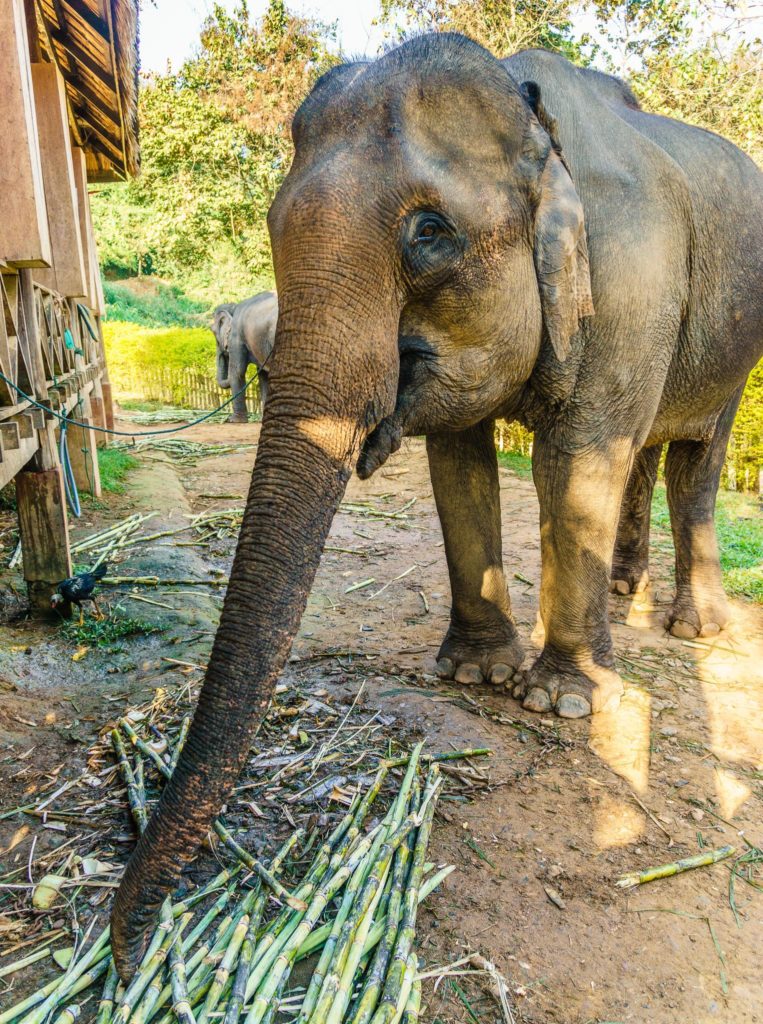
Rescued elephant eating sugar cane at Elephant Village Sanctuary.
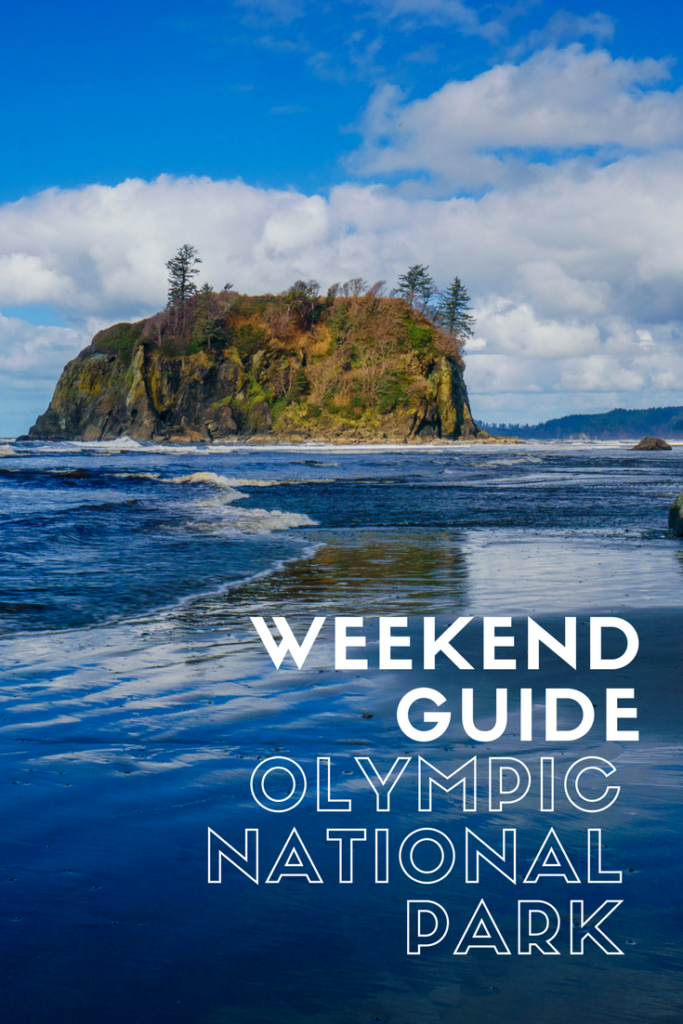
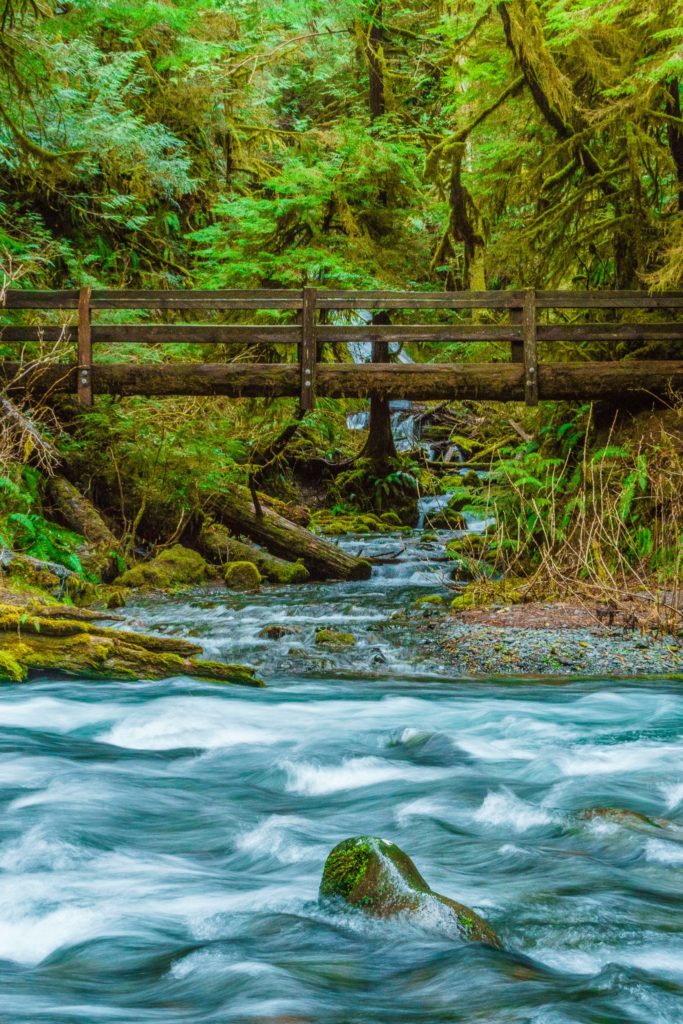
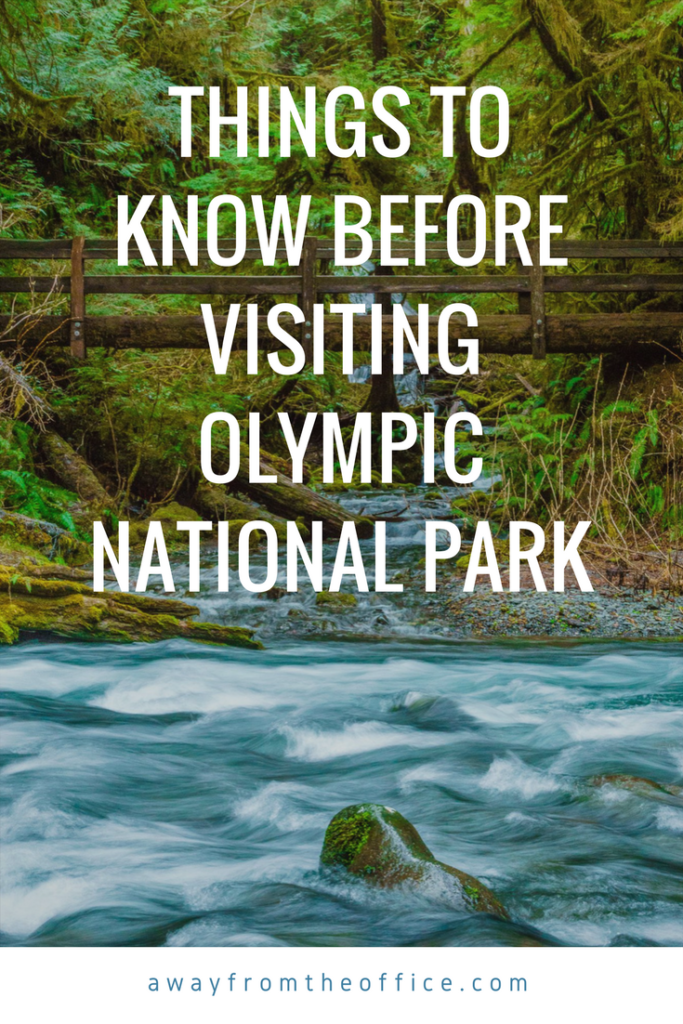
As I mentioned in a previous post, I spent last weekend hiking and photographing the wild, rugged beauty of Olympic National Park. If you want recommendations on what to see and where to stay, I highly recommend checking it out. In this post, I’m going to give you a general idea of how I spent my weekend.
You can spend several days exploring Olympic National Park and not get bored but since I’m a weekend warrior and I don’t live that far away, I decided to make a quick weekend visit.
I was thinking about heading to the park for a solo adventure but decided to invite along my friend, Robyn, since she’s also into hiking and photography. If I know in advance that I want to set aside dedicated amounts of time to shoot a particular scene, it can be a pain in the ass to travel with friends who aren’t into photography. I totally get it. There are only so many hours you can spend staring at the same damn tree. For the record, we spent at least an a hour and a half photographing a single tree (it was a really old, beautiful tree but still. Most people don’t want to deal with that).
As I go through this itinerary, keep in mind that a lot of time was spent at each destination looking for the best spot to set up our tripods, actually taking the photo, etc. If you just want to hike and take a couple of snaps with your camera phone, you can certainly move faster than this.
Friday: Day 1
We left the Seattle area around 2 pm on a Friday so naturally, we got stuck in hellish traffic. On a normal day without traffic, it takes around 3 hours to drive from Seattle to Kalaloch Lodge on the southwestern end of Olympic National Park. Since the Seattle area has major traffic jams almost all the time and it was raining (you’d think we would know how to drive in the rain by now), it took closer to 4 and a half hours to get there.
I recommend either leaving the Seattle area when it’s not rush hour. Or bring a friend with you so that you can at least use the carpool lane. Hmm, maybe that’s the real reason that I invited Robyn along after all.
Once you drive past Olympia and you turn off towards the 101, you’re pretty much in the middle of nowhere. There are still plenty of gas stations so you don’t need to worry about that.
We stopped for gas in a tiny town called McCleary, a town of around 1,600 residents and home to the famous McCleary Bear Festival. When we saw the sign about the festival, we were thinking that it would be a cute festival to celebrate bears. Who doesn’t like bears? Robyn decided to research the bear festival in more detail and sadly, it appears there is some bear-eating involved. A detail that we wish we didn’t know.
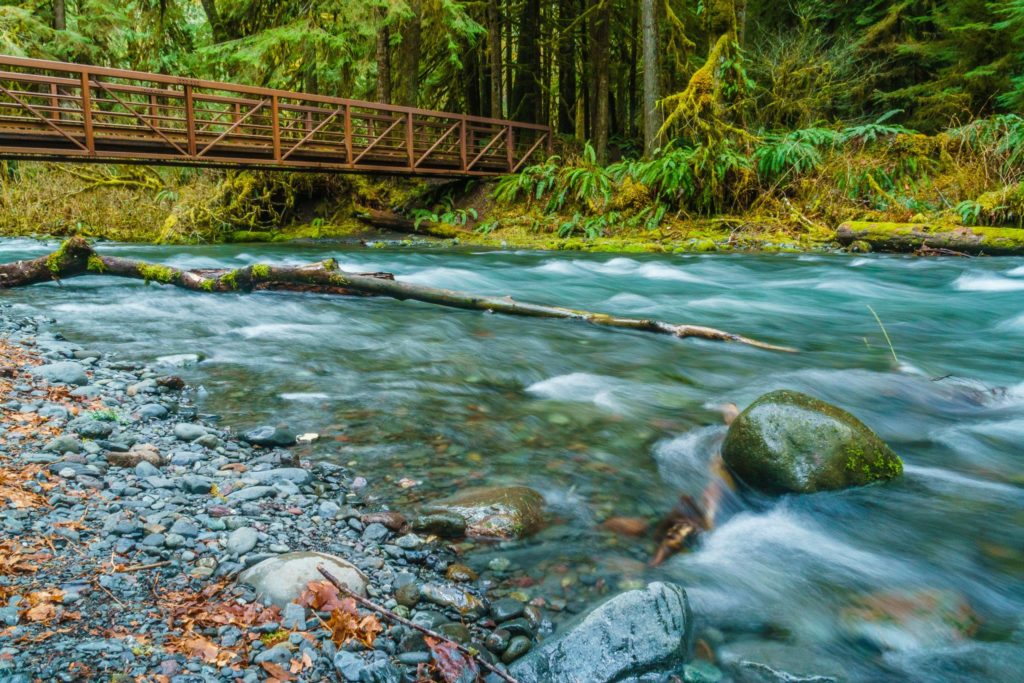
We finally arrived at the Kalaloch Lodge around 7pm and checked into our room. The dining room at Kalaloch closes at 8pm so we decided to eat dinner right away. I had a pretty tasty hamburger with french fries and Robyn had a chicken burger. If you’re into more upscale dishes, like scallops in a lemon cream sauce, they definitely have that too. If you don’t arrive before the dining room closes, you’re on your own since the lodge is remote and there aren’t any restaurants nearby.
The view from Kalaloch Lodge in Olympic National Park
We didn’t really do anything on Friday night since it was dark by the time we were done eating and still pouring outside.
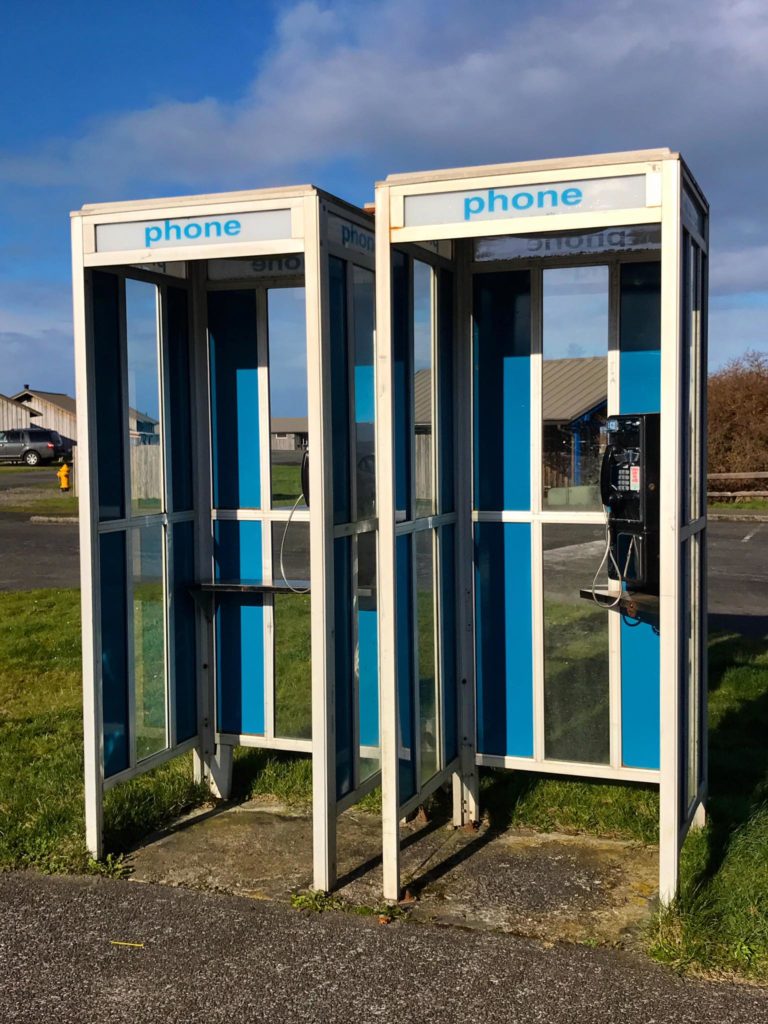
One thing to note about Kalaloch Lodge is that Internet access is not available, nor are TVs. Cell phone coverage is also very limited so the hotel has payphones outside in case you need to call someone. Who the hell has coins nowadays to make a payphone call, anyway?
%CODE3%
Saturday: Day 3
On Saturday, we woke up to light rain, which was a huge improvement over the downpour from the previous night, especially since we would be spending the day outside with our camera gear.
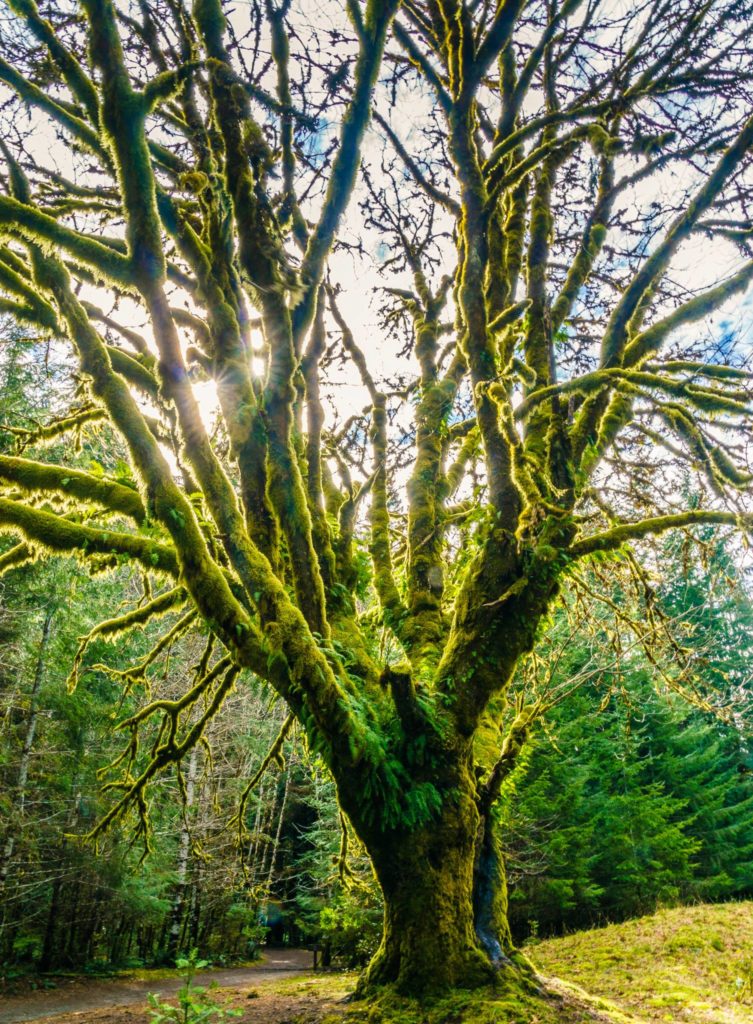
As we headed towards the Hoh Rain Forest on 101-N, we came across a sign for a giant Sitka spruce so pulled off the road to check it out. The tree was located right next to the parking lot and for the next hour and a half, we spent our time taking photos of the impressive tree. If you’re not a photography nut, your visit will probably be no more than 10 minutes. I don’t have exact coordinates for the trip but there was a well-marked sign off 101-N heading towards Hoh Rain Forest.
After spending some quality time with the tree, we turned north again and headed to Ruby Beach.
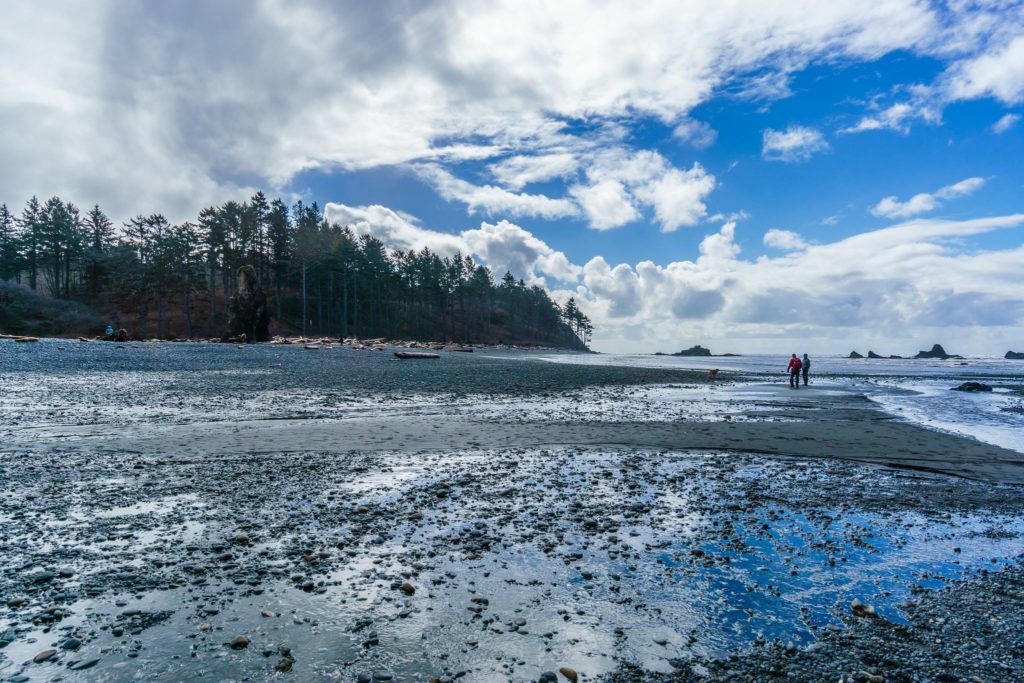
One of the nicest features of Ruby Beach is that it’s a 1/2 mile of hiking roundtrip to get from the parking lot down to the beach, making it accessible for kids and those with mobility issues. The beaches in Olympic Park aren’t for sunbathing. Think tidepools filled with ocean critters, awesome sunsets and wildlife spotting (eagles, otters, whales).
Ruby Beach at Olympic National Park
We were thrilled to see the sun as we pulled into the parking lot, especially since the weather was in the low 40s. Once we got down to the beach, we set up our tripods and started taking pictures. The weather was insane, with a lot of wind and frequent hail showers, followed by sun, followed by more rain and hail showers. Not the most camera-friendly weather but we made it work.
Ruby Beach at Olympic National Park
Make sure you pay attention to the tide when you’re at Ruby Beach, especially if you’re interested in exploring the tide pools. We were there as the tide was coming in. I made the mistake of not paying close attention to the tide and ended up with boots full of freezing ocean water. Let’s just say that it’s not an experience that I wish to repeat.
Ruby Beach Olympic National Park
If you’re a photographer, the ideal time to be at Ruby Beach is sunset but since we had limited time, we spent our sunset time at Lake Quinault.
Ruby Beach is also pretty close to Kalaloch Lodge (around 10 minutes) so I almost went back to grab a change of socks. I didn’t want to waste time driving back to the hotel so we proceeded to Hoh Rain Forest, wet socks and all.
Driving to the Hoh Rain Forest from Ruby Beach took around an hour. There’s a well-marked sign leading visitors to the Hoh Rain Forest Visitors Center. Once you turn off 101, you’ll drive for 12 miles before arriving at the Visitor’s Center. On the way, you’ll pass an adventure store, which sells hiking gear as well as a tiny coffee shop.
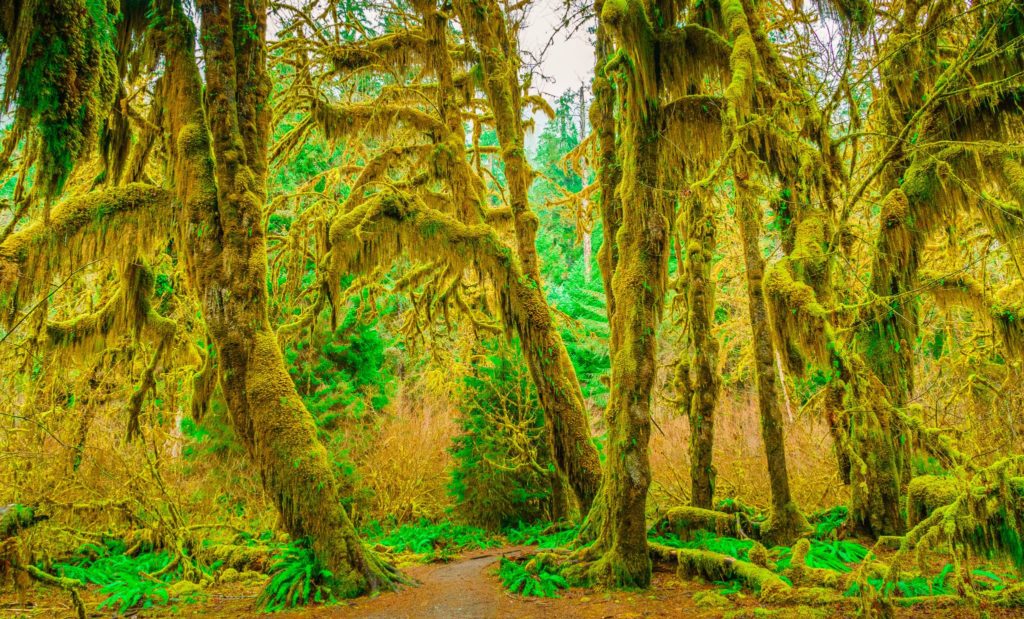
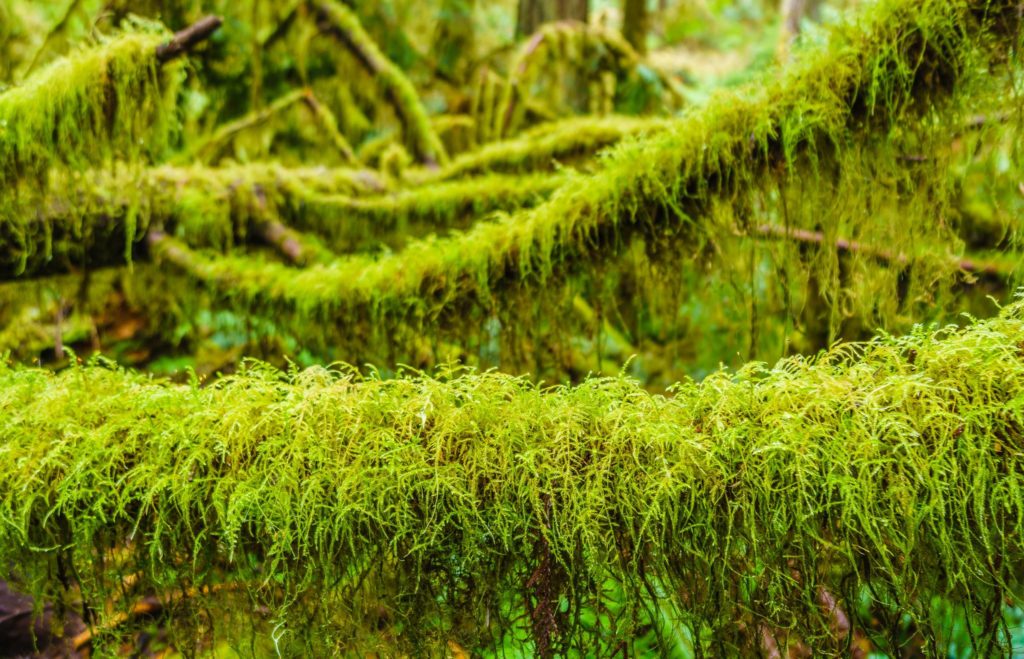
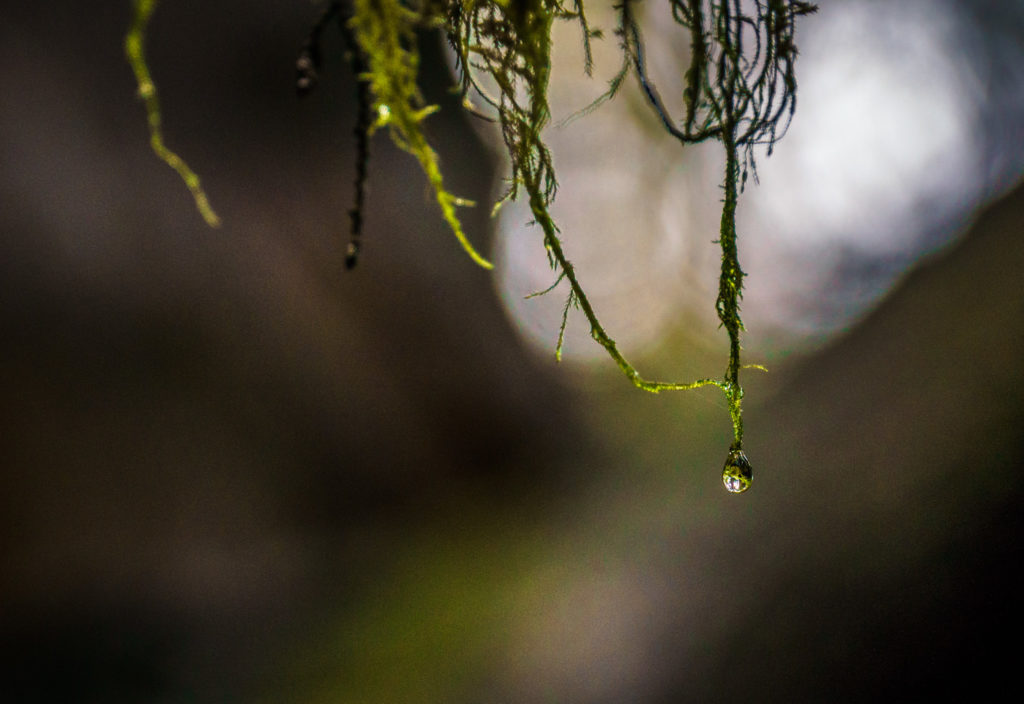
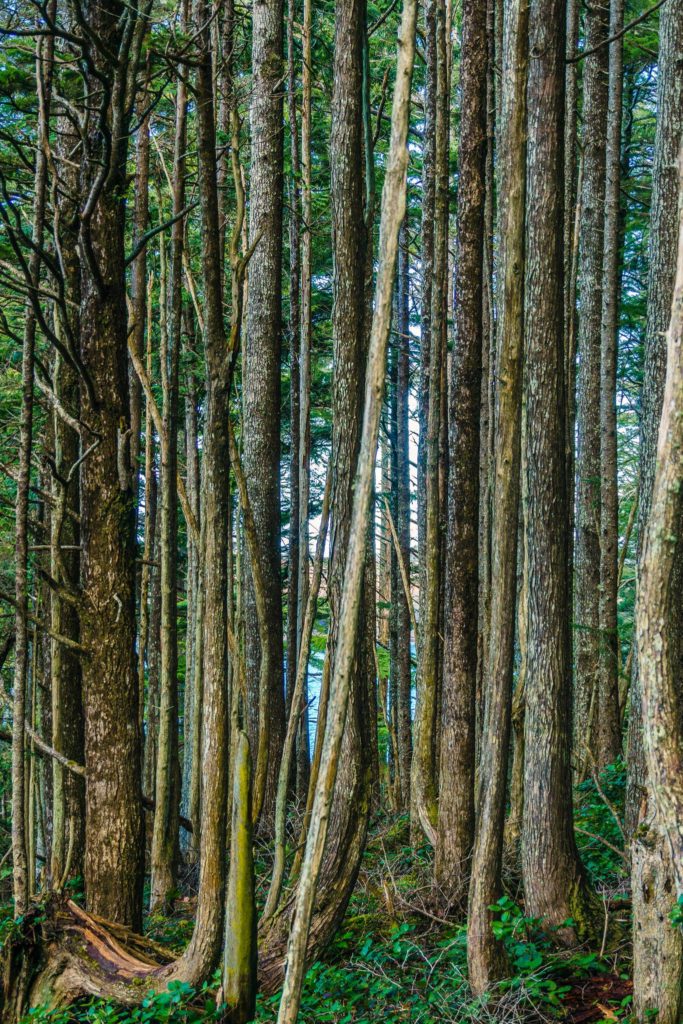
Once we arrived, we headed straight for the Hall of Mosses Trail, which is an easy hike at only 0.8 miles roundtrip. There are a couple of additional hiking trails in the area, such as the Hoh River Trail (17.3 miles) and the Spruce Nature Trail (1.2 miles). We stuck to the Hall of Mosses trail since there are plenty of gorgeous and moss-y areas to photograph.
And as the name implies, Hoh Rain Forest is pretty wet most of the year so you’ll need to wear appropriate rain gear. The area typically gets 12 to 14 feet of precipitation each year, resulting in a lush, green canopy of moss and trees. It was actually a little difficult to photograph this area due to the constantly changing weather conditions. Within a 10-minute span, we went from overcast to sunny to hail storm.
Hall of Moses, Hoh Rain Forest, Olympic National park
After a couple of hours photographing the rain forest, we made our way back to the parking lot. My feet, while not entirely comfortable, were doing ok for the bulk of the hike, until a big hail storm came through at the end at the temperature dropped. My feet turned numb quickly and walking back to the car was a challenge. Thankfully, I was able to purchase new socks at the adventure store about 10 miles away.
Moss, Olympic National Park
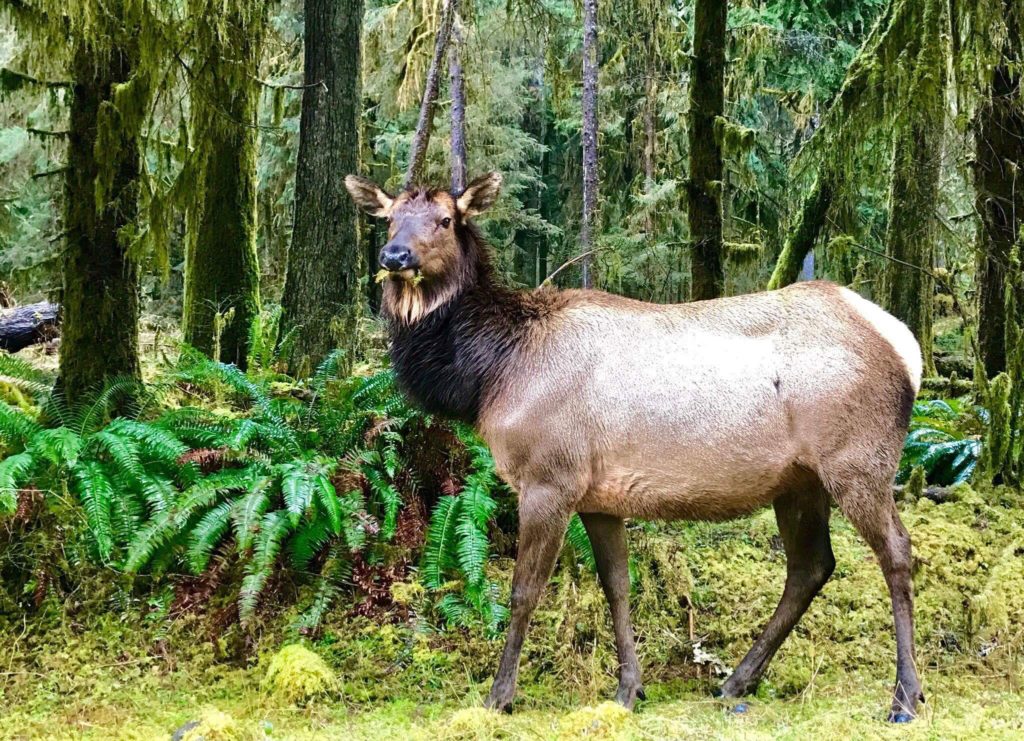
On our way out of the park, we spotted a herd of Roosevelt Elk. The females didn’t mind the fact that we pulled up beside them to take pictures but the males ran away pretty fast.
Roosevelt Elk in Olympic National Park
It took us an hour and a half to drive from Hoh Rain Forest down to the Lake Quinault area. Our first stop in the area was to the Rain Forest Nature Trail, where we had a forest of giant trees to ourselves. Once we finished with this hike, we made our way over to the lodge and down to the lake to photograph sunset. It was my first time visiting Lake Quinauilt Loge and from the outside, it’s very quaint. The lodge was built in 1926 and was fashioned after Old Faithful Inn at Yellowstone. President Franklin D. Roosevelt visited the area in 1937 and supposedly liked it so much that he declared the area a national park.
We packed up our gear after sunset around 8pm, at which point the restaurants at both Lake Quinauilt Lodge and Kalaloch Lodge were closed. We figured that we might be eating funions and pop tarts for dinner but thankfully, there was a pizza joint in Amanda Park that was still open. After downing a very unhealthy meal of cheese pizza, french fries and a root beer, we made our way back to Kalaloch and discovered that the hotel was fully booked, which kind of surprised me since March is very much off-season.
Lake Quinault Sunset: Olympic National Park
Day 3: Sunday
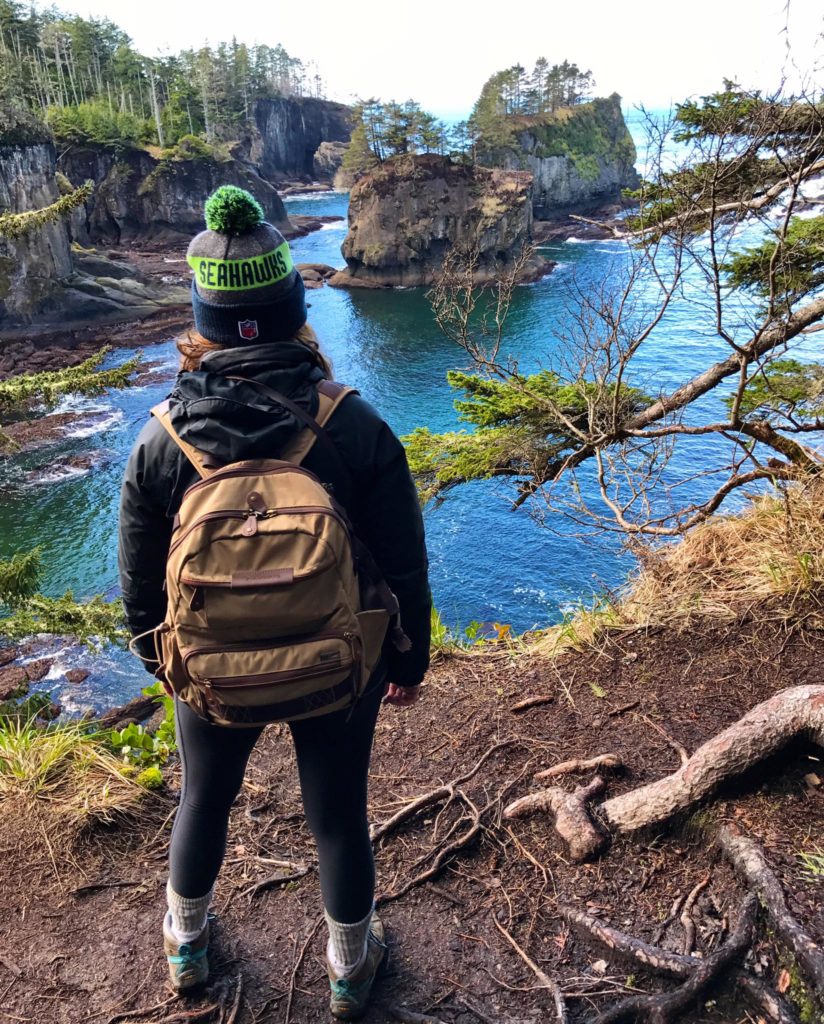
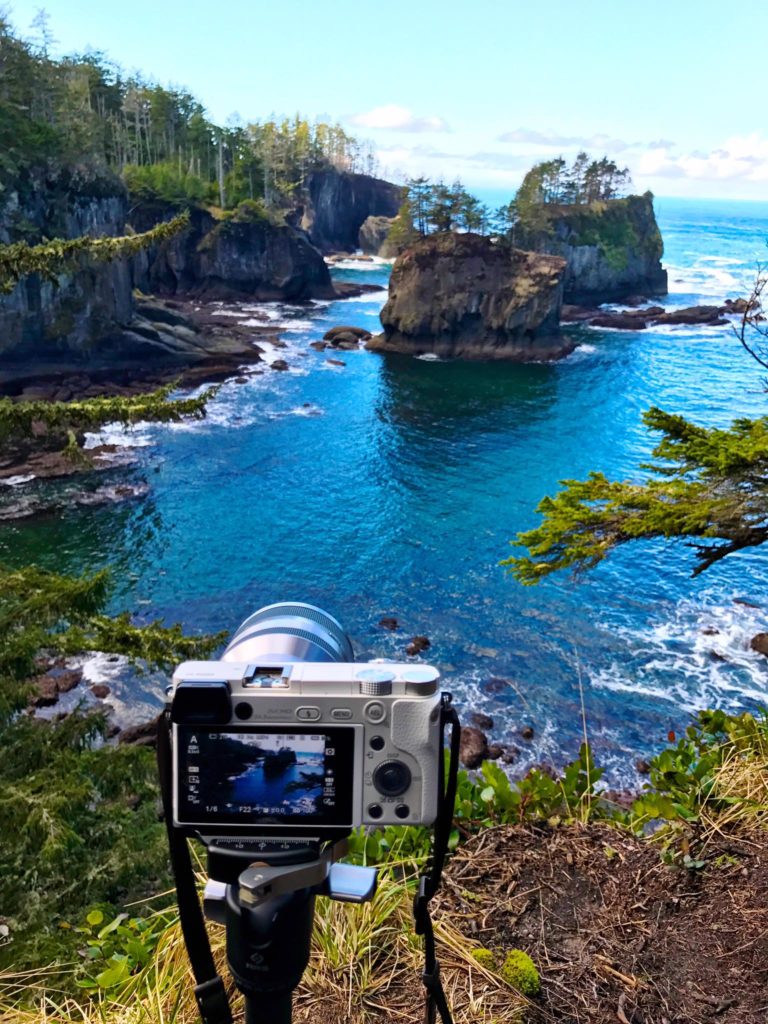
As you can see from the map above, Friday involved a whole lot of driving. We ate breakfast at Kalaloch Lodge (the oatmeal is yummy, btw) and headed north towards Cape Flattery, which is the northwestern most point in the continental U.S. Cape Flattery is located on Makah land so make sure to buy a pass once you arrive in the town of Neah Bay. Once in the town of Neah Bay, you’ll continue on a windy road for another 8 miles to get to the parking lot.
The hike out to Cape Flattery is easy but be aware that it’s pretty muddy. I saw some ladies wearing nice shoes and scarves and I was wondering what they were thinking. There are also elevated boardwalks in portions of the trail and they’re very slippery. I know this because I tried to move over to the side to let some folks pass and I wiped out. I ended up with a bruised butt but my camera was ok. Once you arrive at the Cape Flattery lookout, there’s not much to do other than admire the views and wave hi to Canada, located just across the water.
After finishing at Cape Flattery, we almost headed to Shi Shi beach, which I’ve heard is incredible but we opted out because it was already 1:30 by the time we finished our hike and we still had a long drive back to Seattle, with a stop at the waterfalls.
Cape Flattery, Olympic National Park
We had originally planned to stop at Sol Duc Falls but discovered it was closed once we got there. We didn’t sweat it too much since we had a backup waterfall in mind. We continued east on Highway 101, winding our way around Lake Crescent. You’ll want to take this drive slowly in order to enjoy it.
Cape Flattery, Neah Bay, WA
We finally reached the sign for Lake Crescent Lodge and parked in the lot designated for Marymere Falls, which is another easy, family-friendly hiking, clocking in at 1.8 miles roundtrip. While the falls are definitely the highlight, stop to spend time admiring the unique, moss-y trees and the wooden bridges. Oh, and prepared to get very wet.
Marymere Falls, Olympic National Park
I never knew how challenging shooting a raging waterfall was until I visited Marymere. Thankfully, Robyn had some tricks up her sleeve, which involved covering my camera with my rain jacket and turning it around on the tripod really fast to take the shot. I could only get a single shot off before my lens was covered in water droplets. And being near the water, it very cold and my hands quickly became numb. Next time, I need to bring thinner gloves so I can actually operate my camera while wearing them.
Water near Marymere Falls, Olympic National Park
After visiting the waterfalls, we began the long drive back to Bainbridge Island, where we took the ferry back across to Seattle.
Here’s a roundup of the photography gear that I brought with me:
Olympic National Park is one of the most beautiful places in the U.S. (if not the world) and I’m fortunate to live only a few hours away by car. From snow-capped mountains to rugged, wild beaches to lush rainforest, the park will take your breath away.
If you love the outdoors, you need to plan a trip to Olympic National Park immediately and I’ve included some tips to help you plan your trip.
When to Visit Olympic National Park is a year-round destination and when to visit really depends on the type of experience you’re after.
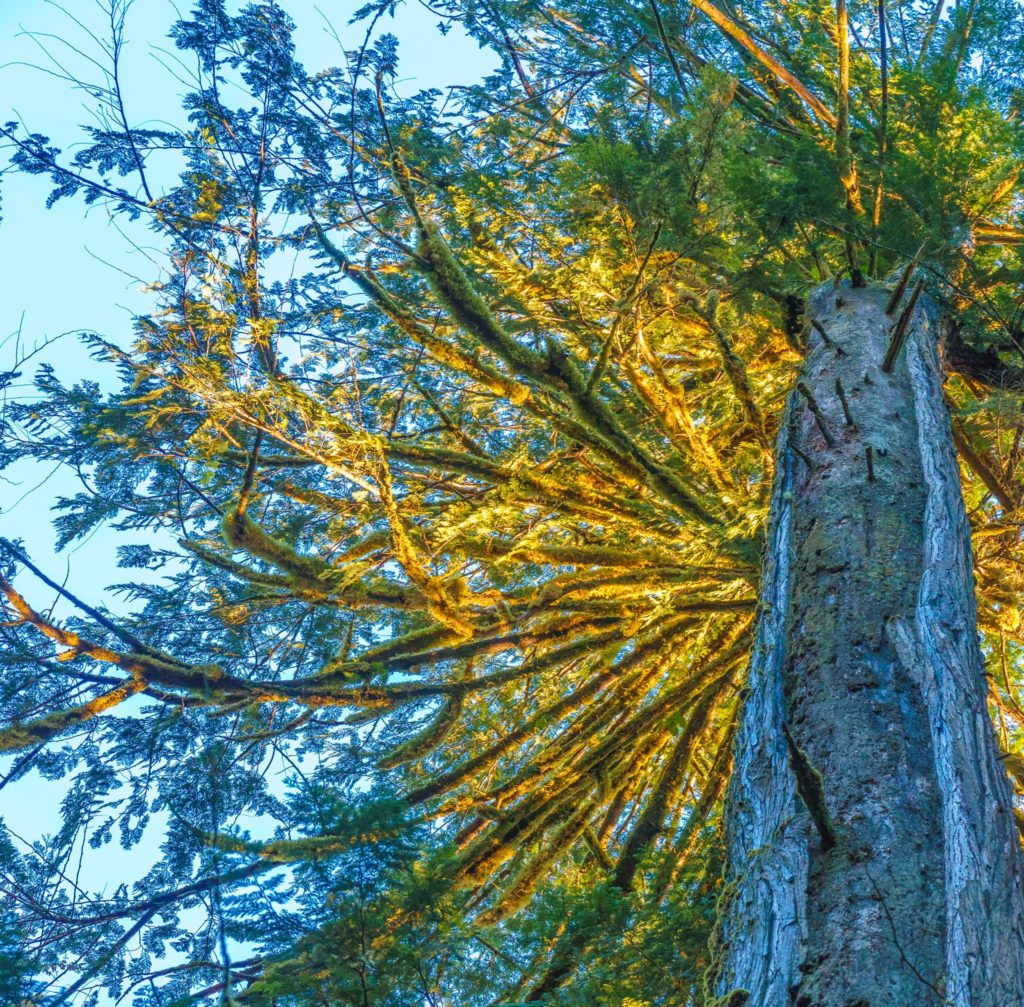
Moss, Olympic National Park
July through September are by far the most popular months to visit, with 60% of all visits occurring in this timeframe. You’ll have less rain and sunnier weather, but you’ll need to book your accommodation well in advance. Another advantage of visiting in the summer is the amount of daylight. In June, the sun rises around 5am and sets around 9:30pm, giving you extra time to hike and explore the outdoors.
Tree near Lake Crescent Lodge in Olympic National Park
The summer also allows you to view mountain wildflowers, which can often reach their peak in late June or early July, depending on the whether. One downside to the summer, aside from the large amount of visitors, is that the waterfalls won’t be as full due to the lack of rainfall.
Temperatures range from the mid 40s in the evening to the upper 70s during the day. Even though precipitation is lowest in the summer, you should still be prepared with rain gear since the weather is so variable on the peninsula.
If you want to be surrounded by gorgeous golden and red foliage, visit in the fall. The fall is the start of the rainy season, which typically begins in mid October, with snow falling in the mountains around that time. Temperatures can range anywhere from the 30s to the upper 60s. If you plan on hiking in the high country, stay up to date on the weather forecasts so that you don’t get in a snowstorm unexpectedly.
Bridge near Marymere Falls, Lake Crescent, Olympic National Park
If you want peace and quiet and don’t mind chilly temperatures, the winter is a fantastic time to visit. Stay on the coast if you’d like to experience a raging winter storm with large swells. If you’re interested in snow activities, head up to Hurricane Ridge for snowshoeing, skiing and tubing. Hurricane Ridge Road is open Friday through Sunday in the winter but a sudden blizzard can close the road at any time so make sure to check out the current road conditions before you go. Some of the National Park lodges also completely or partially close in the winter so make sure you book lodging in advance.
Tree in Olympic National Park
Spring weather in the park is very unpredictable but I can safely say that you will get rained on. I was just in Olympic National Park over the weekend and I experienced rain, sunshine and hail, sometimes within the span of 15 minutes. Spring is quieter than summer and the rainforest is incredibly lush and the waterfalls are flowing this time of year.
What to See Olympic National Park is huge. To give you some context, the park is 1,442 square miles in size, making it larger than Rhode Island and twice as large as Great Smoky Mountain National Park.
A single road (Highway 101) circumnavigates the entire park. Keep in mind that it may take a little longer to drive on 101 than what Google Maps estimates. Parts of 101 are incredibly windy and since it’s only one lane in each direction, you may get stuck behind other cars, especially in the summer.
Board walk at Cape Flattery, Neah Bay, WA
Here are some of my favorite parts of Olympic National Park:
Hurricane Ridge Located 17 miles from Port Angeles, Hurricane Ridge features spectacular mountain vistas and can be visited year-round. This area was named for the 75-mile-an-hour winds that often blow here in winter. It’s also a spectacular area to spot wildlife (visiting in the morning increases your chances of spotting wild animals). If you’re into camping, the nearest campground is Heart O’ The Hills, located 12 miles away.
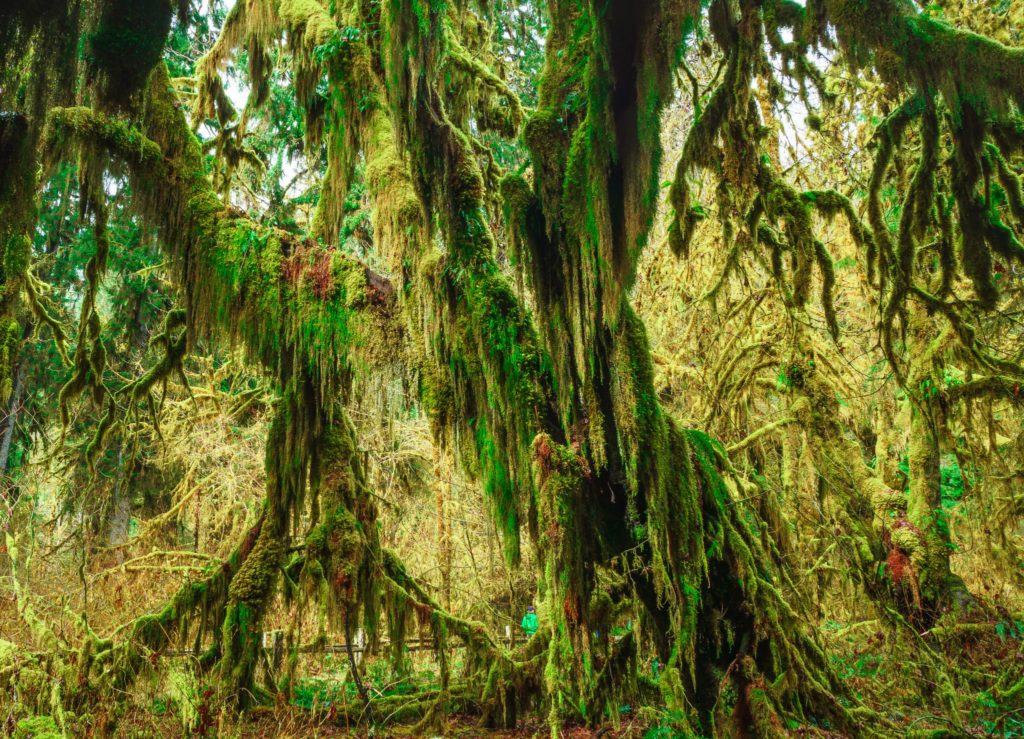
Hoh Rain Forest As the name implies, Hoh Rain Forest receives over 134 inches of rain annually. All that precipitation makes the forest lush, with moss hanging from the trees. One of the best and easiest ways to experience the beauty of the rain forest is to visit the Hall of Mosses Trail near the Hoh Rain Forest Visitor Center.
Hall of Moses, Hoh Rain Forest, Olympic National park
Hall of Moses, Hoh Rain Forest, Olympic National Park
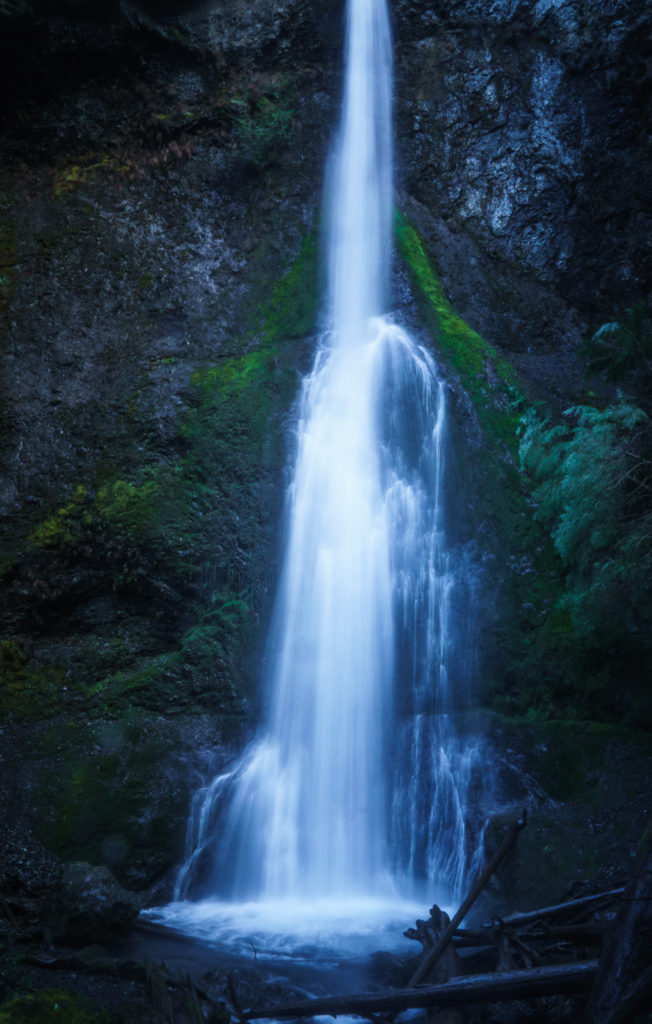
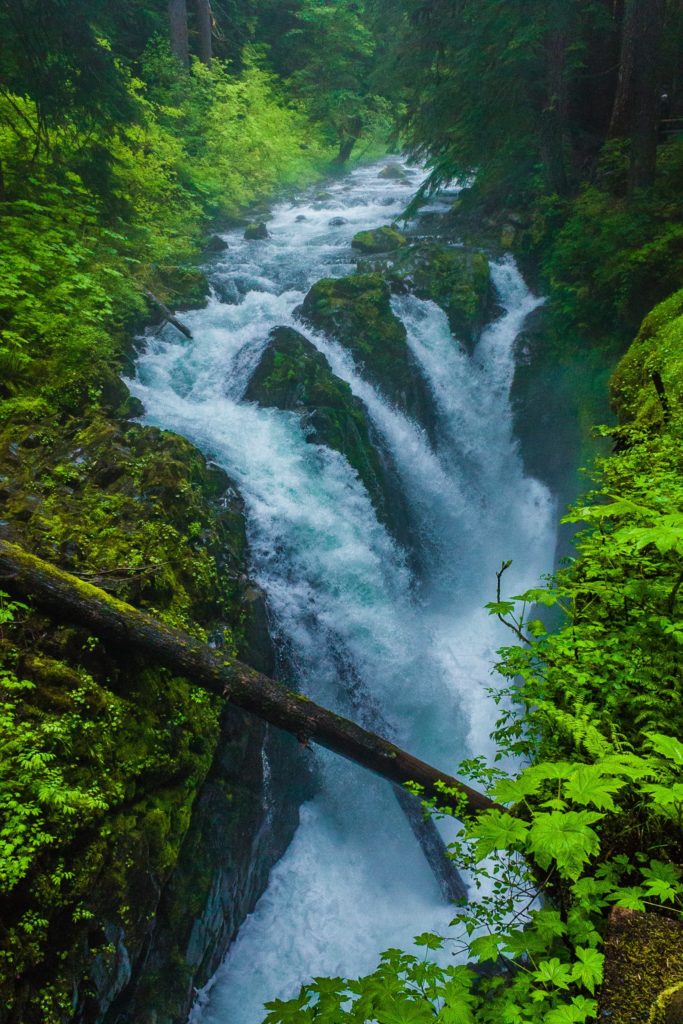
Sol Duc Falls Sol Duc Falls is considered by some to be the prettiest waterfalls in Olympic National Park. Since the hike is only 0.8 miles longer, hikers of all abilities and ages can enjoy the view. Also located in the area are the Sol Duc Hot Springs, which I’ve heard are nice but I have not had a chance to personally visit.
Sol Duc Falls: Olympic National Park
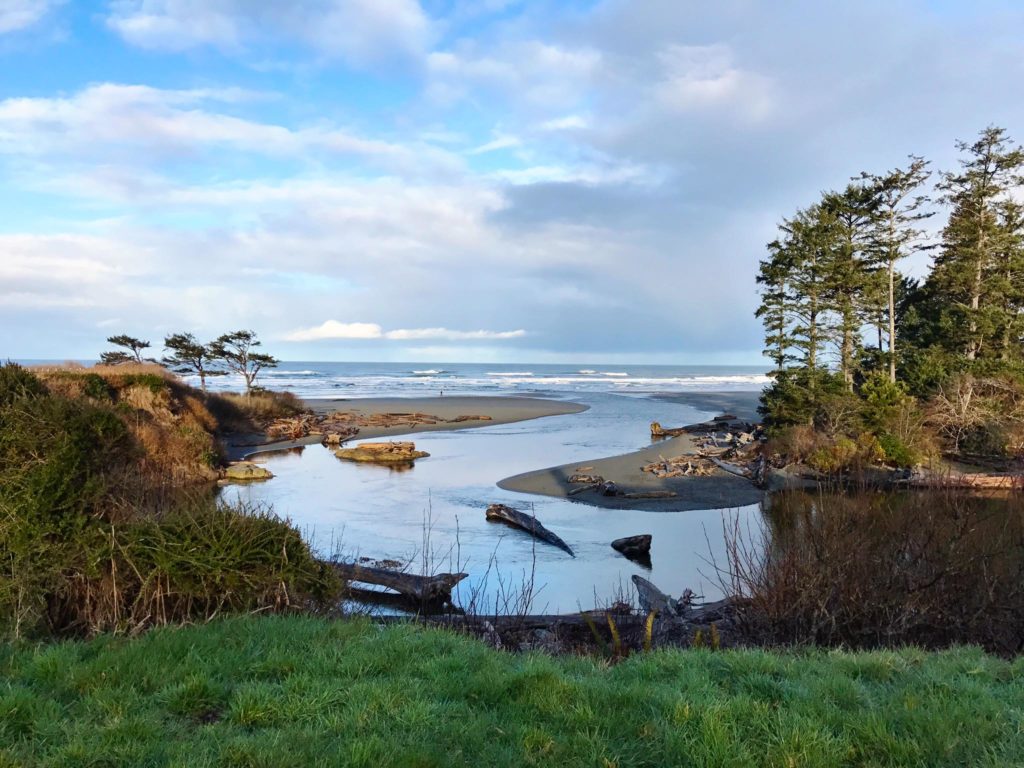
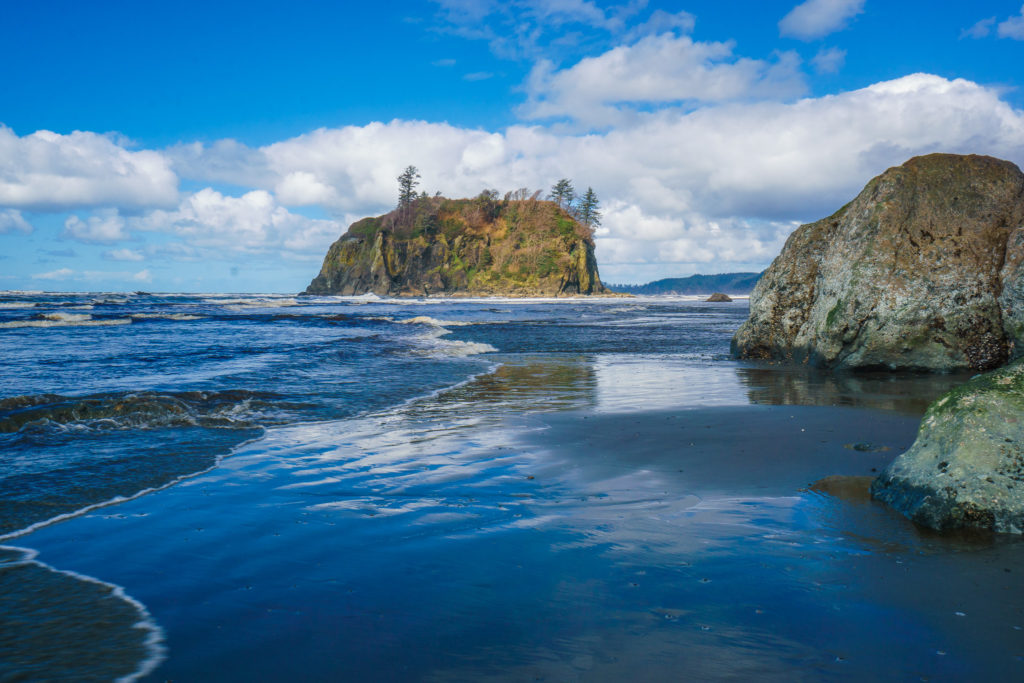
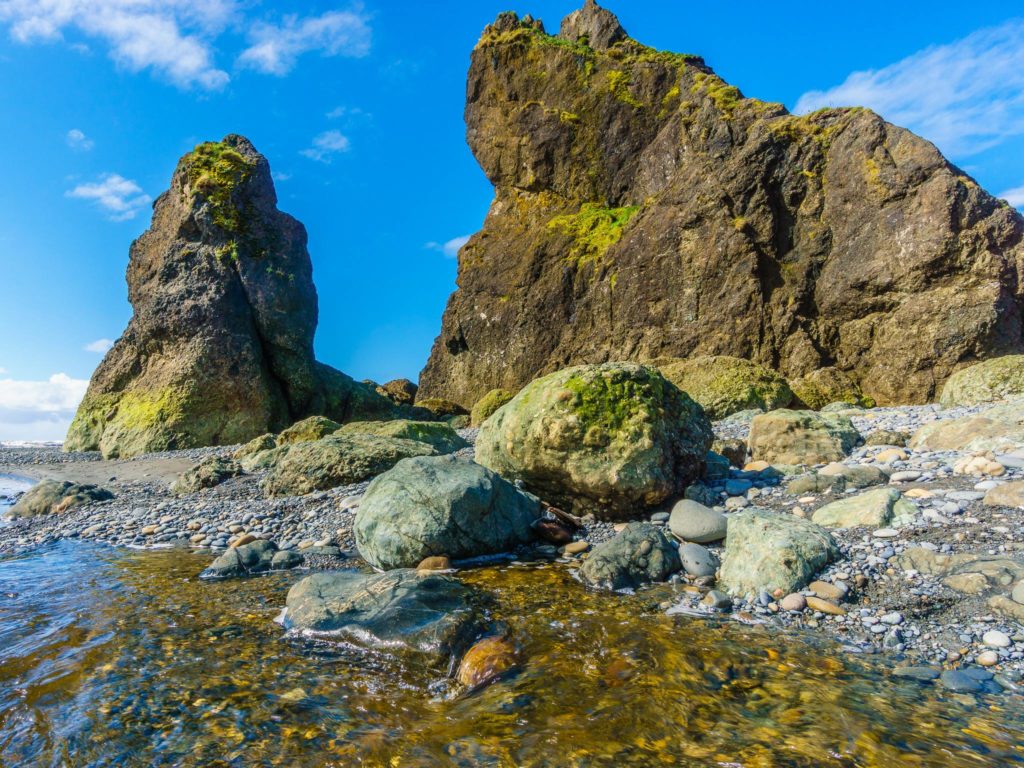
The Beaches Olympic National Park features over 73-miles of coastline so you have a lot of options to choose from, ranging from sandy beaches to cliff-side beaches. Almost of the beaches feature wave-beaten seastacks and tide pools teaming with wildlife (make sure to bring a tide chart!).
Sea stacks at Ruby Beach, Olympic National Park
At the southern end of the park’s coastline, you can visit Kalaloch, Beach 1-4 and Ruby Beach. You can stay overnight at Kalaloch Lodge, which features ocean-front cabins at a fairly inexpensive price point.
Ruby Beach at Olympic National ParkRuby Beach Olympic National Park
Further north, you’ll find beaches in the Ozette area, with trails leading to Sand Point and Cape Alva. Mora and Rialto beach are a little less remote, located an hour’s drive west of Port Angeles.
Ruby Beach at Olympic National Park
Quinault Rain Forest Even if you’re planning stop visit Hoh Rain Forest, Quinault is still worth a visit to see some of the world’s largest trees, including a Sitka spruce, which is 191 feet tall and 1,000 years old. This area is also home to another national park lodge with stunning views over Lake Quinault (I also think it’s the cutest national park lodge). Make sure to keep your eyes peeled for Roosevelt elk.
Lake Quinault Lodge, Olympic National ParkLake Quinault Sunset: Olympic National Park
Lake Crescent Lake Crescent is a stunning area, featuring a glacially-carved lake and the nearby Marymere Falls. While the lake looks inviting, the water is approximately 45 degrees year-round.
Marymere Falls, Olympic National Park
Cape Flattery While it’s not part of Olympic National Park, you should still make an effort to visit Cape Flattery, the northwestern most point in the continental United States. The Cape is located on Makah Native American land and once at the parking lot, you’ll hike for 0.75 to get to jaw-dropping views.
The View From Cape Flattery in Neah BayMy tripod setup at Cape Flattery
Cape Flattery, Neah Bay, WATrees at Cape Flattery, Neah Bay, WA
Where to Stay The question of where to stay is a hard one because it depends on your interests, how many nights you’re planning to stay, whether you want to camp, etc.
I’ve personally stayed in Kalaloch Lodge, which is a fantastic place to stay if you want to stay on the coast and get away from it all. There’s no internet access or TV so you’ll be unplugged from daily life. There is an on-site restaurant, which you’ll want to eat at since dining options nearby are pretty limited. You can also camp at Kalaloch but you’ll need to reserve a campsite well in advance.
The view from Kalaloch Lodge in Olympic National Park
I’ve also stayed at Quileute Oceanside Resort, which is located on tribal land (not part of the national park), approximately 14 miles outside of Forks in La Push, WA. Like Kalaloch Lodge, Quileutae is rugged and remote, with an onsite restaurant. Lodging options here ranging from camping to luxury beach-front cabins with jacuzzis.
%CODE3%
While I haven’t stayed at Lake Crescent Lodge or Lake Quinault, both have absolutely amazing views and nice restaurants. Two additional national park lodging options include the Log Cabin Resort at Lake Crescent and Sol Duc Hot Springs Resort. You can read more about lodging options here.
The view from Quileutae Oceanside Resort in La Push, WA
If you want to stay outside of the national park, Port Angeles is located on the north side of the peninsula and convenient to the Hurricane Ridge and Lake Crescent areas. It’s the largest town you’ll find on the Olympic Peninsula.
On the west side of the peninsula, the towns are small and located far apart. The largest town is Forks, which is convenient to the coastal and rain forest areas.
Water near Marymere Falls, Olympic National Park
What to Pack My suggestions on what to pack include:
Camera: Whether you have a DSLR or take photos with your camera, make sure your device is fully-charged because you’re going to want to snap some Instagram-worthy photos
Battery packs: You’re most likely going to spend your entire day outside and it would be a bummer to run out of phone or camera battery. Bring along a spare battery pack so that you can charge your devices on the go.
Books and board games: Internet access and TVs are pretty limited within the park boundaries. Bring plenty of books and board games with you to keep yourself entertained during the evening hours.
Food: Bring your favorite snacks with you since you’ll be spending a lot of time driving around in your car and out on the trails. I often find that I skip lunch when I’m in Olympic National Park, preferring to eat food while I’m on the go. I’d also suggest packing some food with you in a cooler if you’re going to stay at a lodge for more than a couple of nights since you may get tired of the lodge food.
Rain jacket: It doesn’t matter what time of year you’re visiting, make sure you bring a rain jacket.
Warm clothing: Since the weather is so variable, dress in layers and bring a warm jacket, hat and gloves. I visited Olympic National Park in July a few years ago and needed the hat and gloves on a couple of rainy days. I also recommend either waterproof or water resistant hiking pants since you’ll probably get rained on at some point and you don’t want to spend your day walking around in soggy pants.
Waterproof hiking boots and an extra pair of socks: This is important. The peninsula is very muddy and you don’t want to worry about ruining your nice shoes. I also suggest keeping an extra pair of socks with you in case your feet get wet. My feet got soaking wet at Ruby Beach when I was photographing the rock stacks. I can tell you from experience that 40 degree ocean water in your hiking boots is not a pleasant experience.
Hiking poles: If you regularly use hiking poles, bring them along.
GPS or maps: Cell phone service is very spotty so don’t rely on your phone to point you in the right direction.
Tide chart: Having a tide chart on hand is a must if you want to see tide pools. It’s also an essential item for beach hikes because you do not want to get trapped by a rising tide.
Binoculars: Bring them along if you’d like to look for whales, bald eagles, seals and otters, all of which I’ve seen on my visits to the park.
Daypack: Bring a daypack with hiking essentials in it, like a flashlight, whistle, compass, pocket knife, first aid kit and extra snacks.
Star chart: If it’s a clear night, you may be able to see up to 15,000 stars in the night sky.
Bug spray: It’s the wilderness and bugs live in the wilderness. Bring along bug spray if you don’t want to get bitten
Phone booths at Kalaloch Lodge
Other tips: If you’re planning to arrive at Olympic National Park on a Friday from the Seattle area, leave before 2 pm or else you’ll get stuck in hellish traffic. Trust me on this.
You can arrive/leave Olympic National Park either from the south end by driving down to Olympia and out to the coast or by taking a ferry from Seattle to Bainbridge Island and driving to the north part of the peninsula from there. I recommend crossing via the ferry in at least one direction because it’s a unique Pacific Northwest experience and you’ll get some incredible views of downtown Seattle.
I’ve only camped once in Olympic National Park and it was at Deer Park, located at 5,400 feet and boasting the most stunning sunset and sunrise views you’ve ever seen. Deer Park is a small campground with 14 sites and operates on a first-come, first-serve basis. I almost regret telling you about this campsite since I sort of want to keep it a secret.
Deer Park campground at Olympic National Park
There are several gas stations located on the outskirts of the park. There’s a stretch between the Kalaloch area and Forks where you’ll travel around 40 miles with no service stations (there’s a sign warning you that this will happen).
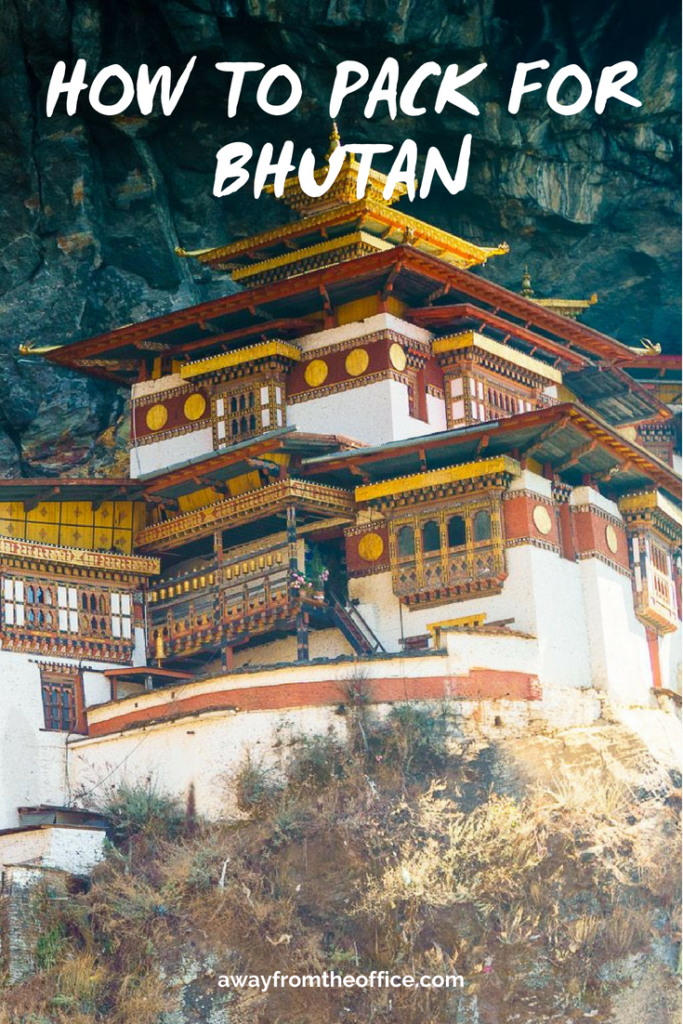
I visited Bhutan at the end of January for 5 days, which presented some packing challenges. First challenge: It’s winter in Bhutan, which means chilly weather. I also went to Bangkok and Luang Prabang after Bhutan, which meant I needed to have warm-weather clothing as well. Second challenge: I wanted to pack in a carry-on backpack and I had a load of photography gear to bring with me. Third challenge: Packing lists for Bhutan are pretty long (at least the ones I found online) and if I brought along every single item on the lists, there’s no way I’d be able to close my carry-on luggage.
With that said, here’s what I found absolutely essential to bring. If you’re visiting in the summer, you obviously won’t need as many warm-weather clothes but the other items are still the same.
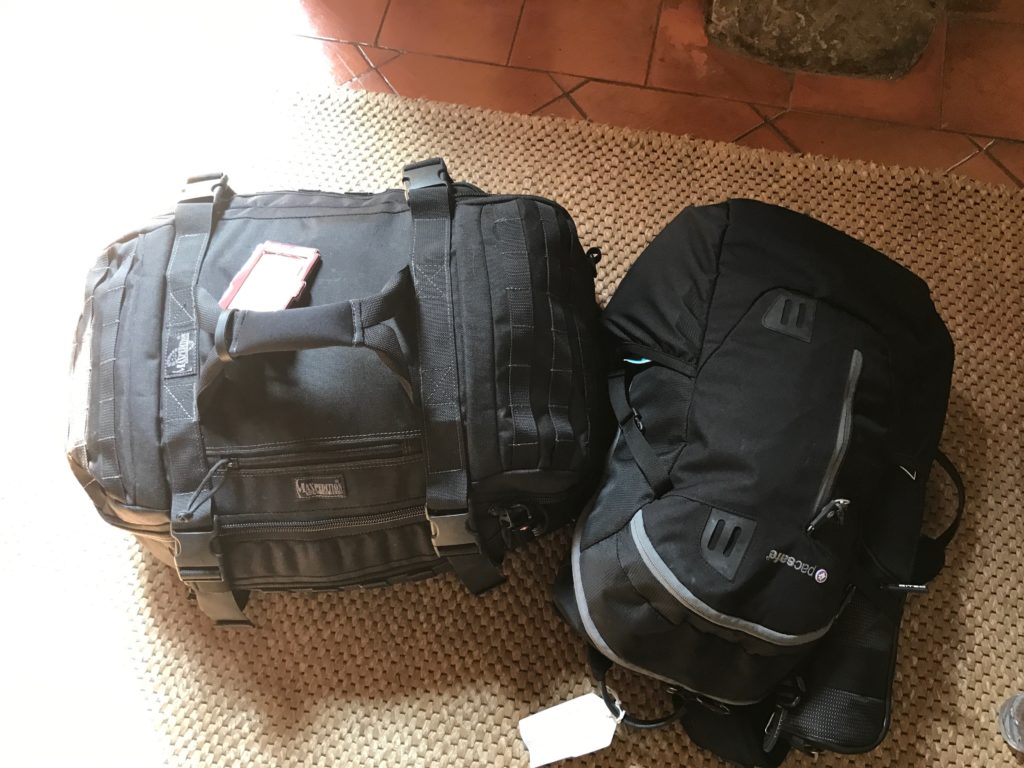
The Luggage
On this trip, I brought my favorite carry-on backpack, the Maxpedition Fliegerduffel. My husband turned me on to this brand since it’s a military-grade bag (a lot of ex-military people use this brand) and virtually indestructible. The duffel has two backpack straps that tuck away when you no longer need them.
To carry all my personal items, including my camera/photography gear, I also brought my Pacsafe daypack. I actually used my Vanguard Havana backpack as my daypack once I landed but in terms of hauling all of my gear onto the plane, the Pacsafe worked wonders.
Maxpedition Fliegerduffel Backpack
Clothing
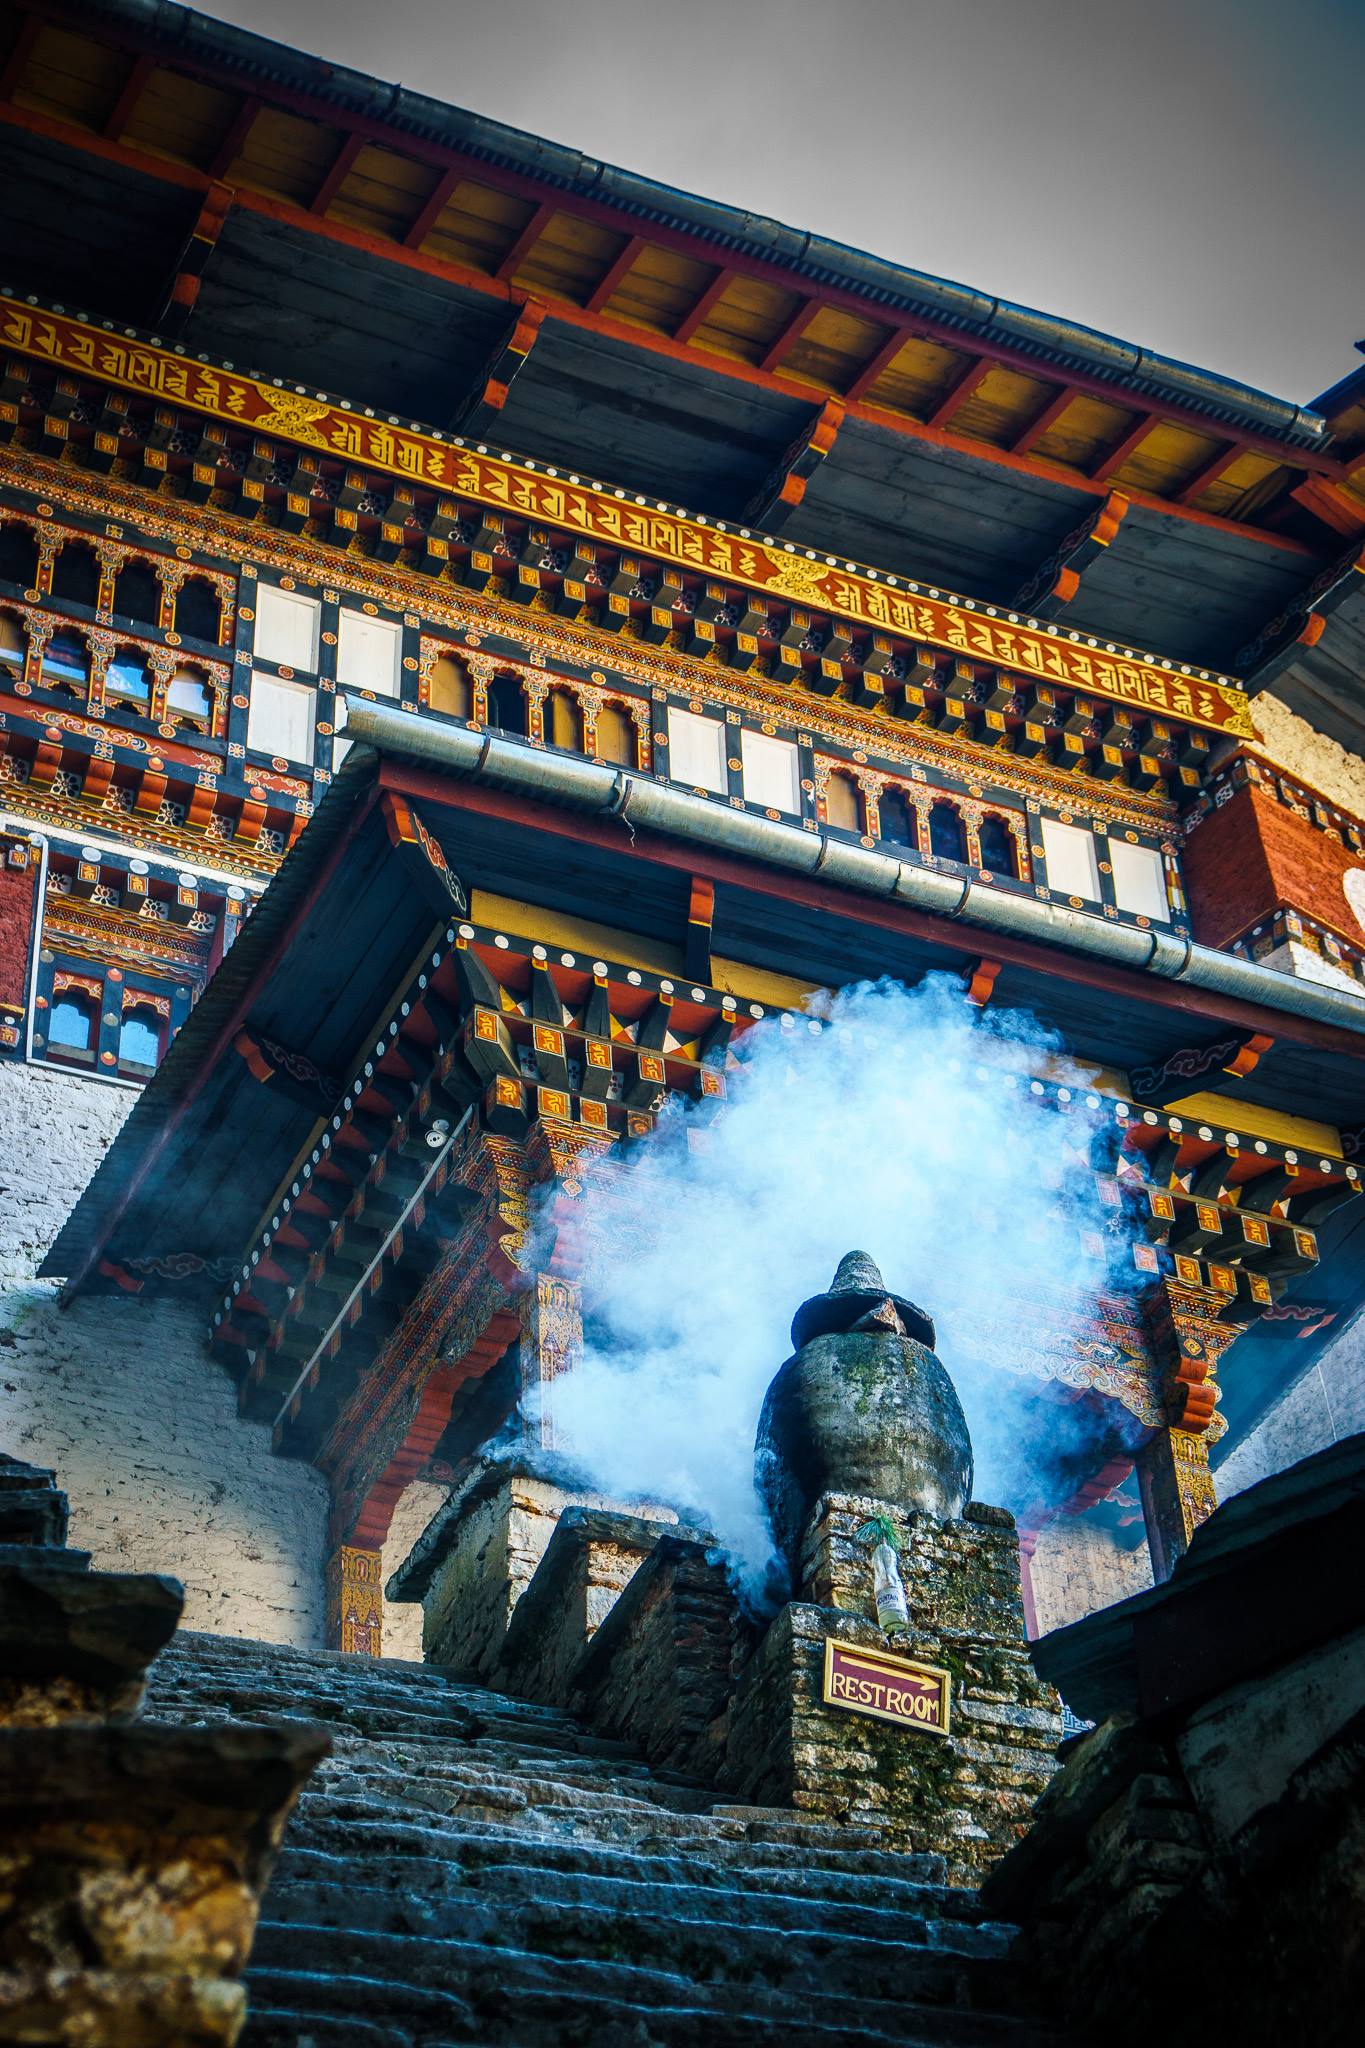
Me in front of the Punakha Dzong, wearing my Lole jacket
Warm jacket: It gets cold in Bhutan in the middle of January, particularly at night and at a higher elevations. It’s not uncommon to see snowfall in December, January and February. I needed a lightweight jacket that could pack flat in my suitcase once I got to Bangkok. The Lole Emeline jacket kept me warm when it got down into the 30s/40s at night and it took up almost no space in my backpack. If you’re going to be trekking in the mountains in the winter, you’ll definitely need something warmer.
Rain shell: Unless your warm-weather jacket also happens to be waterproof, I also recommend bringing a rain shell, particularly one that folds into a tiny pouch. I brought my Columbia Arcadia II jacket, which I also use at home in the PNW. I didn’t need to use it at all in Bhutan since I only encountered light rain/snow on one day. You could also bring an umbrella but I prefer to have my hands free for my camera.
Pants: I brought two pairs of pants that I rotated through, along with a lightweight pair of leggings to wear underneath my pants, just in case. I ended up not wearing the leggings during the day but they were certainly nice to have when I was in the hotel room at night. Even if you’re traveling in the summer, you still need to bring pants because you won’t be admitted to the temples in shorts.
Tops: I packed a couple of lightweight long sleeve tees, one tank top to wear underneath my tees, one sweater and one long-sleeved athletic top that I wore on the hike up to Tiger’s Nest.
Again, if you’re visiting in the summer, you’ll need to bring long sleeves with you since you won’t be admitted in a tank top or short sleeve shirt.
I recommend packing layers because the weather can change dramatically in the span of a few minutes. When I was hiking in Punakha, I got warm enough that I needed to ditch the jacket and my long-sleeve top.
Socks and undergarments: I know this seems obvious but you don’t want to forget your socks. Your feet will freeze in the winter and visiting temples will be very uncomfortable if you forget them (you have to remove your shoes to enter the temple). I also wore my socks in the hotel room at night since the rooms tend to be a bit chilly, even with the heat cranked all the way up.
In addition to a regular bra, you should also bring along a sports bra for the days that you’re hiking. You won’t want to be comfortable in a standard underwire bra on your up to Tiger’s Nest.
Shoes: Most of the guides I read said that you need to bring along sturdy hiking boots, which is true if you’re trekking or you just need additional ankle support. While Tiger’s Nest is steep, it’s not a technical trail and I didn’t feel that hiking boots were a necessity. I got by just fine with my Nike metcons, which I also wore on the flight over.
Accessories : No matter what time of year you’re visiting, you will need your sunglasses so don’t forget them. While you can certainly buy a pair in Thimphu, why would you want to waste your valuable vacation time shopping for something like sunglasses?
If you’re visiting in the winter, bring a warm hat and gloves as well. If you’re visiting in the summer, bring a lightweight, breathable hat to cover your head.
Personal Items
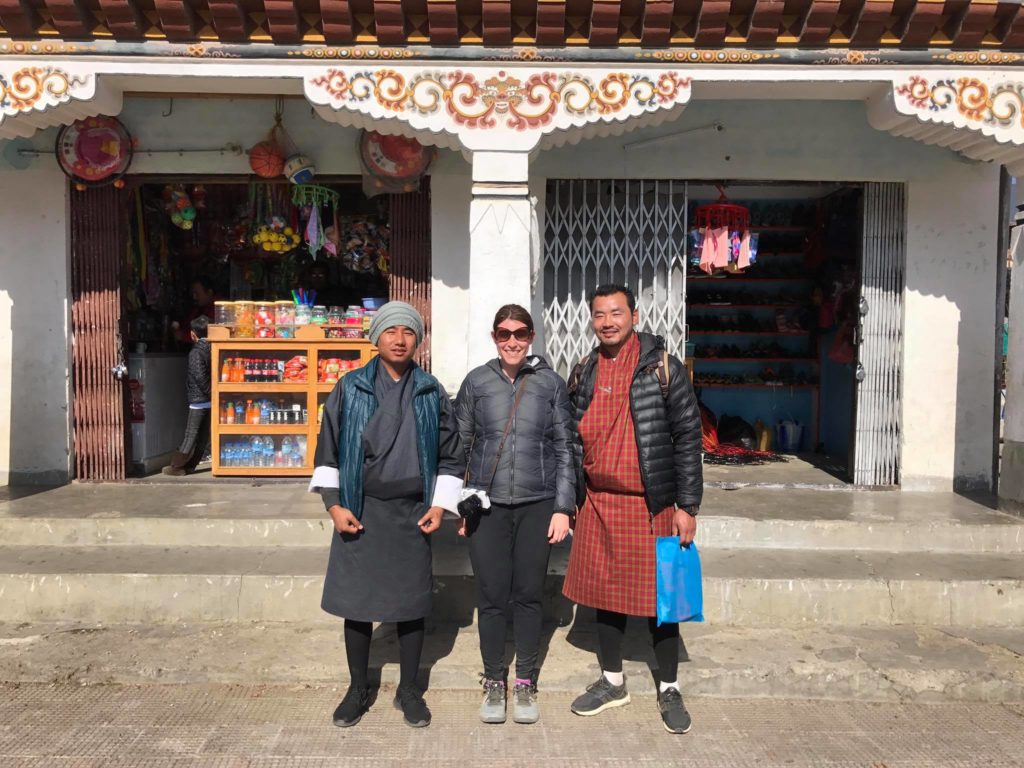
Me with my Keys to Bhutan guide and driver
Sunscreen: Depending on which town you’re visiting, the elevation ranges from 7,000 feet to 10,000 feet (and higher) so you’ll need to protect yourself with sunscreen. I brought two mini spray bottles of sunscreen and found that was enough for 5 days.
Books/Kindle: There’s not a lot to do late at night so keeping yourself occupied with a good book is a nice way to spend the evening. If you’re bringing your Kindle, make sure you download books before the trip since the wifi at the hotels is pretty spotty.
Essential documents: Make sure you bring a printout of your visa confirmation since you will need it to board your flight to Paro. Also bring along your passport, copies of travel insurance and credit cards.
Flashlight: It gets very dark at night and some of the streets aren’t well-lit.
Earplugs: Even if you’re a deep sleeper, I guarantee that you will still need earplugs. Those gangs of dogs are so damn loud and of course they sleep in the middle of the day.
Toiletries: I was glad that I brought shampoo and body wash. The hotels will supply you with both but they may not be brands that you’re familiar with. Don’t forget your deodorant and toothbrush/toothpaste either.
Snacks: You may get hungry while you’re hiking and it’s nice to have some food from home. I brought a few Larabars from home which I ate while hiking up Tiger’s Nest.
Medication: Bring all your medication from home. I also bring along melatonin since it helps me adjust when I have jet lag. I didn’t have any prescription motion sickness medication with me and I wish I did since the roads in Bhutan are very windy and I almost got car sick a couple of times.
Daypack: You’ll want a daypack to carry your daily essentials in. I brought along the Vanguard Havana 41 since I always carry extra lenses and it has space at the bottom to hold them. There’s a divider at the top to separate personal items from the compartment that holds the lenses. If you need a daypack that’s suitable for your photography gear, I highly recommend this one.
International adapter: Electricity runs at 220-240 volts so there’s a good chance that you will need an adapter in order to charge your electronics. I’ve used this Kensington international adapter for years; it has multiple plug options and comes with 2 USB ports, which is handy when you’re in a hotel with only one outlet (common in Bhutan).
Your cell phone: You likely won’t have service so consider buying a local Bhutanese SIM card if you need to be connected.
Cash: Bhutan has ATMs but they can be a little unreliable. I didn’t spend a lot of money but did manage to buy a couple souvenirs, a few beers and I also brought along enough to give my driver and guide a good tip ($10-15 per day is average).
Photography Gear
The average person isn’t going to bring all this gear but I want to give you an idea of what I packed. My photo gear took up a lot of room in my luggage but I still managed to bring carry-on only luggage.
Camera: I have a Sony A6000, which I highly recommend. The newest version of this camera is the Sony A6500.
Tripod: I shoot handheld the majority of the time but if you want to take tack-sharp landscape photos or shoot stars at night (which I highly recommend), you’ll need a tripod. Don’t cheap out and buy a flimsy tripod that is going to drop your camera on the ground. Invest in a high quality, lightweight tripod and ball head.
I personally love the Gitzo Traveler tripod, which is made out of carbon fiber and therefore lightweight, yet incredibly sturdy.
Lenses: Lenses are a matter of personal preference; you should really understand your style of photography before you invest serious cash into them. If you aren’t sure if you want to buy a particular lens, I recommend renting them on Borrow Lenses. For my Sony, I have the 18-200mm, 10-18mm for wide angle shots, 17-60mm and a 32mm prime.
Camera batteries and battery charger: I always travel with a ridiculous number of spare batteries because the last thing I want to do is have my camera go dead while I’m in the middle of taking a once-in-a-lifetime shot.
Memory cards: Just like with batteries, I’d rather have too many memory cards rather than too few.
Filters, like polarizing and neutral density filters: I used these a few times. Polarizing filters reduce glare and make blue skies pop. Neutral density filters are like sunglasses for your camera and reduce the amount of light coming it. It’s what allows photographers to blur movement in broad daylight, like waterfalls. If you’ve never used filters before, you should practice before you leave for your trip.
Lens wipes: I’m picky about lens wipes since some of them leave streaks or little tiny fibers on the lens. My favorite are these Zeiss wipes.
*Note: The post above contains some Amazon affiliate links. The products mentioned are all products that I purchased with my own money and brought with me to Bhutan. I only recommend products that I’ve personally used and love.